A leggy sedum is a light-starved sedum — full stop. The stretching tells you the plant has been photosynthesizing below the threshold it needs to stay compact, and the only real fix is more direct sun plus a hard cut back to the surviving growth. A few cases are about water or soil, but the dominant cause is light, and the surgeon-fix for already-stretched stems is to cut, propagate, and start over.
Three failure modes show up in home gardens: the classic stretch where the gaps between leaves grow long; the floppy sprawl where the stems bend under their own weight; and the lean where the entire plant reaches toward a window. All three are leaves on the same branch — insufficient direct sun over a period of weeks.
The reader’s first move is to find the sun, then prune. Moving the plant to full sun lets it rebuild stored energy in the crown, which is what fuels the recovery growth after the cut. Skip the pruning first and the plant has to push new growth from depleted reserves.
What “Stretching” and “Floppy” Actually Mean for Sedum
Three failure modes, three underlying causes, and the same fix for all three. Sorting which one the sedum is in tells the reader which fix to prioritize.
Etiolation is the classic stretch. The gaps between leaves (called internodes) grow long, so the stem looks leggy rather than compact. The leaves themselves stay small and pale, and the whole plant leans toward the brightest light source. The color fades from the characteristic blue-green or red-tipped to a uniform light green. Etiolation is irreversible on the original stem — the new growth will be compact, but the stretched stem stays stretched.
Flop is the gravity-driven version. The stems stay short but bend outward under their own weight, leaving a rosette that opens up rather than staying tight. Flop is usually a combination of insufficient light and overwatering — the stems are too soft to hold their shape. The leaves often curve down at the edges, and the center of the plant may start to expose the crown. Flop is reversible on the same stem if the cause is water rather than light.
The combined case is chronic low light plus chronic overwatering. The plant stretches AND flops AND leans. This is the most common indoor sedum presentation and the hardest to fix without cutting back. The recovery sequence is relocate first, then cut, then propagate the tips — all three steps are needed, and the four-week recovery calendar is in section 8. The visual identification of chronic stretching is covered in the sedum yellow-leaves diagnosis alongside pale-color and soft-stem signs.
Cause 1 — Not Enough Direct Sun (The Dominant Cause)
Sedum needs six or more hours of direct sun, not “bright indirect.” A windowsill that looks bright to human eyes is dim to a plant evolved for open fields, and the deficit shows up as stretching within two to three weeks.
The mechanism is a hormone called gibberellin. When light is below the threshold the plant needs, gibberellin production increases, which lengthens the cells between leaves — the exact stretch the reader is seeing. The same hormone response happens in any plant stretching toward light, but sedum is unusually sensitive because it evolved to find direct sun in rocky outcrops. There is no soil or water fix that overrides this hormone — the only fix is the light source itself.
The threshold is firm. Less than 4 hours of direct sun per day is a stretching guarantee — the plant will elongate as fast as it grows. 4 to 6 hours is the floppy-risk zone, where the plant stays compact but loses the strength to hold its shape. 6+ hours direct sun is the compact, flower-heavy, color-saturated form most gardeners want. The full light requirements are in the sedum varieties guide, with variety-by-variety thresholds.
The indoor diagnostic: a south-facing window in summer delivers 30,000–50,000 lux at midday. A north-facing window delivers 1,000–3,000 lux — that’s a 20x deficit. A simple phone lux meter app confirms the threshold. If the reading at midday is below 25,000 lux even briefly, the sedum will stretch. The fix is either a sunnier window or a grow light, not a brighter spot in the same dim window.
Cause 2 — Overwatering (The Floppy Companion)
Overwatered sedum is soft-stemmed, so it flops even when the light is adequate. The combination of too much water and too little light is the most common presentation of floppy sedum.
The visual signs of overwatering are specific. The stems feel thick and soft when squeezed — they should feel firm and slightly woody near the base. The leaves look translucent or puffy rather than matte and full. The soil stays wet to the touch for more than 24 hours after a deep soak. The center of the plant may start to open, exposing the crown. The full overwatering diagnostic is in the sedum watering guide.
The fix is the soak-and-dry rhythm: deep water, then wait until the soil is dry to 5 cm depth before the next watering. Terracotta pot, drainage hole, gritty mix — the same combination that prevents root rot also prevents soft-stemmed floppiness. The water-retentive plastic and glazed ceramic pots hold moisture longer than sedum needs, and the pot weight test (water, wait 24 hours, weigh) is the most reliable diagnostic for whether the soil is drying fast enough.
For already-floppy stems, the immediate move is to stop watering and let the soil dry to 5 cm depth. Resume only when the leaves show the slightest softness rather than on a calendar. The floppy stems will not firm up — they’re permanently damaged — but the new growth from the crown will be firm if the watering rhythm is fixed. The full calibration is in the watering guide.
Cause 3 — Excess Nitrogen or Compost-Heavy Soil
Rich soil makes sedum grow fast but soft, which flops. The plant looks lush and dark green — the opposite of compact and colorful — but the stems can’t hold the weight of the new growth.
The visual signs of over-rich soil are different from the other two causes. The plant is well-grown, with long internodes, but the new growth is soft and the color is a deep, almost waxy green. The plant may not flower, or the flowers are small and few. A white or dark crust on the soil surface, or a sour smell when the soil is disturbed, are the soil-mix clues. Outdoor sedum planted near a freshly-fertilized lawn often shows this pattern within weeks.
The fix is to repot into the lean gritty mix from the complete sedum care guide — 50% cactus mix, 25% pumice, 25% coarse sand for containers, or 60% native soil, 30% coarse sand, 10% fine gravel for in-ground plantings. Skip fertilizer for at least six months. For outdoor beds, replace the top 10 cm of compost-rich soil with a gravel-pumice blend and top-dress with a thin layer of pumice.
The recovery from over-rich soil is slower than from water or light, because the soil itself has to be replaced. Expect 8–12 weeks for the new growth to compact. The plant will not revert the existing stretched stems — only the new growth will be compact — so cut back at the same time you repot. The full soil recipe is in the soil guide; the headline is that sedum thrives in poor soil.
Fix Step 1 — Relocate to Direct Sun (The Most Important Move)
Sun first, prune second. Relocating before pruning lets the plant use stored energy to fuel the recovery growth after the cut. Pruning before relocating forces the plant to push new growth from depleted reserves.
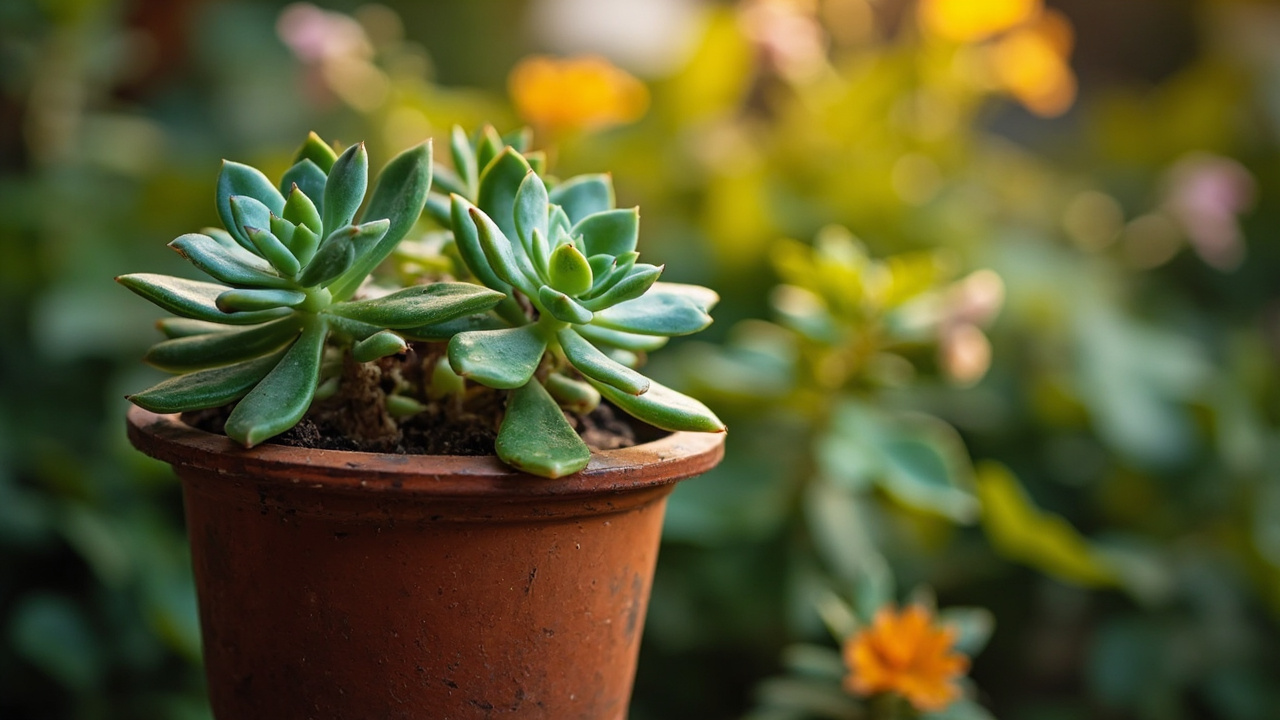
Outdoor relocation: south-facing bed, slope, raised border, gravel strip alongside a fence, or the top of a rock garden. Any spot that catches six or more hours of direct sun is the right spot. For ust the south-facing side of a slope or a raised bed is ideal. The sedum can be moved with a 20 cm root ball in spring or early fall; water once deeply after transplanting and then leave it alone.
Indoor relocation: south-facing window, sunroom, or a spot in the home that gets six or more hours of direct sun. If no such window exists, a full-spectrum grow light at 20–30 cm above the plant on a 12-hour timer is the only real fix. The light intensity should be at least 30 watts actual draw for a 30 cm x 30 cm coverage area. Rotate the pot a quarter turn weekly so the growth stays even.
Acclimation: a sudden jump from indoors to full sun burns leaves. Five-day ramp: day 1 morning sun only, day 2 morning sun plus an hour of midday, day 3 full morning sun plus two hours afternoon, day 4 full sun minus the hottest two hours, day 5 full sun. The full acclimation and sun-scald prevention is in the sedum light guide.
Fix Step 2 — Cut Back and Pinch (Reset the Shape)
Pinch the tips during active growth, hard cut after flowering. The two operations do different things — pinching produces a denser compact bush, hard cutting resets the entire plant.
The pinch: snap the top 3–5 cm of each stem in spring or early summer. Use your fingers, not scissors — the clean break heals faster. Each pinched tip forks into two new stems, so the plant doubles its branching density at the cut point. The pinched material can be propagated or composted. Pinching works best on upright sedum like Autumn Joy, Matrona, and Neon; low-growing groundcover usually needs the hard cut instead.
The hard cut: cut the entire plant to 5 cm above the crown in late fall after flowering, or in early spring before active growth. Use clean sharp pruners and cut just above a leaf node. The plant will regrow from the crown each spring with compact, properly-colored stems. For outdoor sedum in zones 3–7, hard cut in late fall and lightly mulch the crown with gravel for winter protection.
What NOT to do: don’t cut into the woody base. Old wood that has lost its green color will not produce new growth. The cutoff is roughly the spot where the green stem tissue turns brown and woody; stay above that line. For a sedum that has stretched all the way to the woody base, the entire plant needs to be propagated from the tips and the old base discarded. The full pruning walk-through is in the sedum propagation guide.
Fix Step 3 — Propagate the Tips (Insurance + Multiplication)
Tip cuttings root in two to four weeks and grow compact from the start. The cut tips don’t have to be discarded — they’re the cleanest propagation material.
The move: cut or pinch the top 5–10 cm of each leggy stem. Strip the lower leaves to expose 2 cm of bare stem. Let the cutting callus in dry air for 3 days — this is the step most beginners skip, and it’s the difference between rot and a clean root. Insert the callused stem into dry gritty mix, water once, then leave it alone for 10 days. The first roots emerge in 2–4 weeks, and the first new growth appears in 4–6 weeks.
Care during propagation: bright indirect light for 10 days, not full sun. The cutting has no roots to support the transpiration of full sun, so the leaves will sunburn. After 10 days, transition to full sun over the same 5-day ramp as an outdoor relocation. Water only when the soil is dry to 2 cm depth — the cutting is much more rot-prone than an established plant.
What to expect: the new plants will be compact from day one because they start in full sun. They will not have the memory of the leggy mother plant. Within one growing season, the propagated tips will catch up to the size of the original plant before the stretch started. The full propagation walk-through is in the save-dying-sedum recovery guide, with diagrams of leaf, stem, and division techniques.
The Recovery Calendar (What to Expect Over the Next 8 Weeks)
Four to six weeks for compact regrowth, eight weeks for full reset. The reader’s job after the relocate-plus-cut is to do less, not more.
Week 1–2: acclimation to the new light. Some leaf drop on the bottom of cut stems is normal — the plant is redirecting energy to the new growth points. Water only when the soil is dry to 5 cm depth. No fertilizer. No mulch on the crown. The plant may look sparse at this stage, and that’s fine.
Week 3–4: new compact growth emerges from the cut points and from the crown. The growth is slower than the original stretch because it is in full sun — and that slower growth is the compact growth. Water when the soil is dry to 5 cm depth. Skip fertilizer entirely. Pinch the new tips if the plant is responding with single stems rather than branched growth.
Week 5–8: the full reset is in motion. The plant is fully acclimated to the new light, the new growth is compact and properly colored, and the crown is established. Resume normal watering rhythm. Do not fertilize — the next feeding window is spring of the following year. The first flowers will appear in the next flowering cycle.
Prevention (Keeping Sedum Compact Year After Year)
Fix the three causes at the source — light, water, soil — and the stretch never comes back. The prevention is the same as the fix, just applied before the stretch starts.
Light: six or more hours of direct sun, or a grow light on a 12-hour timer with the intensity at 30 watts minimum over a 30 cm square. Rotate the pot a quarter turn weekly. In the indoor case, never assume “bright indirect” is enough — measure the lux with a phone app.
Water: soak-and-dry rhythm, terracotta pot, drainage hole, gritty mix. The pot weight test catches failure early — if the pot is still heavy 24 hours after a deep soak, the soil is too water-retentive. The full watering rhythm is in the watering guide.
Soil: lean mix, no fertilizer until the second year, half-strength kelp or compost tea at most once a year after that. The first-year sedum wants nothing added to the soil. The full soil recipe is in the sedum soil mix guide. With these three locked, the sedum stays compact year after year, and the only reason to prune is to shape, not to recover.
Turn any PDF statement into a clean sheet
Skip the typos and the hours of copying. Our converter handles any bank statement format and outputs Excel, CSV, or QBO for QuickBooks. No file retention, free to try.
Convert your statement