Sedum is the most forgiving succulent you can propagate — leaf cuttings, stem cuttings, and division all produce new plants reliably, but only if you get one step right that most beginner guides skip entirely. If you’ve tried propagating succulents before and watched them rot or shrivel before roots appeared, the failure wasn’t your technique — it was skipping the callusing stage that sedum absolutely requires.
This guide covers three propagation methods for sedum — leaf cuttings for maximum yield, stem cuttings for speed, and division for instant results — plus the exact timing, moisture levels, and troubleshooting you need for each. Whether you’re multiplying a single ‘Autumn Joy’ on a windowsill or dividing a sprawling Dragon’s Blood groundcover, the principles below apply across the genus. For the full sedum care foundation, our sedum plant care complete guide covers light, watering, and soil in one place.
Start with the callusing step below — it’s the difference between cuttings that root and cuttings that rot.
The Callusing Step — Why Every Successful Propagation Starts Here
The single most common reason sedum propagation fails is cuttings placed directly into moist soil. Fresh cuttings have an open wound at the base, and that wound is an entry point for fungal spores present in all potting mixes. In moist conditions, the fungus colonizes the cut end within 48 hours, turning it soft and brown before any roots can form. The cutting looks fine for a few days, then suddenly collapses — and most growers assume they watered too much, when the real problem started the moment they planted.
Callusing is the process of letting that cut end dry and form a hard, corky seal. This seal physically blocks fungal entry and signals the cutting to start producing root-initiating cells at the wound site. For sedum, callusing takes 2-5 days depending on temperature and humidity: warm, dry conditions (22-25°C, 40-50% humidity) produce a callus in 2-3 days; cool, humid conditions can take 5-7 days.
To callus properly, lay your fresh cuttings on dry paper towel or newspaper in bright indirect light — not on soil, not in water, not in direct sun. Direct sun desiccates the cutting; soil introduces fungal spores; water prevents callusing entirely. Leave them undisturbed and check daily. A properly callused end feels dry and slightly hard to the touch, not damp, sticky, or soft.
Leaf Cuttings — Turning One Leaf into a New Plant
Leaf propagation works exceptionally well on sedum because every healthy leaf contains enough stored water and energy to produce both roots and a tiny new rosette. A single mature plant can donate 20-30 leaves without any visible damage, making this the highest-yield propagation method. The trade-off is time: leaf cuttings take 6-12 weeks to produce a plant large enough to pot individually.
The technique matters. Twist a healthy lower leaf sideways until it snaps cleanly from the stem — don’t cut it with a blade, because you need the small base plate (where the leaf meets the stem) to remain intact. That base plate is where roots and the new rosette emerge. Damaged or partially torn leaves rarely propagate successfully. Let the twisted leaf callus for 2-3 days, then lay it flat on dry pumice or perlite — do not bury the base plate. Burying it causes rot.
After placement, mist lightly once every 5-7 days — not daily. Daily misting keeps the surface too damp and causes the leaf to rot before rooting. Provide bright indirect light (an east-facing windowsill is ideal). Roots typically appear within 2-3 weeks, followed by a tiny rosette at the leaf base in 4-6 weeks. Once the rosette is 2-3cm across and the original mother leaf has withered away, transplant it into standard 2:1 gritty mix. For the right soil composition at transplant stage, our sedum soil mix guide covers the exact ratios.
Stem Cuttings — The Fastest Way to a Full Plant
Stem cuttings produce a recognizable sedum plant in weeks rather than months. Unlike leaf cuttings, which must build an entire plant from scratch, a stem cutting already has a stem and leaves — it just needs roots. This is the best method when you’ve pinched back an upright variety and have healthy stem sections to spare, or when a trailing variety has grown leggy and needs pruning.
Cut a 5-10cm stem section just below a node (the point where leaves attach to the stem) using a clean, sharp blade. Remove the lower 2-3cm of leaves by twisting them off — this exposed stem section is what goes into the soil. Let the cutting callus for 3-5 days (stem cuttings need longer than leaf cuttings because the wound is larger). After callusing, insert the bare stem 2-3cm deep into barely-moist gritty mix. If the cutting is top-heavy, support it with a small stick or a couple of stones around the base.
Wait 5 days before the first light watering — this gives the callused end time to begin root disturbance without sitting in moisture. Roots typically form within 2-3 weeks. The gentle tug test tells you when rooting is complete: after 3 weeks, tug very lightly on the cutting. Resistance means roots have gripped the soil. No resistance means wait another week and test again.
Division — Splitting Mature Sedum into Multiple Plants
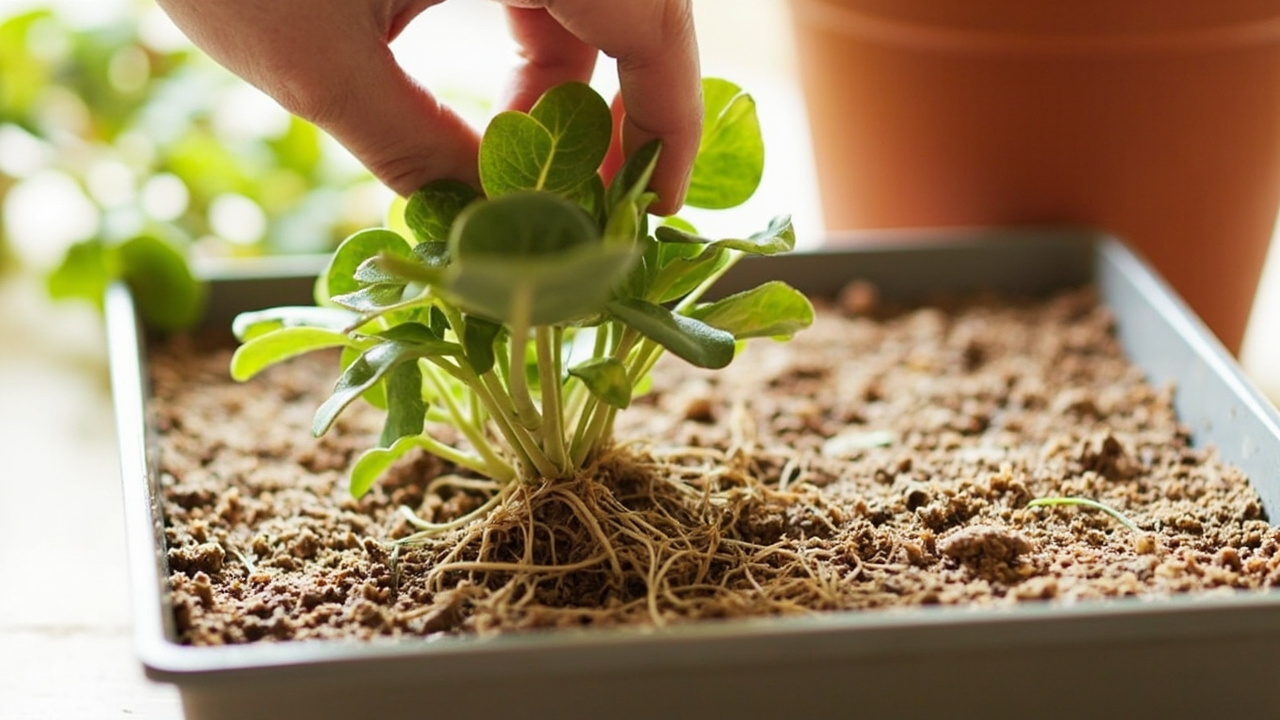
Division is the most reliable propagation method because each section already has an established root system. There’s no waiting for roots to form, no callusing period, and no delicate early stage. It’s the best method for mature upright varieties (Autumn Joy, Matrona) and spreading groundcovers (Dragon’s Blood, Angelina) that have formed dense, multi-stemmed clumps.
The technique is straightforward: lift the entire plant from its pot or garden location in early spring, just as new growth begins. Gently tease apart the root ball by hand, separating it into sections that each have roots and at least 2-3 stems. For tightly bound root balls, use a clean, sharp knife to cut through the mass. Replant each division immediately into fresh gritty mix at the same depth it was growing before. Water lightly after 3-5 days — not immediately, because any cut roots need time to callus over.
Division is the only propagation method that works on sedum in autumn, because you’re moving an already-rooted plant rather than asking a bare cutting to establish. Divide in September-October to give sections 4-6 weeks to settle before winter dormancy. For variety-specific growth habits that affect how quickly plants clump and become ready for division, our sedum varieties guide covers which types form dense clumps fastest.
When to Propagate — Seasonal Timing for Best Results
Timing matters more than technique. Spring (March through May) is the ideal propagation window for sedum: increasing day length and warming temperatures trigger active growth hormones in the parent plant, and cuttings taken during this period root fastest. Expect 70-90% success rates with leaf and stem cuttings taken in spring from healthy, actively growing plants.
Early summer (June) works but requires more attention to moisture management. High temperatures speed callusing but also increase the risk of rot in humid conditions. If you’re propagating in early summer, reduce misting frequency and ensure excellent air circulation around your cuttings. Autumn (September-October) is acceptable for division of in-ground plants before winter sets in, but cuttings taken in autumn often fail to establish meaningful root systems before dormancy.
Winter (November through February) is the one season to avoid entirely. Sedum is dormant during this period — growth hormones are inactive, and cuttings taken from dormant plants either won’t root or will rot before spring arrives. If you must propagate in winter, provide bottom heat (20-22°C) and 14 hours of grow light daily to simulate spring conditions, but expect lower success rates. The parent plant will also produce weaker cuttings in winter because it’s directing energy to root survival rather than new growth.
Troubleshooting — Common Propagation Problems and Fixes
Cutting rotted at the base: too much moisture during callusing or after planting. Switch to a drier propagation mix (100% pumice or perlite), reduce misting to once weekly, and ensure your container has drainage. Leaf dried up without rooting: too little humidity or the leaf was damaged during removal. Increase misting frequency slightly, or cover cuttings with a loose plastic dome to retain humidity — but remove it for 30 minutes daily to prevent mould.
Cutting grew roots but no new rosette: this is normal for some sedum varieties, particularly upright types. The rooting stage and the rosette-formation stage are separate processes, and the gap between them can be 4-8 weeks. Be patient — as long as the cutting looks healthy and roots are growing, top growth will follow. Mould on the callusing end: an air circulation problem. Move cuttings to a spot with better airflow, remove any affected cuttings immediately, and reduce misting frequency. A small fan running on low in the room can prevent mould entirely during humid summer months.
Cutting wilted after transplanting: some wilting is normal for 2-3 days after potting rooted cuttings — the root system is adjusting to the new soil environment. Keep the plant in bright indirect light and resist the urge to overwater during this transition. If wilting persists beyond 5 days, the root system may have been damaged during transplant — reduce light exposure and mist daily until the plant recovers.
From Bank Statement to QuickBooks-Ready File
That manual cleanup you just read about? This tool skips it. Turn your PDF into QBO for QuickBooks without storing your data anywhere.