Planting sedum is one of the rare gardening tasks where doing less actually works — pick the right spot, set the crown at the right depth, give it one good soak, and a stonecrop will reward you for years of polite neglect. The trick is that the “less” is specific. Sedum planted too deep rots. Sedum planted in rich soil grows soft and flops. Sedum planted in shade stretches and never flowers.
This guide walks through the three real-world planting scenarios for sedum — outdoor ground beds, containers, and rock walls — with the timing, soil, depth, and spacing rules that decide whether a stonecrop thrives for a decade or sulks for a season. The reader’s only job today is to plant once, water once, and walk away. Everything else is patience.
Sedum tolerates a wider range of climates than most succulents, but the planting rules stay consistent: full sun, lean soil, the crown at soil level, and a single soak at planting. Get those four right, and the rest of the year takes care of itself.
When to Plant Sedum (Timing by Climate and Variety)
Plant sedum in spring or early fall, never in peak summer. The rule is simple: warm soil plus cool air is the only combination that lets roots grow without heat stress.
When soil temperature sits above 10°C (50°F) and the air is mild, sedum roots push out fast — usually within two to four weeks for upright varieties like Autumn Joy and three to six weeks for slower alpine groundcovers. Peak summer planting forces the plant to push roots while losing water through its leaves faster than it can replace it, which is why midsummer sedum plantings often stall.
Adjust the window by USDA zone. In zones 3–7, spring planting after the last frost is safest. In zones 7–9, fall planting — six weeks before the first expected hard frost — gives roots a long cool window to establish. In zones 9 and warmer, late winter through early spring is the planting window, and summer dormancy is real.
Soil temperature matters more than calendar date. A cheap soil thermometer takes the guesswork out: stick it 5 cm deep at 8 a.m. for three days. If the reading holds above 10°C, plant. If it’s still bouncing, wait another week.
Picking the Right Site (Light, Slope, and Drainage)
Full sun is non-negotiable. Sedum needs six or more hours of direct sunlight to stay compact and flower.
The best sites slope slightly, drain within thirty minutes after rain, and catch southern or western sun. A raised bed, a rock garden, a south-facing bank, or a gravel strip along a fence all work. Sedum also thrives in the pockets of a green roof, where the soil is shallow and the drainage is by design.
The worst sites are low-lying soggy ground, the dense shade under tree canopies, and lawn edges that get hit by sprinkler overspray. These don’t kill sedum immediately, but they produce stretched, floppy plants that flower sparsely and rot in the first wet winter. If the only available spot is partly shaded, lean toward a low-growing groundcover variety like Sedum acre or Sedum spurium, which tolerate more shade than upright types.
The quick drainage test: dig a hole 20 cm deep, fill it with water, and see how long it takes to empty. If the water is still standing after thirty minutes, the site is too wet for sedum. Either pick a different spot, build a raised bed, or amend the soil heavily with pumice and coarse sand before planting.
Preparing Soil for Sedum (The Lean, Gritty Recipe)
Sedum hates rich soil. Lean and gritty is the rule, and the more the soil resembles a crushed-gravel path, the happier the plant.
For outdoor in-ground planting, blend the native soil in a 60 / 30 / 10 ratio: 60% native soil, 30% coarse sand or pumice, and 10% fine gravel. The native soil gives the plant something to anchor into; the sand and gravel give water somewhere to go. Skip the compost, skip the peat, skip the moisture-retaining polymer crystals.
For containers, the recipe shifts to 50% cactus mix, 25% pumice, and 25% coarse sand. A pre-bagged cactus mix is fine as a base, but on its own it stays too wet for outdoor containers. The extra pumice and sand create the air pockets that sedum roots need. The full container recipe is laid out in the sedum soil mix guide.
Sedum tolerates a slightly wider pH range than most succulents — 6.0 to 7.5 — and handles mildly alkaline soil better than acidic. Gardeners in coastal or chalky soils rarely need to amend for pH, but those with heavy clay should focus on drainage rather than pH adjustment. A more detailed soil walk-through sits in the soil guide; the headline is that lean and gritty beats rich and water-retentive every time.
Planting Sedum in the Ground (Step-by-Step)
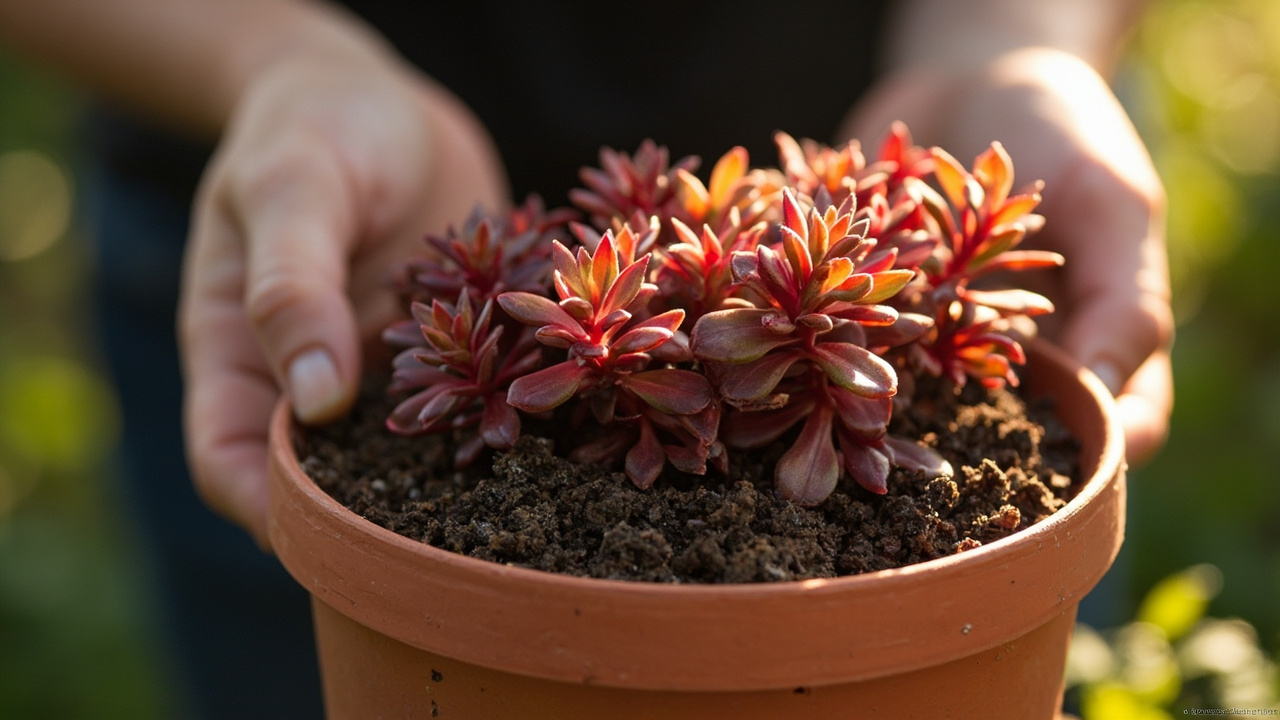
Plant the crown at soil level — never deeper. The crown is the spot where the stem meets the roots, and burying it is the single fastest way to rot a sedum.
Spacing depends on the variety you’re planting. Upright sedum like Autumn Joy, Matrona, and Neon needs 30–45 cm between plants so air can move through the clump. Low-growing groundcover like Dragon’s Blood or Angelina wants 20–30 cm. Trailing varieties like Burro’s Tail or Sedum morganianum can be planted 15–25 cm apart for a quick fill, but they look better with a bit more room to drape.
The actual move is straightforward. Dig a hole twice as wide as the root ball and exactly as deep. Backfill so the crown sits at the surrounding soil level, firm the soil with your hands, and water once thoroughly until you see moisture at the surface. That’s the entire first watering — there is no need to soak daily.
The first seven days are a no-touch zone. No fertilizer, no daily watering, no mulch piled against the crown. A light gravel top-dressing is fine and actually helps drainage, but bark mulch or compost on the crown is a rot invitation. For the watering rhythm after planting, the sedum watering guide covers the seasonal detail; the short version is to wait until leaves soften slightly before watering again.
Planting Sedum in Containers and Rock Walls
Containers are the riskier setup because drainage is the whole game — and most pot failures happen because water has nowhere to go.
Choose a terracotta pot with a drainage hole. Terracotta breathes, which helps the soil dry evenly; plastic and glazed ceramic hold moisture longer than sedum prefers. For groundcover varieties, a shallow bowl (called a “succulent pan” or “azalea pot”) is better than a deep pot because the soil dries faster. For upright sedum, a regular 20–30 cm pot with a drainage hole is plenty.
The drainage layer myth: putting gravel or pot shards at the bottom of the pot does not improve drainage. Modern research has shown that a perched water table forms at the interface between the fine soil and the gravel layer, which actually makes drainage worse. Instead, use a small piece of mesh or a coffee filter over the drainage hole to keep soil from washing out, then fill the pot with the gritty mix from above.
For rock walls, tuck small plugs into the soil-filled crevices between stones, water once from above to settle the soil into the roots, then leave them alone. The stone-facing walls that catch a few hours of direct sun are ideal because the stones absorb heat during the day and release it at night — exactly the microclimate alpine sedum evolved for.
Aftercare for the First 30 Days (Do Less, Not More)
The post-planting rule is one deep soak at planting, then monitor the leaves before reaching for the watering can again.
Week one: water only if there has been no rain for seven or more days. Check soil moisture at 5 cm depth — if it feels dry to the touch, water deeply. If it feels cool or damp, walk away. The most common sedum planting death is the well-meaning gardener who waters daily because the leaves look thirsty under afternoon sun.
Weeks two through four: do a gentle tug test. Grasp the base of the stem and pull lightly. If the plant resists, roots have taken hold and the planting is established. If it lifts out, press it back in, water once, and try again in another week. Most sedum establishes within four weeks in warm soil.
What not to do: no fertilizer until next spring, no mulch piled on the crown, no overhead watering every day. Sedum does not need feeding in its first year — the lean soil is enough. The full overview of the post-planting calendar is in the complete sedum care guide; the first month is the only period that needs close attention.
Common Planting Mistakes (And How to Fix Them)
Three mistakes kill most newly planted sedum: depth, water, and shade. The good news is that all three are fixable if caught within the first season.
Burying the crown. If the sedum was planted too deep and the lower leaves are yellowing, lift it, brush off the wet soil, and replant at the correct depth with fresh gritty mix. Expect some leaf drop in the recovery period — sedum can tolerate losing the bottom leaves as long as the crown stays viable.
Daily watering. If the sedum is sitting in soggy soil and the leaves look translucent or mushy, stop watering immediately. Let the soil dry to 5 cm depth, then resume only when the leaves show a slight softness. The discipline is to trust the leaves, not the calendar.
Deep shade. If the sedum is stretching and the gaps between leaves are getting longer, the spot is too dark. In the first season, dig the plant up with as much root as possible, move it to a sunnier spot, water once, and let it re-establish. Sedum survives relocation better than most succulents as long as the new spot has the drainage and light it needs.
Once planted correctly, sedum settles into a routine that asks for almost nothing. For variety-specific advice on which sedum to plant next, the varieties guide covers upright, groundcover, and trailing options by USDA zone. To expand the planting from one sedum to several, the propagation guide walks through leaf cuttings, stem cuttings, and division of established clumps.
From PDF to Excel in one click
Forget retyping line by line. Upload any bank statement, get a spreadsheet you can actually use. Your files are never stored, and you can test the converter with 3 free conversions.
Try it free