It’s a scene that plays out in homes everywhere. You visit your local nursery and fall in love with a gorgeous fiddle leaf fig. You bring it home, place it in the perfect spot, and admire your new green addition.
But a few weeks later, the disillusionment begins. One leaf, then two, develop yellow patches before dropping to the floor.
Brown tips appear. The whole plant seems to slump in defeat.
Does this sound painfully familiar?
If you’ve ever felt that pang of guilt and wondered, “How can I save my plant?”, you are not alone. A 2023 Trees.com survey found that one in five houseplant owners have lost at least half of their plant collection.
Plant decline is rarely one mistake. It is a series of misunderstood signals — subtle cries for help that get lost in translation. The good news: once you learn the language, most diagnoses take 10 to 20 minutes and most recoveries begin within 7 to 14 days of correct treatment.
Why Your Plant Is Dying: The 4-Step Diagnosis
Before you reach for fertilizer or a new pot, run a four-step diagnosis. Each step takes 2 to 5 minutes and produces a clear answer that points to the next move.
Most plant failures trace to one of four root causes: water imbalance (over- or under-watering), light mismatch, pest pressure, or root rot. Within 10 to 20 minutes of structured diagnosis, you can identify which one applies and skip the 6 to 12 months of guesswork that come from treating symptoms in the wrong order.
Step 1: Confirm the Plant Is Actually Alive
Many plants that look lifeless are simply dormant or deeply stressed. Rushing to the compost bin is the first mistake. Your first task is to determine whether there is still life to work with.
Many houseplants enter a natural dormancy period, especially those growing from bulbs, tubers, or rhizomes. Caladiums and Alocasias are famous for dropping every leaf and dying back to the soil in winter. They are not dead — they are resting.
A truly dying plant shows signs of irreversible decay. The most common: widespread mushy root rot creeping up the base of the stem, a trunk that feels hollow or soft, or a pest infestation that has consumed the plant’s vitality.
The fastest diagnostic is the scratch test. Choose a main stem or woody branch 2 to 3 inches above the soil line. Using your fingernail or a clean knife, gently scrape away a small patch of the outermost bark.
If you see green tissue and feel moisture, that green layer (the cambium) is the plant’s living vascular tissue — your plant has a fighting chance. Expect recovery signs within 7 to 21 days if you correct the underlying cause.
Step 2: Decode Your Plant’s Distress Signals
Once you have confirmed the plant is alive, the symptoms become clues. Reading them correctly moves you from guessing to diagnosis within 5 to 10 minutes.
Yellow leaves (chlorosis): The location of yellowing tells you where to look. Yellowing on the oldest lower leaves, dropping one at a time, is usually natural aging.
Yellowing on multiple lower leaves while soil is constantly damp points to overwatering. Uniform yellowing across the plant, including new growth, often indicates nitrogen deficiency.
Brown leaves with crispy edges: This is a telltale sign of low humidity rather than underwatering. Indoor heating drops relative humidity to 20 to 30% in winter, well below the 40 to 60% most tropical houseplants prefer. Brown leaf tips appear within 7 to 14 days of humidity drop.
Drooping or wilting: Wilting that recovers within 1 to 2 hours of watering is a clear thirst signal. Wilting that does not recover after watering points to root damage or vascular disease. The distinction matters because the treatments are opposites — overwatering a wilted plant with damaged roots accelerates decline within 3 to 5 days.
Spots, patches, or unusual markings: Small yellow or brown spots scattered across leaves indicate pest pressure (spider mites, thrips, scale). Black spots with concentric rings signal fungal infection (early blight, septoria). White powder on leaf surfaces is powdery mildew, common in humid conditions above 70%.
Sticky residue on leaves or floor: Sticky sap on or under the plant almost always means aphids, scale, whiteflies, or mealybugs are feeding above. Check the undersides of leaves and stem joints within 24 hours of noticing the residue.
Step 3: Match Symptoms to the Underlying Cause
Within 5 minutes of symptom mapping, you can usually narrow the cause to one of four categories: water, light, pests, or root rot. The match determines your next move.
Water-Related Causes (60% of Cases)
Water imbalance is the single most common cause of plant decline in home gardens. Both overwatering and underwatering produce drooping leaves, but the other signs differ.
Overwatering signs: yellowing of multiple lower leaves, soil that stays wet 24+ hours after watering, green algae on soil surface, sour smell from soil, fungus gnats hovering around the plant. Roots turn brown and mushy within 7 to 14 days of consistent overwatering.
Underwatering signs: dry, crispy leaf edges (not just tips), soil pulling away from the pot edge, leaves that recover within 1 to 2 hours of watering. Prolonged underwatering (3 to 4 weeks) causes leaf drop and stem shriveling.
For a complete protocol, see our guide on how often to water houseplants — the principle applies to most species, not just mass cane.
Light-Related Causes (20% of Cases)
Light mismatch usually shows as stretching (etiolation), pale new growth, leaf drop without other symptoms, or scorch marks on the leaves closest to the light source.
Most houseplants need 6 to 8 hours of bright indirect light daily (10,000 to 25,000 lux). North-facing windows deliver 1,500 to 4,000 lux — sufficient for shade-tolerant species only. South-facing windows deliver 50,000+ lux, which scorches most tropical foliage within 30 minutes of direct exposure.
A simple shadow test diagnoses your light level within 2 minutes: hold your hand 12 inches above a piece of paper at plant height.
A sharp, dark shadow means too much direct light. A soft, faint shadow means bright indirect — ideal. No visible shadow means low light, suitable only for ZZ plant, snake plant, or cast iron plant.
Pest Pressure (10% of Cases)
Pests usually announce themselves with sticky residue, visible insects on undersides of leaves, fine webbing (spider mites), or stippled leaf surfaces (thrips). A magnifying glass and 5 minutes of inspection is usually enough to identify the culprit.
The most common indoor pests — aphids, spider mites, mealybugs, scale, fungus gnats — can each be treated with insecticidal soap, neem oil, or sticky traps within 7 to 14 days. Severe infestations require 2 to 3 rounds of treatment spaced 5 to 7 days apart.
For full pest identification guidance, see our indoor plant pest identification guide.
Root Rot (10% of Cases, Highest Severity)
Root rot is the most severe diagnosis because by the time leaves yellow and stems soften, the roots have often been compromised for 2 to 4 weeks. Recovery is possible but requires immediate action within 24 to 48 hours of diagnosis.
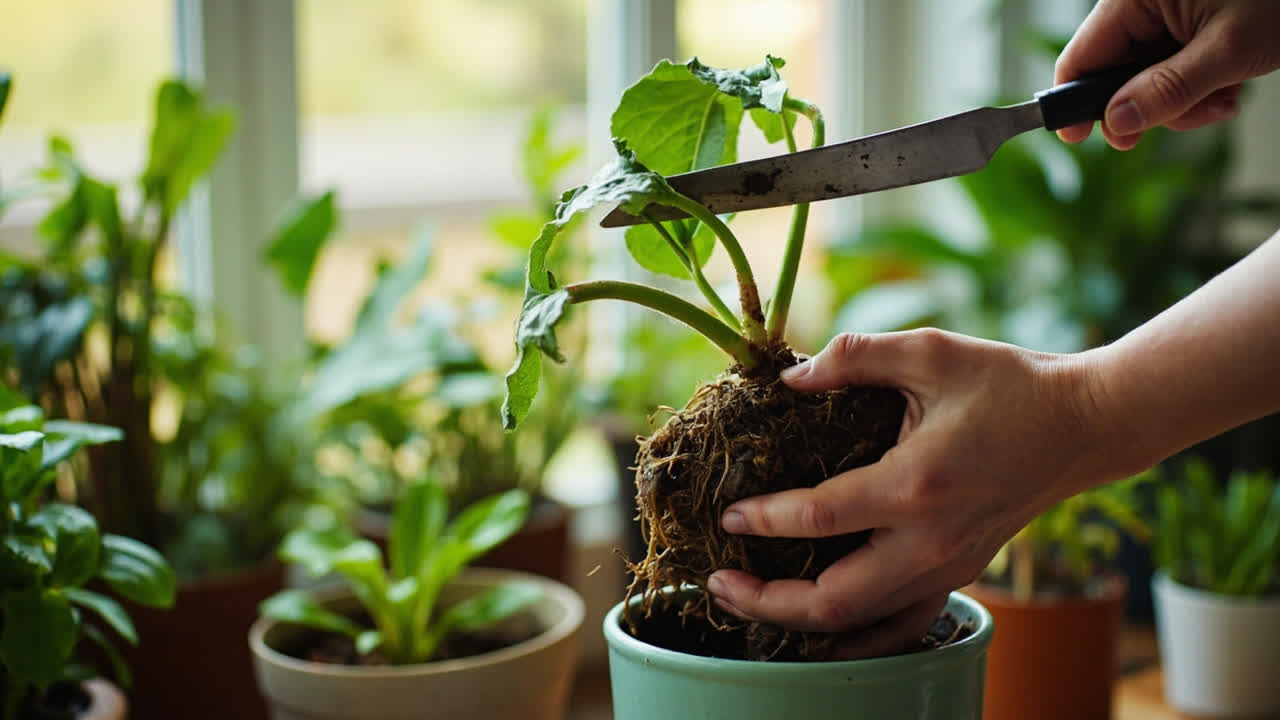
To confirm root rot, gently slide the plant out of its pot. Healthy roots are white or pale tan and firm; rotted roots are brown or black, mushy, and may smell sour.
Trim affected roots with sterilized scissors (wipe with 70% alcohol between cuts), repot in fresh well-draining soil, and withhold water for 5 to 7 days to let cut surfaces callus over.
For full root rot prevention and treatment, see our root rot prevention guide.
Step 4: Apply the Right Treatment (Within 24 Hours)
Treatment choice depends on your diagnosis from Step 3. Each path takes 15 to 45 minutes of active work and produces visible recovery signs within 7 to 21 days if applied correctly.
If the cause is overwatering: Stop watering immediately and move the plant to a spot with better air circulation.
If the soil is still soggy after 24 hours, repot into fresh dry soil. Expect recovery within 7 to 14 days; full vigor within 4 to 6 weeks.
If the cause is underwatering: Soak the rootball in a basin of room-temperature water for 15 to 30 minutes. Let excess drain.
Resume normal watering on a check-the-soil-first schedule. Recovery is usually visible within 24 to 48 hours.
If the cause is light mismatch: Move the plant to a more appropriate spot — closer to or further from the window as needed. If no natural light is available, add a USB clip-on LED grow light positioned 12 to 18 inches above the plant for 8 hours daily. Expect new growth within 4 to 8 weeks.
If the cause is pests: Isolate the plant from other houseplants to prevent spread. Treat with insecticidal soap or neem oil every 5 to 7 days for 2 to 3 rounds. Quarantine for 14 to 21 days after the last visible pest before reintroducing to other plants.
If the cause is root rot: Repot immediately in fresh, well-draining soil. Do not water for 5 to 7 days after repotting. Trim affected roots before repotting.
Recovery is slower — expect 2 to 4 weeks for new root growth, 6 to 12 weeks for visible recovery above the soil line.
Step 5: Adjust Care to Prevent Relapse
Most plants that die a second time do so because the underlying habit (overwatering, wrong light spot, skipped pest checks) was never corrected. The five-step recovery is incomplete without addressing the routine that caused the decline.
Light is everything: “Bright, indirect light” is the most common recommendation, but it means different things in different spaces. A spot 2 to 3 feet from an east-facing window, with gentle morning sun, is the textbook example. An unobstructed south-facing windowsill provides hours of intense direct sun that scorches most tropical houseplants within 30 minutes.
Watering is a response, not a schedule: The “water once a week” rule is a myth that causes most overwatering-related deaths. Water based on need, not calendar.
The finger test — top 1 to 2 inches of soil dry to the touch — is the simplest and most reliable method. Adopt it within the first week of recovery; it eliminates 60 to 80% of water-related decline.
Humidity matters: Most tropical houseplants prefer 40 to 60% relative humidity. Winter indoor heating drops humidity to 20 to 30% in most homes.
Brown leaf tips within 7 to 14 days of heating season are a humidity signal, not a watering signal. Group plants together, run a humidifier, or use a pebble tray to raise local humidity 10 to 20%.
Pest checks are preventive: Spend 2 minutes per week inspecting leaf undersides and stem joints. Catching pests early (1 to 5 insects visible) requires one treatment round. Catching them late (50+ insects, sticky residue, leaf damage) requires 3 to 4 rounds over 3 to 4 weeks and risks spread to other plants.
Plant-Specific Revival Guides
If you know which species is in trouble, our species-specific revival guides give detailed protocols calibrated to that plant’s needs. Each runs 1,500 to 3,500 words and includes diagnosis flowcharts, watering schedules, and recovery timelines.
- Save a dying snake plant — diagnosis, root rot treatment, watering reset (1,800 words)
- Save a dying mass cane — yellow leaves, leaf drop, stem rot (2,200 words)
- Save a dying jade plant — overwatering rescue, leaf shrivel, propagation fallback (1,900 words)
- Save a dying corn plant — leaf browning, fluoride sensitivity, repotting (2,100 words)
- Save a dying rubber tree — leaf drop, sap loss, low humidity recovery (1,700 words)
- Lucky bamboo brown tips — water quality, fluoride, light balance (1,400 words)
What to Do Now
Set a 20-minute timer and run the four-step diagnosis above. By the end, you should have a clear cause and a clear next move.

If your diagnosis points to water imbalance: water correctly today and recheck in 7 days.
If it points to light: move the plant or add a grow light within the next 24 hours.
If it points to pests: isolate the plant today, treat within 48 hours, and quarantine for 14 to 21 days after the last visible pest.
If it points to root rot: repot today in fresh soil and withhold water for 5 to 7 days.
For species-specific revival, follow the link in the section above to a plant-by-plant guide. Most recoveries take 2 to 6 weeks from correct treatment; full vigor typically returns within 3 to 6 months. If your plant shows no new growth after 8 weeks of correct care, revisit the diagnosis — the underlying cause was likely misidentified.