If your Dracaena massangeana is looking off despite getting enough light, the problem might not be above the soil — it might be below it. Mass cane plants need a specific well-draining soil mix that balances moisture retention with the air porosity their wide, shallow roots require. Get this wrong and you’ll see the same symptoms as underwatering: brown tips, yellowing leaves, and slow growth — even when the watering schedule is otherwise correct.
The confusion is understandable. Most potting advice says “well-draining soil” without ever defining what that means for this particular plant. The result is gardeners using generic bagged mix, overwatering slightly, and wondering why their mass cane steadily declines after a repot. This guide gives you the exact recipe and the reasoning behind it — so you know not just what to do but why.
There’s also a second decision most advice glosses over: the pot itself. Terracotta, plastic, and ceramic all affect how the soil performs once it’s in the pot. Mass cane roots aren’t deep divers — they spread horizontally and need oxygen as much as they need water. That shapes both the soil mix and the pot choice in ways that matter in real homes.
Why Your Mass Cane Plant Needs Its Own Soil Mix
Mass cane (Dracaena massangeana) isn’t fussy about many things, but soil is where most general guidance falls apart. The plant originates from tropical regions with loose, forest-floor material — not the dense, moisture-holding mix most indoor potting soils are designed to provide.
What Goes Wrong with Generic Potting Mix
Standard bagged potting soil is engineered to retain moisture across a wide variety of plants. That sounds convenient, but mass cane roots don’t grow deep — they spread outward in a shallow, fibrous mat that needs oxygen at every level. In a standard mix, the soil stays wet too long between waterings, and the roots essentially drown in the lower third of the pot where water collects.
The symptoms often look exactly like thirst: the plant droops slightly, the leaf edges brown, growth slows. So the gardener waters more, the problem gets worse, and eventually root rot sets in silently below the surface. By the time yellow leaves appear, the root system is already compromised.
The Air-Porosity Principle : Why Roots Need Room to Breathe
Plant roots don’t just absorb water — they need oxygen to function. This is especially true for Dracaena massangeana, which has a relatively low transpiration rate compared to other tropical houseplants. When soil particles pack tightly, air pockets collapse and the roots essentially suffocate even in damp conditions.
A soil mix with good porosity means water moves through quickly after watering but the root zone still holds enough moisture for the plant to draw from between waterings. The difference is in the structure of the mix, not just the frequency of watering.
The Ideal Soil Recipe for Dracaena Massangeana
The right mix for mass cane has three functional components. You can combine them yourself or use this as a shopping guide when buying a ready-made cactus and succulent mix — most of those need only a small amendment to work perfectly for Dracaena.
Component 1 : Peat Moss or Coco Coir (Moisture Retention Base)
Peat moss or coco coir forms the moisture-retention backbone. Either works; coir is increasingly preferred for sustainability reasons and slightly better pH neutrality, but peat is equally effective for mass cane. This component holds water in a form the root system can access between waterings without staying waterlogged.
Use about 40–50% of the total volume as your base. If the mix feels like it’s drying out too fast in your home conditions (especially in summer or with terracotta), increase this slightly.
Component 2 : Perlite (Drainage and Air)
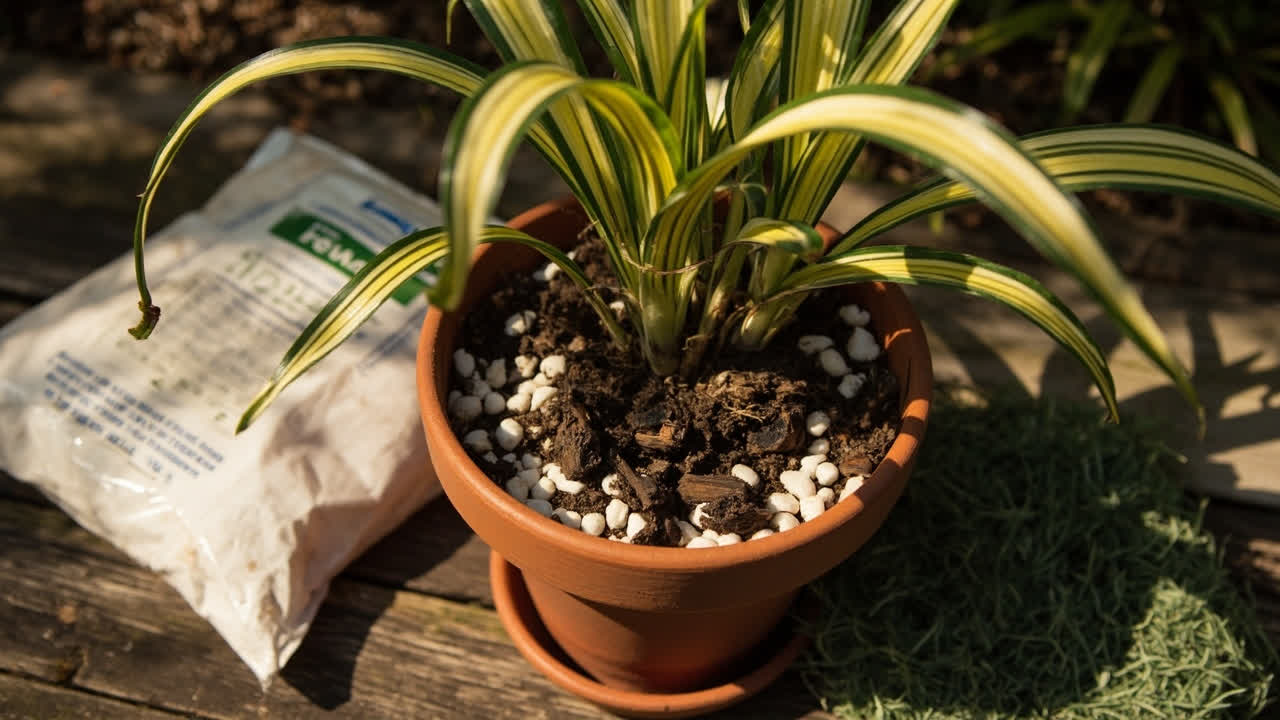
Perlite is the white volcanic glass particles in most quality potting mixes. They create drainage channels and hold air in the soil structure even after watering. Without perlite or an equivalent (pumice works too), the soil collapses and compacts over time, especially after repeated watering.
Use roughly 25–30% perlite by volume. This is the component most “all-purpose” potting soils skimp on, which is why they fail for mass cane. If you’re buying a bagged mix, check the perlite content — if you can’t see white particles, add more.
Component 3 : Pine Bark or Activated Charcoal (Structure and Slight Acidity)
Pine bark (or orchid bark) and activated charcoal each serve a dual purpose: they add structure that resists compaction over time, and they create the slightly acidic to neutral pH range (roughly 6.0–7.0) that Dracaena massangeana prefers. Pine bark also slowly decomposes, feeding beneficial microorganisms at the root zone.
Add roughly 20–25% bark or charcoal to the mix. A small amount — a handful per litre of mix — of activated charcoal also helps keep the soil profile sweet and reduces fungal risk in enclosed pots.
Choosing the Right Pot
The soil mix only performs as well as the pot it’s in. Pot material directly affects how quickly the soil dries out after watering — which is the single biggest controllable variable in mass cane health.
Terracotta vs Plastic vs Ceramic : The Trade-offs
Terracotta is the best choice for most indoor mass cane situations. The porous walls allow moisture to evaporate through the pot sides, which naturally accelerates drying and prevents the waterlogged conditions that cause root rot. If you’ve ever felt a terracotta pot walls and noticed it stays slightly damp — that’s the plant-safe version of the process working.
Plastic and ceramic pots retain moisture longer. This can be useful in very dry climates or air-conditioned spaces where soil dries out too fast, but it requires much more careful watering discipline. With plastic, you’re one accidental overwatering away from the soil staying wet for two weeks in winter.
If you love the look of a ceramic cachepot, the practical solution is to keep the plant in a plastic nursery pot that fits inside the ceramic shell. Lift it out to water, let it drain fully, then return it to the decorative outer pot. That way you get the aesthetics without the moisture risk.
Pot Size Rule : When and How Much to Size Up
Resist the temptation to jump to a much larger pot. A pot that’s only 1–2 inches wider in diameter than the current root ball is sufficient at each repotting stage. Going larger creates excess soil volume that holds water far beyond what the plant can use, and that excess moisture is the leading cause of post-repot root rot.
A good indicator: if you can fit more than two fingers between the current root ball and the pot wall, you likely have room to go up one size without rushing. If roots are visibly circling the outside of the root ball, that’s a clear repot signal — regardless of the season.
How to Know When to Repot
Most guides say “repot when roots come out the drainage hole.” By that point, your mass cane has been root-bound for months. There are earlier, less disruptive signals worth watching.
Early Signs of Root Bound (Before Roots Escape the Drain Hole)
Watch for these signals in spring and early summer — the active growth season when the plant can recover most quickly from root disturbance:
- The soil dries out extremely fast after watering — within 2–3 days even in normal conditions
- New growth is noticeably smaller than in previous seasons
- The plant has been in the same pot for 2–3 years without any other issues
- Roots are visible at the soil surface or beginning to circle the top of the root ball
- Water applied to the surface seems to sit and drain very slowly — indicating root density blocking percolation
Any combination of two or more of these signs means the root system has exhausted its room to expand. Repotting sooner rather than later gives the plant room to continue growing.
Seasonal Timing : Spring into Summer Is Ideal
The best window for repotting mass cane is late spring through mid-summer, when the plant is actively growing and can generate new root tissue quickly. Avoid repotting in late autumn or winter when the plant’s metabolism slows — it will sit in stressed, slow-recovery mode for months.
If you discover a root-bound emergency in winter (roots circling so tightly they’ve deformed the pot), it’s better to wait until spring unless the plant is actively declining. Reduce watering slightly if you must wait, and accept a slower recovery period.
Repotting Step by Step
Repotting mass cane is straightforward — the main risks are over-handling the roots and packing the new soil too firmly. Here’s what to do at each stage.
The Process : What to Do at Each Stage
Water the plant 1–2 days before repotting. A moist root ball holds together better during the transfer and causes less root stress than a dry one.
Remove the plant gently. Tilt the pot and slide the root ball out without pulling on the stem. If it sticks, run a knife around the inside edge of the pot — never squeeze or force the root ball.
Inspect the roots. Healthy mass cane roots are off-white to light tan. Dark, mushy, or smelly roots indicate root rot — trim those away with clean scissors before proceeding. If you find more than 30% of the root system is rotted, reconsider whether the current pot size and soil conditions contributed.
Loosen the outer root layer. Without aggressively tearing roots, gently loosen the outer inch or two of the root mat with your fingers. This helps the roots grow outward into the new soil rather than continuing to circle.
Add a base layer of fresh mix to the new pot. Fill the bottom of the new pot with enough mix so the top of the root ball sits about 1 inch below the pot rim — this allows room for watering.
Position the plant and backfill. Place the root ball centred in the new pot, then add mix around the sides in layers, gently firming each layer with your fingertips. Do not compress with force — the goal is to eliminate large air pockets, not to make the mix dense. The surface should sit slightly lower than the rim.
Water lightly and drain. Water thoroughly until it flows from the drainage hole, then let it drain fully. Do not fertilize for 4–6 weeks after repotting — the root system is rebuilding and can’t handle the salt load.
What to Watch for in the First 4 Weeks
Some stress after repotting is normal. Expect 2–4 weeks of the plant looking “settling” — slightly slower growth, perhaps a few lower leaves yellowing as the plant redirects energy to new root establishment. That’s the system recalibrating.
What to be concerned about:
- Generalised yellowing across many leaves (not just a couple of lower ones) — may indicate root damage or overwatering
- Soil that stays visibly wet for more than 10 days after watering — the pot may be too large or drainage inadequate
- Leaf tips turning crispy brown within days of repotting — usually a sign of transplant stress combined with low humidity or dry air, not root rot
If any of these occur, check the soil moisture at the root level before watering again, and resist the urge to “help” by watering more. Overwatering is the most common post-repot mistake.
Common Repotting Mistakes and How to Avoid Them
Overpotting : Too Much Soil Holds Too Much Water
The impulse to give a struggling plant “more room” often backfires. A pot that’s too large relative to the root ball holds proportionally more water than the plant can use, and the soil stays saturated at the bottom where the roots are most vulnerable. The plant can actually decline faster in an oversized pot than in one that’s slightly snug.
When in doubt, go conservatively up in size. You can always move the plant again in a year if it’s thriving.
Packing the Soil Too Firmly : It Compacts When Wet
It’s natural to want the soil to feel solid and stable after a repot, but pressing firmly around the root ball compresses the air pockets the roots need. Use only enough pressure to stabilise the plant — the root ball should hold its shape when you lift the pot, but the surrounding soil should feel light and slightly springy.
A good test: after watering, the soil surface should not develop a hard crust. If it does, you’ve compressed too much and should loosen the top inch with a fork before it dries out completely.
What Comes Next
With the right soil mix and a properly sized terracotta pot, your mass cane has the drainage foundation it needs to stay healthy. Combine this with correct watering — letting the top 2–3 inches of soil dry out before watering again — and you’ll see the difference in leaf quality within a month or two.
From here, the natural next steps are a watering review and a light check. Use our how often to water a mass cane plant guide to fine-tune your schedule, and cross-reference with the mass cane brown tips article if you’re still seeing edge browning — that symptom is most commonly tied to either watering habits or soil drainage, and now you can troubleshoot both.
If you’re also dealing with yellowing leaves, our mass cane plant leaves turning yellow and brown guide covers the broader diagnostic picture.
Turn any PDF statement into a clean sheet
Skip the typos and the hours of copying. Our converter handles any bank statement format and outputs Excel, CSV, or QBO for QuickBooks. No file retention, free to try.
Convert your statement