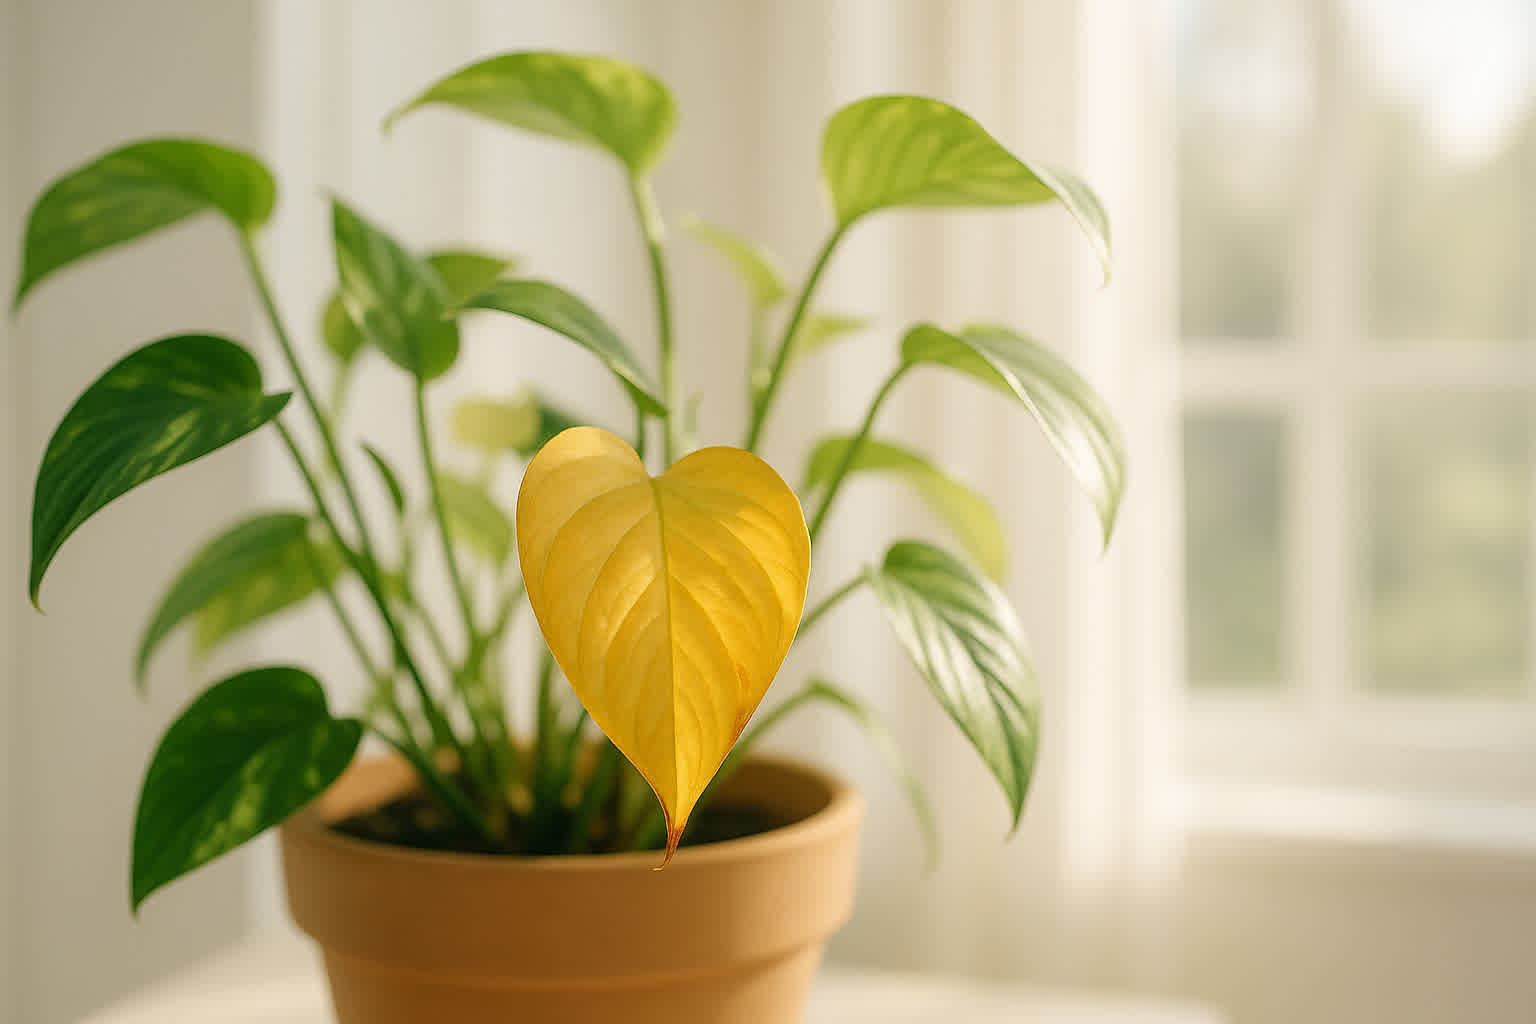

If your indoor plant leaves are turning yellow and you don’t know why, here’s the thing that most articles skip over: yellow leaves are a symptom, not a diagnosis. The same yellowing pattern can mean too much water, too little water, a nutrient deficiency, or nothing wrong at all — depending on which leaves are affected, how the yellowing is distributed, and what else is happening on the plant.
Understanding why indoor plant leaves turn yellow requires learning to read those patterns. Each cause produces a recognizable signature — where the yellow starts, how it spreads, what other symptoms appear alongside it. This article walks through every major cause, explains the mechanism, and gives you a specific fix. By the end, you’ll know exactly what’s happening to your plant and what to do about it.
The most common cause of yellowing indoor plant leaves is overwatering, which displaces oxygen from soil pores and suffocates roots. But underwatering, nutrient deficiencies, light problems, root rot, and natural leaf aging all produce yellow leaves too — and each requires a different response. Get the diagnosis wrong and you treat the wrong problem, sometimes making it worse.
Overwatering: The #1 Cause of Yellow Leaves
Overwatering fills the air pockets in soil with water, and roots need that air to function. When soil stays waterlogged for 5 or more days after watering, roots cannot access oxygen. Without oxygen, root cells cannot respire — and without respiration, they cannot absorb water or nutrients. The plant shows the same symptoms as drought: wilting, yellowing, and decline. The soil feels wet. The roots are drowning, not dry.
How to identify overwatering yellowing: the lower and inner leaves yellow first. The pattern often starts at leaf margins or between veins. The soil stays wet for 5+ days after watering. The pot feels heavier than it should. Leaves may feel slightly limp even though the soil is wet — confused for “needing more water,” which kills the plant faster.
The fix: stop watering immediately. Check that the pot has drainage holes at the bottom. If the pot sits in a saucer, empty it after each watering — roots sitting in standing water are effectively overwatered every day. Allow the soil to dry to 1–2 inches deep before re-watering (stick your finger in; if it feels moist, don’t water). Move to brighter light if possible — photosynthesis speeds water uptake and helps the plant recover faster.
If the soil is compacted or the pot is too large for the root system, repot into a vessel with only 1–2 inches of clearance around the existing root ball. Use a well-draining potting mix (perlite or pumice blended 20% into standard potting soil dramatically improves drainage).
Underwatering: The Second Most Common Cause
Underwatering damages plants differently. When soil dries out completely, root tips that contact dry soil particles can experience desiccation injury — the root cells collapse and die. Unlike overwatering damage, underwatering damage is often irreversible. When you finally water, the plant cannot fully recover because damaged roots no longer function.
How to identify underwatering yellowing: yellow leaves appear with crisp, dry, brown or black edges. The yellowing is usually more uniform across the leaf rather than starting at the base. The soil pulls away from the pot edges. The plant looks wilted — but when you water, it doesn’t fully bounce back within 24 hours. The pot feels abnormally light.
The fix: water deeply when the top 1–2 inches of soil feel dry. The goal is to saturate the root zone, not just wet the surface. Place the pot in a tray of water and let it soak from the bottom up for 30 minutes (this is more effective than top-watering for severely dry soil). For severely hydrophobic soil (water runs straight through without absorbing), soak the pot in water for several hours until the soil rehydrates.
Prevention: water when needed, not on a fixed schedule. Check soil moisture every 2–3 days during growing season, weekly during winter. Terra cotta pots dry out faster than plastic. South-facing windows accelerate drying. Adjust your frequency to the plant’s actual needs, not the calendar.
Nutrient Deficiencies: The Big Three That Cause Yellowing
Plants need 16 essential nutrients. Three of them — nitrogen, iron, and magnesium — produce yellowing symptoms most commonly in indoor plants. Each has a distinct visual signature that lets you diagnose which one you’re dealing with.
Nitrogen deficiency: Yellowing starts on the older, lower leaves first and moves upward. The entire leaf turns yellow, not just the veins or edges. The plant slows its growth noticeably. Stems become thinner than normal. If your plant hasn’t been fertilized in 2+ months and the lower leaves are pale yellow while upper leaves look normal, it’s almost certainly nitrogen deficiency.
Iron deficiency: Yellowing appears between leaf veins (interveinal chlorosis), leaving a dark green vein network against a yellow leaf background. Unlike nitrogen deficiency, iron deficiency affects the newest leaves first — the growing tips at the top of the plant show yellowing while older leaves remain green. In severe cases, leaf edges turn brown and the entire leaf dies.
Magnesium deficiency: Also interveinal, but the pattern differs: yellowing starts at the leaf edges and moves inward, with the oldest leaves showing symptoms first (like nitrogen, unlike iron). The veins stay green, creating a green arrowhead pattern pointing toward the leaf base. In advanced stages, the yellowed areas turn necrotic (brown and crispy).
The fix for nitrogen: apply a balanced liquid fertilizer (look for roughly equal N-P-K numbers, like 10-10-10 or 20-20-20) at half-strength every 2–3 weeks during growing season. Or use a nitrogen-specific fertilizer like blood meal or fish emulsion.
The fix for iron: if the plant is in alkaline soil (pH above 7.0), iron becomes unavailable even if iron is present. The fix is to lower pH with a soil acidifier (white vinegar diluted to pH 5.5–6.5, applied monthly) or use chelated iron (EDDHA chelation is more effective than EDTA in alkaline conditions). Apply iron chelate at 1 teaspoon per gallon of water every 2–4 weeks until new growth emerges green.
The fix for magnesium: dissolve 1 teaspoon of Epsom salts (magnesium sulfate) per gallon of water and apply as a soil drench every 4–6 weeks. Epsom salts work fast — you’ll see improvement in new growth within 2–3 weeks. Do not overapply; magnesium toxicity causes leaf curl and root burn.
For more on recognizing nutrient problems before they become severe, see our guide on signs of over-fertilization — which includes the opposite problem (nutrient excess) and how to distinguish it from deficiency.
Light: Too Much or Too Little
Indoor plants evolved under specific light conditions, and too much or too little produces visible stress that includes yellow leaves.
Too much direct light: Plants that receive more direct sun than they evolved for develop yellow and brown scorched patches on the most exposed leaf surfaces. The damage is asymmetric — it affects the side facing the window, not the shaded side. Leaves may become bleached and papery before turning brown. Usually only the topmost leaves are affected. This is distinct from sunburn on humans — plants can’t move to shade, so the damage accumulates.
The fix: move the plant 2–3 feet back from south or west-facing windows, or filter the light with a sheer curtain. Even sun-loving plants like succulents prefer indirect light through a sheer curtain over direct afternoon sun in most climates. Plants that naturally grow under forest canopy (pothos, peace lily, calathea) need 50–200 foot-candles; direct sun gives them 1,000+ and burns them.
Too little light: Plants in chronically low-light conditions yellow from the bottom up. The yellowing is accompanied by leggy growth (long, thin stems reaching toward any light source), overall pale coloring, and slowed or stopped growth. A plant that was compact when you bought it but has become stretchy and yellow within a few months is light-starved. The bottom 1–3 leaves yellow and may drop.
The fix: move to the brightest window you have. South-facing windows deliver 800–1,000+ foot-candles at midday; east-facing windows provide 200–400 foot-candles. If no window provides enough light, supplement with a grow light — LED full-spectrum fixtures deliver 200–400 foot-candles at 12 inches distance for most small plants.
For plants suited to low-light conditions, see our selection of low light plants that thrive in dimmer conditions without yellowing. If your current plant is not on that list, it likely needs more light than it’s currently getting.
Root Rot: When Overwatering Becomes Critical
Root rot is what happens when overwatering continues long enough for fungal or bacterial pathogens to colonize damaged roots. It’s the advanced stage of overwatering damage — and it’s the point at which saving the plant becomes significantly harder.
When roots sit in waterlogged soil for extended periods, root tissue dies. Dead roots release compounds that feed anaerobic bacteria and fungi, which then colonize the remaining healthy roots. The plant loses its ability to absorb water and nutrients — and shows it through yellowing that doesn’t respond to watering changes, persistent wilting despite moist soil, and often a musty or sour smell from the soil.
How to identify root rot: gently remove the plant from its pot and examine the roots. Healthy roots are white, cream, or tan — firm and slightly elastic. Rotting roots are brown to black, mushy, and collapse when you touch them. They may feel slimy. The smell is distinct — earthy-sour, not the clean mineral scent of healthy soil. If you see this, stop watering immediately and treat the plant.
The fix: trim all brown/black mushy roots back to healthy white tissue. Rinse the root ball with clean water. Repot in fresh, sterile potting mix (do not reuse the old soil — it’s contaminated). Use a pot with adequate drainage and only slightly larger than the remaining healthy root system. Water very lightly for the first 2–3 weeks, then gradually return to a normal watering schedule. Consider applying a fungicide containing thiophanate-methyl or neem oil as a preventive drench to protect the remaining roots from further infection.
Root rot spreads fast. A plant showing root rot symptoms today can be dead within 2–3 weeks if untreated. For more comprehensive steps on saving severely affected plants, see our article on how to save a dying plant.
Natural Leaf Aging: When Yellow Is Normal
Not every yellow leaf indicates a problem. Lower, older leaves naturally yellow and drop as the plant redirects resources to newer growth. This is called senescence — a programmed lifecycle response where the plant breaks down the nitrogen and other nutrients in old leaves and relocates them to meristematic tissue at the growing tips.
How to identify normal aging yellowing: the lowest leaves on the plant (closest to the soil surface) turn yellow first. Only one to three leaves yellow at a time. The plant continues producing new growth from the top or ends of stems. The remaining leaves look healthy — green, firm, and turgid. There are no other symptoms: no brown edges, no spots, no wilting.
When to worry: if more than 2–3 leaves yellow per week, or if yellowing is spreading to leaves that aren’t the oldest, something is wrong. If your plant is suddenly losing many leaves at once, it’s a stress response — usually caused by a dramatic environmental change (moved to a new location, temperature shock, or a significant watering problem).
What to do: nothing. Simply remove yellowing leaves by hand or with clean scissors. Do not pull leaves — this can tear stem tissue. Cut at the base of the leaf stem, leaving a small stub that dries and falls off naturally. Removing yellow leaves does not help the plant recover — it simply improves appearance. The plant will manage the nutrient recycling itself.
How to Diagnose Yellow Leaves: Step-by-Step
When you see yellow leaves, work through this checklist in order. Most causes will reveal themselves in the first three steps.
Step 1: Check soil moisture. Insert your finger 1–2 inches into the soil near the center of the pot (not at the edge, where soil dries fastest). If it feels wet or cool: overwatering or root rot. If it feels dry and warm: underwatering or heat stress. If it feels damp but the plant is still wilting: check for root rot by examining roots.
Step 2: Check drainage. Lift the pot — if it feels abnormally heavy, water is pooling at the bottom. Check the drainage holes. If they’re blocked or the pot has no holes, that’s the primary cause. Empty any standing water in saucers immediately.
Step 3: Inspect the roots. If soil stays wet despite correct watering, gently remove the plant and examine the root system. White, firm roots = healthy. Brown, mushy, smelly roots = root rot. If the root ball is wrapped tight (roots circling the pot), the plant is root-bound and needs a larger pot.
Step 4: Assess light conditions. Measure light at the plant’s location with a light meter or smartphone app (many free options exist). Compare to the plant’s needs. Is it near a window? Is the window filtered or direct sun? Has the season changed and the sun angle shifted? A plant that thrived in January by a south window may burn by March when the sun is higher and stronger.
Step 5: Review your fertilizer schedule. When did you last fertilize? If it’s been more than 6–8 weeks during the growing season (spring and summer), the plant may be nutrient-depleted. If you’ve fertilized heavily in the past month and the plant shows yellowing with brown tips, you may have over-fertilized — which causes root burn that prevents nutrient uptake just like underwatering.
Fixes for Each Cause at a Glance
For quick reference, here are the specific fixes for each yellowing cause.
- Overwatering: Stop watering. Ensure drainage holes are open. Let soil dry to 1–2 inches deep before re-watering. Repot into well-draining mix if needed. Move to brighter location.
- Underwatering: Soak the pot in a water tray for 30 minutes. Then water deeply when top 1–2 inches of soil are dry. Improve watering frequency habits.
- Nitrogen deficiency: Apply balanced liquid fertilizer at half-strength every 2–3 weeks. Use 10-10-10 or 20-20-20 at label rates.
- Iron deficiency: Lower soil pH with diluted white vinegar or apply chelated iron (EDDHA type) at 1 teaspoon per gallon every 2–4 weeks.
- Magnesium deficiency: Apply Epsom salts at 1 teaspoon per gallon as a soil drench every 4–6 weeks.
- Too much light: Move plant 2–3 feet from window or add sheer curtain filter. Symptoms improve within 1–2 weeks on new growth.
- Too little light: Move to brightest window or supplement with LED grow light. Leggy growth is permanent — prune it back to encourage compact regrowth.
- Root rot: Remove plant, trim all damaged roots, rinse root ball, repot in fresh sterile soil in a clean pot with working drainage. Apply fungicide drench. Water lightly for 2–3 weeks.
- Natural aging: No action needed. Remove yellow leaves by cutting at the base if you prefer. Plant is healthy.
Preventing Yellow Leaves Going Forward
Most yellow leaf problems are preventable with consistent care practices. Here’s what works.
Water correctly: The single most effective habit is watering only when the soil is dry to 1–2 inches depth. Use the finger test — no moisture meter needed. Water thoroughly until it flows from the drainage holes, then stop. Never let the pot sit in standing water.
Ensure proper drainage: Every pot needs at least one drainage hole at the bottom. 1/4 to 1/2 inch diameter. More holes are better than one. For decorative pots without drainage, either drill holes or use the pot as a cover over a nursery pot with holes — you can remove it to water and let excess drain.
Match light to the plant: Know your plant’s light requirements before buying. If you have low light, choose low-light plants. If you have bright indirect light, choose plants that evolved in forest understories. For specific guidance on watering techniques for common houseplants, see our guide to watering house plants properly.
Adjust for seasonal changes: Plants use more water and fertilizer in spring and summer (longer days, active growth) than in fall and winter (dormancy or slow growth). Reduce watering frequency by 30–50% when daylight hours decrease. Stop fertilizing entirely during winter months unless your plant is actively growing.
Fertilize on a schedule during growing season: Apply balanced liquid fertilizer at half-strength every 3–4 weeks from March through September. This prevents the nutrient depletion that causes yellowing in active growers. If your plant is in low light and not actively growing, skip the fertilizer — excess nutrients build up in soil and cause root burn.
Monitor regularly: Check plants every 3–5 days during growing season. Look at leaf color, check soil moisture, examine for new growth or pest activity. Catching problems early — before leaves turn yellow — is always easier than treating them after the fact. A weekly 5-minute inspection per plant prevents 90% of the problems that lead to yellow leaves.
If your plant is already showing yellowing and you’re unsure of the exact cause, start with the simplest fixes first: check watering, ensure drainage, and wait. Most plants recover within 2–4 weeks once the underlying stress is removed. Patience is part of the fix.
For mass cane plants specifically showing yellowing, see our dedicated article on mass cane yellow leaves, which covers the unique patterns this species exhibits.
Turn any PDF statement into a clean sheet
Skip the typos and the hours of copying. Our converter handles any bank statement format and outputs Excel, CSV, or QBO for QuickBooks. No file retention, free to try.
Convert your statement