
Hydroponic nutrients are concentrated liquid fertilizers specifically formulated for soilless growing systems, where plants draw all their nutrition directly from water. The standard starting point is 5–10 mL of hydroponic nutrients per liter of water, depending on your crop stage and starting water quality.
Most beginners get this wrong — not because the math is hard, but because the nutrient bottle’s instructions assume you’re growing in soil, where things behave differently.
If you have already mixed a batch and your plants are looking off, you are probably not alone. The most common mistakes in hydroponic nutrient mixing are entirely predictable, which means they are also entirely fixable before any real damage is done.
Here is what actually happens when you mix hydroponic nutrients wrong, and exactly how to get it right the first time.
Why Most Hydroponic Beginners Mix Nutrients Wrong
That cap-per-gallon instruction on the side of your nutrient bottle? It was written for soil growers.
Soil acts as a buffer — it holds onto nutrients, releases them slowly, and filters out some of the variability in concentration. Your hydroponic reservoir does none of that.
When you mix hydroponic nutrients in water, what you pour in is exactly what your plant roots are exposed to. There is no buffer, no slowdown, no second chance to get the ratio right after the plant has already absorbed too much.
Nutrient burn happens fast in hydroponics. In soil, a slightly strong mix might cause slow yellowing over two weeks. In a hydroponic system, the same concentration can cause leaf burn in 48 hours because the roots are absorbing nutrients at full speed with no soil barrier.
This is not a failure of your technique — it is a structural difference between how the two growing methods handle concentration in a hydroponic farming system.
Understanding this gap is what separates a successful hydroponic grow from a dead reservoir by week two.
What You Need Before You Start
Mixing hydroponic nutrients accurately requires three tools. Without them, you are guessing.
EC/PPM Meter : Why You Need One
EC stands for electrical conductivity, and it is the most reliable measure of how much dissolved nutrient is actually in your water.
PPM (parts per million) is the same reading expressed differently — some meters show EC, some show PPM, and the conversion factor varies by meter.
Either way, the reading tells you whether your nutrient solution is in the right range for your growth stage.
For most leafy greens and herbs in a hydroponic system, the target EC range is 1.2–2.0 mS/cm during vegetative growth, rising toward 2.0–3.0 mS/cm as plants enter flowering.
Without an EC meter, you have no way to know whether you are in that range or whether you just poured in twice what you needed.
pH Meter : Digital vs. Strips
Digital pH meters give you a numerical reading to two decimal places. pH strips give you a color approximation.
For hydroponic nutrient mixing, the approximation is not good enough — pH affects nutrient availability in a specific, measurable way, and a half-point error can lock out an entire nutrient even when the concentration is correct.
If you are running a hydroponic system, a digital pH meter calibrated once per month is the minimum acceptable tool.
Strips are fine for a one-time soil test. They are not fine for monitoring a living nutrient reservoir.
Water Test : What to Look For
Your starting water matters more than most guides acknowledge.
Tap water typically contains 100–300 PPM of dissolved solids before you add any nutrients. If you are mixing nutrients into already-hard water, you are stacking concentrations on top of a baseline you did not account for.
A basic TDS meter or lab water test tells you your starting point, so you can adjust nutrient dose downward rather than overshooting.
The tools you need before you mix: an EC/PPM meter, a calibrated digital pH meter, and a TDS reading of your starting water. That is the full list. Everything else is optional.
Understanding the NPK Ratio and What’s Actually in the Bottle
The three numbers on a bottle of hydroponic nutrients — N-P-K — represent nitrogen, phosphorus, and potassium, in that order. These are the macronutrients plants consume in the largest quantities.
But reading those numbers correctly, and understanding what they do in a hydroponic context, requires more than a surface-level interpretation.
What N-P-K Actually Does for the Plant
Nitrogen drives leaf and stem growth.
In hydroponics, plants access nitrogen faster than they do in soil, which means excess nitrogen causes rapid, soft growth — long internodes, large thin leaves, and in extreme cases, translucent or transparent foliage.
This is not a healthy look; it is a stress response.
The trade-off is real: more nitrogen accelerates growth but also amplifies every other mistake in your system, including overwatering and low light stress.
Phosphorus supports root development and flowering.
In hydroponics, phosphorus availability is highly pH-dependent — at pH above 7.0, phosphorus binds with calcium and becomes unavailable, even if the solution contains plenty of it. This is why pH management matters more than the NPK numbers on the label.
Potassium regulates water movement through the plant and supports overall cell function.
Hydroponic plants often show potassium deficiency as leaf margin browning or scorching, which is easy to mistake for nutrient burn if you do not know what to look for.
The Micronutrient Gap Most Beginners Miss
NPK is only part of what hydroponic plants need. Iron, manganese, zinc, copper, boron, and molybdenum are all required in smaller quantities — but they are not optional.
Many hydroponic nutrient products include micronutrients. Some do not. Check your bottle before you mix.
If your nutrient product does not include a full micronutrient package, your plants will develop deficiencies in 3–5 weeks regardless of how perfectly you manage NPK and pH.
Why Hydroponic Nutrients Differ from Soil Fertilizers
Soil fertilizers are formulated for a medium that already provides microbial activity, organic matter buffering, and a slow nutrient release profile.
Hydroponic nutrients are formulated for direct water absorption with no buffer. A soil fertilizer mixed at the bottle’s recommended strength in a hydroponic reservoir will typically burn plants within days, because there is nothing holding the nutrients back from the root zone.
The implication is straightforward: hydroponic nutrients require their own mixing standard, not the one printed on the bottle. That standard comes from your EC meter, not from the cap.
Step-by-Step: How to Mix Hydroponic Nutrients Correctly
With tools ready and the science understood, here is the actual hydroponics nutrients mixing sequence.
Step 1: Start with Clean Water
Fill your reservoir with water at room temperature — ideally 65–72°F (18–22°C). Cold water holds more dissolved oxygen and reduces stress on roots during nutrient absorption.
If you are using tap water, run it through a carbon filter if your tap water has chlorine or chloramine, as both can damage beneficial bacteria in active hydroponic systems and stress root tissue in passive ones.
Measure your starting water with your TDS meter and note the baseline reading. Subtract this from your target PPM to determine how much nutrient to add.
Step 2: Add Nutrients in the Right Order
For two-part or three-part nutrient systems — which most liquid hydroponic fertilizers are — add Part A first, mix thoroughly, then add Part B.
Mixing them together in concentrated form before dilution can cause nutrient lockout reactions, where compounds precipitate out of solution and become unavailable to the plant.
After adding both parts, mix the reservoir vigorously for 30 seconds minimum.
For single-part nutrients, add the measured dose slowly while circulating the water. If you are using a reservoir with an active pump running, the mixing is continuous. If you are mixing in a static container, stir by hand for at least one full minute.
Step 3: Check and Adjust pH
After nutrients are fully mixed and dissolved, measure pH with your calibrated digital meter. The target range for most hydroponic crops is 5.5–6.5, with 5.8–6.2 being the sweet spot for maximum nutrient availability across the full spectrum of elements.
If pH is below 5.5, raise it with a pH Up product — add small amounts, measure, wait two minutes, measure again.
If pH is above 6.5, lower it with pH Down. Never add more than the recommended dose per adjustment; overcorrecting causes its own lockout problems.
After adjusting pH, check it again in 15 minutes. Buffering effects from your starting water and nutrient concentration mean the first reading is often not stable.
Step 4: Verify with EC Meter
Once pH is stable, check your EC reading. Compare it against the target range for your crop and growth stage, not against the label’s generic recommendation.
A tomato in week 3 of flowering needs a different EC than lettuce in week 2 of vegetation. Your EC meter is the only tool that tells you whether your plants are actually getting the right concentration.
If EC is too high, add more clean water until you reach the target range. If EC is too low, add a measured dose of nutrients, re-check pH, and re-check EC.
Document your adjustments — this log will tell you what your water and your crops actually need over time, rather than relying on a generic label forever.
Getting pH Right (and Why It Changes Everything)
pH is not a one-time setting. In a hydroponic reservoir, pH drifts constantly — from CO2 absorption by roots, from nutrient uptake, from water evaporation and top-ups, from temperature changes.
Setting pH once and forgetting it is the second most common reason hydroponic beginners lose plants, right after nutrient burn from overshooting the concentration.
The reason pH matters so much is that it controls which nutrients are available for absorption at any given moment. This table shows the availability window:
| pH Range | Nutrient Availability | Status |
|---|---|---|
| Below 5.0 | Calcium, magnesium, potassium become unavailable; aluminum toxicity risk rises | ❌ Too acidic |
| 5.0 – 5.5 | Iron, manganese more available; phosphorus begins to lock out | ⚠️ Low end of acceptable |
| 5.5 – 6.5 | Full spectrum availability — N, P, K, Ca, Mg, Fe, Mn, Zn all absorbable | ✅ Optimal range |
| 6.5 – 7.0 | Phosphorus, iron availability drops; calcium and phosphorus begin binding | ⚠️ High end of acceptable |
| Above 7.0 | Phosphorus and most micronutrients lock out almost entirely | ❌ Too alkaline |
The practical implication
a perfectly mixed nutrient solution with the correct EC and NPK values can still cause severe deficiencies if the pH is above 7.0, because plants physically cannot absorb phosphorus and micronutrients from alkaline water.
This is why pH levels must be checked every time you touch your reservoir — not just when you first mix it.
How to Raise or Lower pH Safely
Use commercial pH Up (potassium hydroxide) or pH Down (phosphoric acid) products designed for hydroponics.
Start with half the dose the product recommends for your reservoir size, measure, wait, then adjust again.
Small corrections are safer than overcorrection, which requires another correction in the opposite direction — a cycle that can swing your reservoir from one extreme to the other before it stabilizes.
Store pH adjustment products away from nutrient products. Cross-contamination between pH Up and your nutrient bottle can degrade both.
The pH Lockout Window (5.5–6.5)
Most hydroponic crops absorb nutrients most efficiently between pH 5.8 and 6.2. Within this narrow window, the full spectrum of macronutrients and micronutrients remains available simultaneously.
Outside this window — particularly above 6.5 — you begin losing access to phosphorus and iron, even if your reservoir contains abundant quantities of both.
If your plants are showing phosphorus deficiency symptoms (purple stems, slow growth, dark or bluish-green older leaves) and your EC is within range, check your pH. It is almost certainly above 6.5.
The First Two Weeks: What to Watch For
The first 14 days after transplanting into a fresh nutrient reservoir are the period where most problems either become visible or can still be corrected before significant damage occurs.
Watch for these signals:
Week 1: Early Stress Signals
Leaf color changes within the first five days are the most reliable early warning system.
Pale or yellowing new growth typically indicates a nitrogen deficiency — in week one, this usually means the EC was set too low and the plants are running out of fuel. Pale older leaves can indicate iron deficiency, which in week one usually traces back to pH being above 6.5.
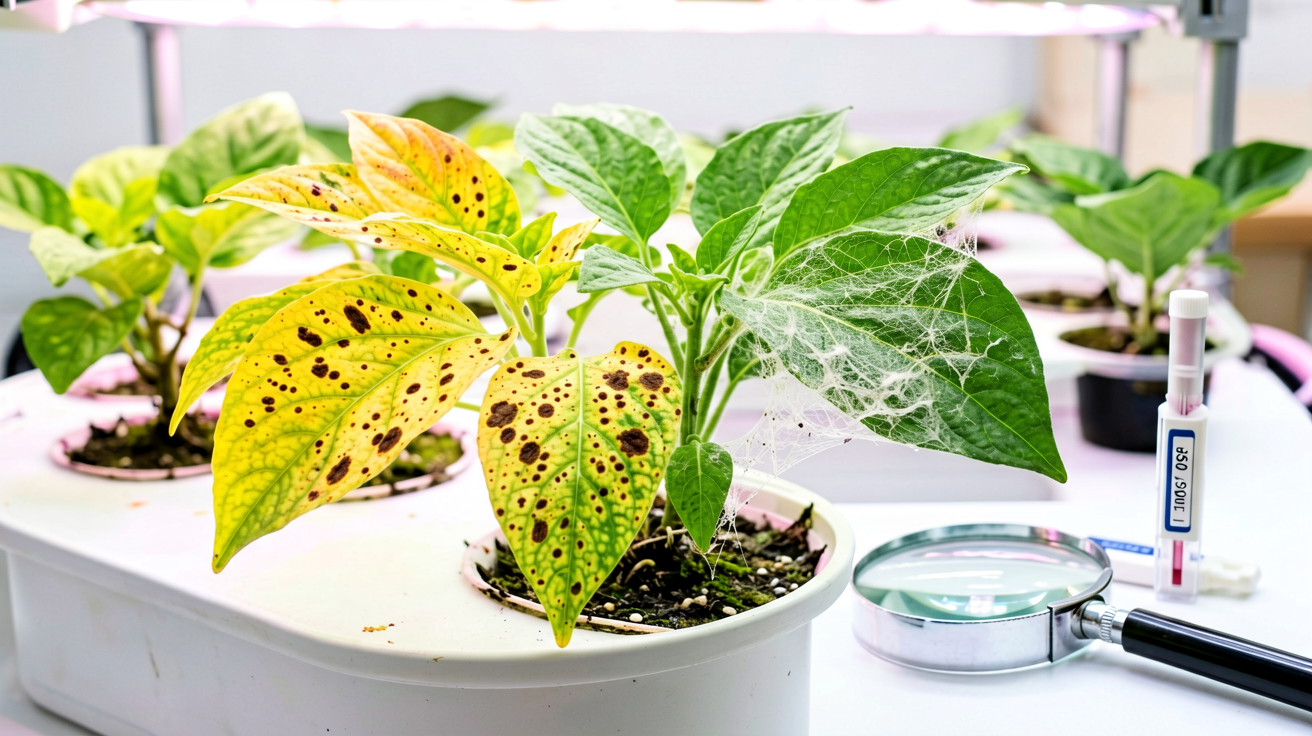
Burning at the leaf margins — brown or crispy edges on the outer perimeter of leaves — is the signature symptom of nutrient burn from excessive concentration. It starts at the oldest leaves first and moves inward.
If you see this in week one, your EC is too high. Dilute the reservoir with clean water and re-check your target concentration.
Slow or stalled growth in week one is not automatically a problem — some crops spend the first several days establishing roots before pushing new leaf growth.
If new growth has not started by day 7–10, check EC, check pH, and verify that water temperature is in the 65–72°F range. Cold water suppresses root function and mimics deficiency symptoms.
Week 2: Healthy Establishment vs. Trouble Signs
By week two, a healthy hydroponic plant in the right conditions should show visible new growth — new leaves expanding, growing tips looking vigorous, color consistent across the canopy.
If plants look the same as the day you transplanted them with no new growth, the nutrient solution is not providing enough available energy. Increase EC in small increments — 0.2–0.3 mS/cm at a time — and re-check after 48 hours.
The clearest sign of a successful first two weeks is root color. In most hydroponic systems, healthy roots look white to off-white and are visibly growing. Brown, slimy, or smelly roots indicate root rot, which in week two usually traces back to water temperature being too high (above 75°F), too little oxygenation, or a reservoir that was not cleaned before filling.
When to Flush and Start Over
If you are seeing consistent burn across multiple plants despite checking EC and dilution, if the reservoir has become seriously out of balance and you cannot correct it with small adjustments, or if roots show signs of rot — flush the entire system.
Drain the reservoir, clean it with a food-safe hydrogen peroxide solution, refill with fresh water, re-establish pH, and mix a fresh nutrient batch at the correct target EC for your crop.
The trade-off: flushing resets everything, including any beneficial microbial colonies in active systems like DWC or NFT.
If you are running a bioactive system, frequent flushing disrupts the beneficial bacteria that help plants absorb nutrients.
In practice, if plants are burning or rotting, you flush anyway — the alternative is losing the entire crop.
Fixing the Five Most Common Mixing Mistakes
These are the specific errors that show up most often in hydroponic nutrient failures, and how to fix each one fast.
Mistake 1: Mixing Too Concentrated
The root cause of nutrient burn is almost always adding more nutrients than the system calls for.
The bottle says cap per gallon. You are in a hydroponic reservoir, not soil. The cap per gallon measurement was calibrated for a completely different growing medium.
If your EC reading is above the target range for your growth stage, dilute with clean water until the EC is in range. This is always the fix. There is no shortcut.
Mistake 2: Ignoring Starting Water Quality
If your tap water runs 250 PPM out of the tap and you add nutrients calculated to reach 1000 PPM total, you have overshot by 250 PPM before the plants even start absorbing anything.
Test your starting water every time you refill the reservoir. This one habit prevents the majority of nutrient burn issues in home hydroponic systems.
Mistake 3: Wrong pH Range for Growth Stage
Seedlings and young transplants prefer a slightly lower EC and a tighter pH window (5.5–6.0) because their root systems are still small and their absorption capacity is limited.
Mature plants in full vegetation can handle a wider range (5.5–6.5) and a higher EC. If you are running one reservoir with plants in multiple growth stages, match your pH and EC to the most sensitive plant in the system.
Mistake 4: Mixing in the Wrong Order
Pouring both A and B nutrients into the reservoir simultaneously at full concentration before adding water can cause precipitation reactions that lock out calcium and phosphorus.
Always dilute nutrients in water before they reach the reservoir, and always add multi-part nutrients separately with mixing between each addition.
Mistake 5: Not Checking Temperature
Cold nutrient solution suppresses root absorption and can cause the same deficiency symptoms as an understrength mix.
Warm nutrient solution above 75°F reduces dissolved oxygen and creates conditions for root rot.
Keep reservoir water between 65–72°F (18–22°C). This is especially critical in summer months or in grow rooms with high ambient temperatures.
If your reservoir temperature runs warm, consider a reservoir chiller, insulating the reservoir with a reflective cover, or switching to a larger reservoir that dissipates heat more slowly.
How to Mix Hydroponic Nutrients
The full hydropinic nutrients mixing picture comes together when you see these five mistakes as connected, not separate.
Your starting water sets the baseline. Your nutrient concentration sets the ceiling. Your pH determines whether anything in that nutrient solution is actually available. Your temperature determines whether your plants can absorb it.
Every variable interacts. Get all five in the right range and your hydroponic nutrient mix will work — not perfectly every time, but reliably enough that the plants tell you they are happy.
The most important thing to remember from this guide: your EC meter and your pH meter are not optional accessories. They are the only tools that tell you what is actually happening in your reservoir.
The bottle label tells you what the manufacturer thinks you should use. Your meters tell you what your plants actually need. Trust the meters.
From Bank Statement to QuickBooks-Ready File
That manual cleanup you just read about? This tool skips it. Turn your PDF into QBO for QuickBooks without storing your data anywhere.
Start Converting