Rubber plants (Ficus elastica) propagate reliably from stem cuttings and air layering, even if you have never propagated a houseplant before. The process is straightforward: take a healthy cutting or wound a stem, encourage roots in water or moss, then pot the new plant. With the right timing and a healthy mother plant, most cuttings root within 3–6 weeks.
Success is highest in spring and early summer when the plant is actively growing. The single biggest mistake is trying to root a leaf by itself — a rubber plant leaf without a node will never produce new growth. You need a section of stem with at least one node, the point where a leaf attaches to the stem. That is where roots will emerge.
This guide covers two proven methods. Stem cuttings work well if you have a plant with multiple stems or if you are pruning anyway. Air layering is better for tall, leggy plants where you want to reduce height and create a new plant at the same time.
What You Need to Propagate a Rubber Plant
Gather everything before you cut. Rubber plant sap is milky and can irritate skin, so consider wearing gloves.
- Sharp, clean pruning shears or a knife (wipe with rubbing alcohol)
- A healthy mother plant with firm stems and no signs of disease
- Small pots with drainage holes and a well-draining potting mix (equal parts perlite and peat or coco coir)
- A clear glass or jar for water propagation
- Sphagnum moss and plastic wrap (for air layering)
- Optional: rooting hormone powder or gel
The best time to propagate is when temperatures are consistently above 60°F (15°C). In most homes, that means late spring through early autumn. Avoid propagating in winter when growth slows and cuttings take twice as long to root.
How to Propagate a Rubber Plant from Stem Cuttings
Stem cuttings are the most accessible method. You can root them in water or directly in soil — both work, but water lets you monitor root development while soil produces stronger roots from the start. For ongoing care after your cutting is established, see our guide to rubber plant care requirements.
Choosing and Taking the Cutting
Look for a stem that is firm, green, and has at least two leaves. Using clean shears, cut a 4–6 inch (10–15 cm) section just below a node at a 45-degree angle. The angled cut increases the surface area for rooting. Remove the lower leaves, leaving one or two at the top. If the remaining leaves are large, you can cut them in half horizontally to reduce water loss.
The cut end will ooze milky sap. Let it callous for 30–60 minutes, or dip it in water until the sap stops flowing. If you are using rooting hormone, dip the cut end into the powder now and tap off the excess. Hormone is optional for rubber plants — they root readily without it — but it can speed up the process by about a week.
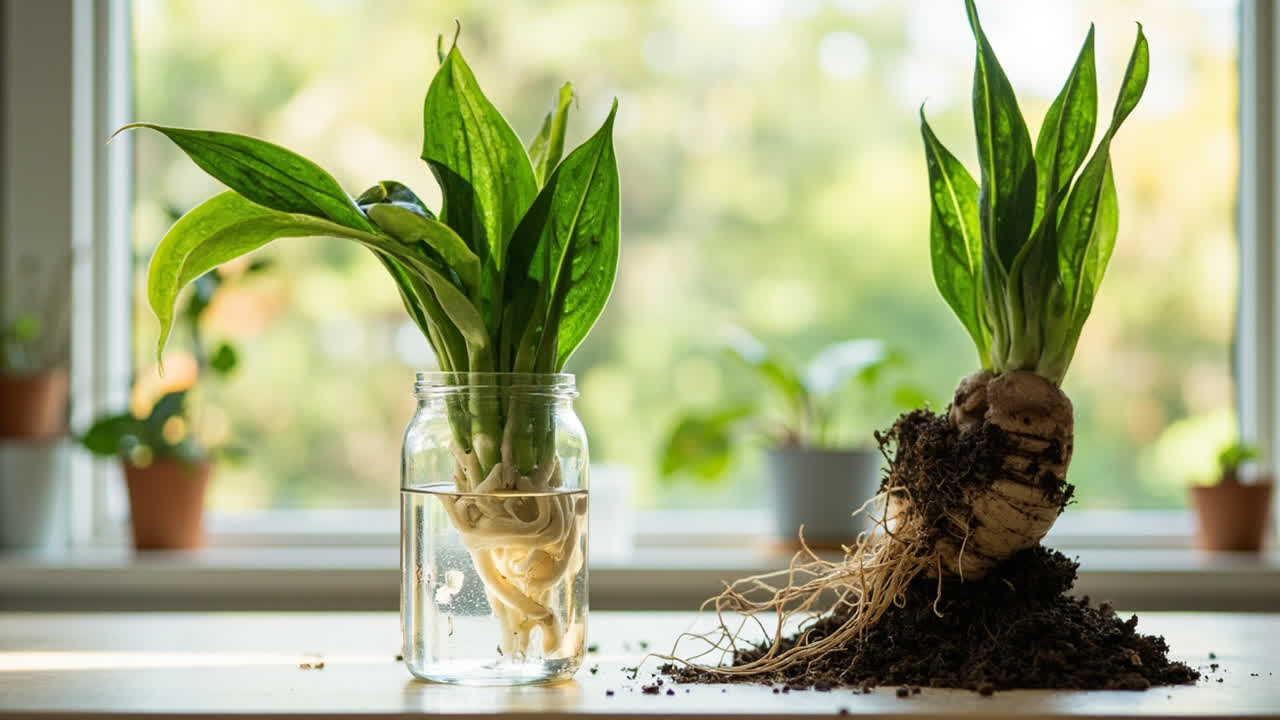
Rooting in Water
Place the cutting in a clear jar of room-temperature water so the node is submerged but the leaves stay above the rim. Set it in bright, indirect light — a north- or east-facing windowsill works well. Change the water every 3–4 days to prevent bacterial growth.
Root initials usually appear at the node within 2–4 weeks at 65–75°F (18–24°C). Wait until the roots are at least 2 inches (5 cm) long before transferring to soil. If you wait too long (beyond 3–4 months), the water-rooted cutting may struggle to adapt to soil.
Rooting Directly in Soil
Plant the cutting in a small pot of moist, well-draining mix so the node is buried about 1 inch (2.5 cm) deep. Firm the soil around the stem. Cover the pot with a clear plastic bag or dome to hold in humidity, but open it for 10 minutes every other day to let air circulate and prevent mold.
Keep the soil lightly moist — not wet — and place the pot in bright, indirect light. Roots typically form in 4–6 weeks. You can check by giving the stem a very gentle tug; if it resists, roots have started. Soil-rooted cuttings skip the water-to-soil transition shock, which makes them slightly more reliable for beginners.
Air Layering a Rubber Plant
Air layering lets you grow roots on a stem while it is still attached to the mother plant. It is the best method for tall, single-stem rubber plants that have lost their lower leaves. The new plant starts with an established root system, so survival rates are higher than with cuttings. If you are deciding between species, note that air layering works on rubber plants but is less reliable on a rubber plant compared to fiddle leaf fig propagation.
Making the Wound
Choose a spot on the stem about 12–18 inches (30–45 cm) below the top leaves, just below a node. Using a clean knife, make an upward diagonal cut about 1.5 inches (4 cm) long into the stem, cutting about one-third of the way through. Alternatively, remove a 1-inch (2.5 cm) ring of bark around the stem (girdling). The wound interrupts the flow of sap and triggers root growth at that point.
Dust the wound with rooting hormone if you have it. Insert a small piece of toothpick or twig into the cut to keep it open so it does not heal over before roots form.
Wrapping with Moss
Soak a handful of sphagnum moss in water for 10 minutes, then squeeze it out so it is damp but not dripping. Pack it around the wounded section of stem, covering it completely. Wrap the moss tightly with clear plastic wrap or aluminum foil, securing both ends with tape or twist ties to hold in moisture.
Check the moss every week and add water with a syringe if it is drying out. Keep the plant in its normal bright, indirect light. Roots should become visible through the plastic within 4–8 weeks, depending on temperature and season.
Removing and Potting
When you can see a network of roots at least 2 inches (5 cm) long through the plastic, cut the stem just below the moss ball with clean shears. Pot the new plant in a container with well-draining mix, keeping the moss around the roots — do not remove it. Water thoroughly and place in bright, indirect light. The mother plant will usually produce new growth from the cut point within a few weeks.
When to Transfer from Water to Soil
The right moment matters. Transfer water-rooted cuttings when roots are 2–3 inches (5–7 cm) long and have started branching. Roots that are too short (under 1 inch) lack the mass to survive the transition. Roots that have been in water for more than 3–4 months become adapted to water and may rot when moved to soil.
To transfer, fill a small pot with moist, well-draining mix and make a hole with your finger. Lower the roots in gently and firm the soil around the stem. Water lightly and keep the pot in bright, indirect light for the first two weeks. Keep the soil slightly more moist than usual during this transition period — the water-rooted cutting needs time to grow the finer soil-adapted roots. After two weeks, return to a normal watering routine.
Common Rubber Plant Propagation Mistakes
Most propagation failures come down to a few avoidable errors:
- Using a leaf without a node. A rubber plant leaf in water will survive for months and may even grow short roots, but it will never produce a new stem. Always include a section of stem with at least one visible node.
- Overwatering soil cuttings. Keeping the soil waterlogged starves the cutting of oxygen and causes rot at the cut end. The mix should feel like a wrung-out sponge — moist but not wet.
- Moving to soil too early. Transplanting before roots are 2 inches long risks breaking the fragile root initials. Patience here pays off.
- Propagating in low light or cold. Below 60°F (15°C), rooting slows dramatically or stops. If your room is cool, use a heat mat set to 70–75°F (21–24°C) under the pot.
- Dirty tools. Unsterilized shears can introduce bacteria into the cut. Wipe blades with rubbing alcohol between every cut, especially if you are taking multiple cuttings from one plant.
Propagating a rubber plant is one of the more forgiving houseplant projects. With a clean cut, a visible node, and a warm spot with indirect light, most cuttings root reliably. Start with one stem cutting in water — it is the simplest way to see progress — and move to air layering once you are comfortable with the process.