Brown leaves on an African violet are a symptom, not a disease. The pattern, location, and speed of onset tell you whether the cause is environmental, cultural, or the early stage of something more serious. Most brown-leaf problems are fixable if you read the signal correctly and act before the damage reaches the crown.
African violets are especially prone to leaf browning because of their fuzzy foliage, their sensitivity to water temperature, and their low tolerance for salt buildup. A pothos with brown tips is an aesthetic issue. An African violet with brown leaves can be a warning that the crown is at risk.
This guide walks through the five most common brown-leaf patterns, what each one means, and what to do about it. The triage checklist at the end gives you the exact order to work through when you first see brown on your plant.
How to Read Brown Leaf Patterns on African Violets
Start with three questions. Where on the leaf is the brown: edges, tips, spots, or the entire leaf? How fast did it appear: overnight, over a few days, or gradually over weeks? What is the texture: dry and crispy, soft and mushy, or flat and papery?
These three answers narrow the cause to one or two possibilities before you change anything about your care routine. The african violet care guide covers the full baseline. This article focuses on what goes wrong and how to read it.
Brown Leaf Edges: Low Humidity, Salt Buildup, or Cold Water
Brown leaf edges are the most common complaint. The tissue at the margin dries out and turns crispy, usually starting on the oldest outer leaves and working inward. In most homes, the primary cause is low humidity. African violets prefer 40 to 60% relative humidity. Below 30%, which is common in heated winter rooms, the leaf margins desiccate.
Salt buildup from fertilizer is the second most common cause. If the brown edges appear a few weeks after you start feeding, or if you have been fertilizing without flushing the soil, salts accumulate at the leaf margins and burn the tissue. Flush the soil with plain room-temperature water and reduce fertilizer concentration to one-quarter strength.
Cold water on the leaves causes a specific pattern: irregular brown or white spots, often ring-shaped, that appear within hours of watering. This is called ring spot or leaf spotting. It is cosmetic but permanent on affected leaves. Switch to room-temperature water and the problem stops appearing on new growth.
For the full watering and flushing routine, see the african violet watering guide.
Brown Spots on Leaf Surfaces: Sun Scorch, Cold Water, or Fungal Leaf Spot
Discrete brown spots on the leaf surface have three main causes. Sun scorch produces irregular brown patches, usually on the upper surface of leaves closest to the window. The patches are dry and flat. Move the plant farther from the window or add a sheer curtain. See the african violet light requirements guide for the right distance.
Cold-water ring spot produces round or ring-shaped white-to-brown marks, often with a darker border. These appear within hours of watering with cold tap water. The spots do not spread to new growth once you switch to room-temperature water.
Fungal leaf spot produces small brown or gray spots, sometimes with a yellow halo, that slowly enlarge and may merge. This is more common in humid, poorly ventilated conditions. Remove affected leaves, improve air circulation, and avoid misting. A light application of neem oil spray can help prevent spread, but it will not reverse existing damage.
Brown or Mushy Lower Leaves: Natural Aging vs. Crown Rot
One or two lower leaves yellowing and then turning brown is normal aging. African violets continuously produce new leaves from the crown, and the oldest outer leaves eventually senesce. Remove them by snapping them off at the base when they are fully yellow or brown.
If multiple lower leaves turn brown and mushy at the same time, especially if the brown starts at the base of the leaf where it meets the crown, this is an early sign of crown rot. Feel the center of the rosette. If it is firm, you may be able to stop the progression by reducing watering, improving drainage, and removing all affected tissue. If the crown is soft and mushy, the plant is unlikely to survive, but you can still save healthy leaves as cuttings.
The key distinction: natural aging affects one or two outer leaves at a time, slowly. Crown rot affects multiple leaves rapidly, and the tissue is soft rather than dry.
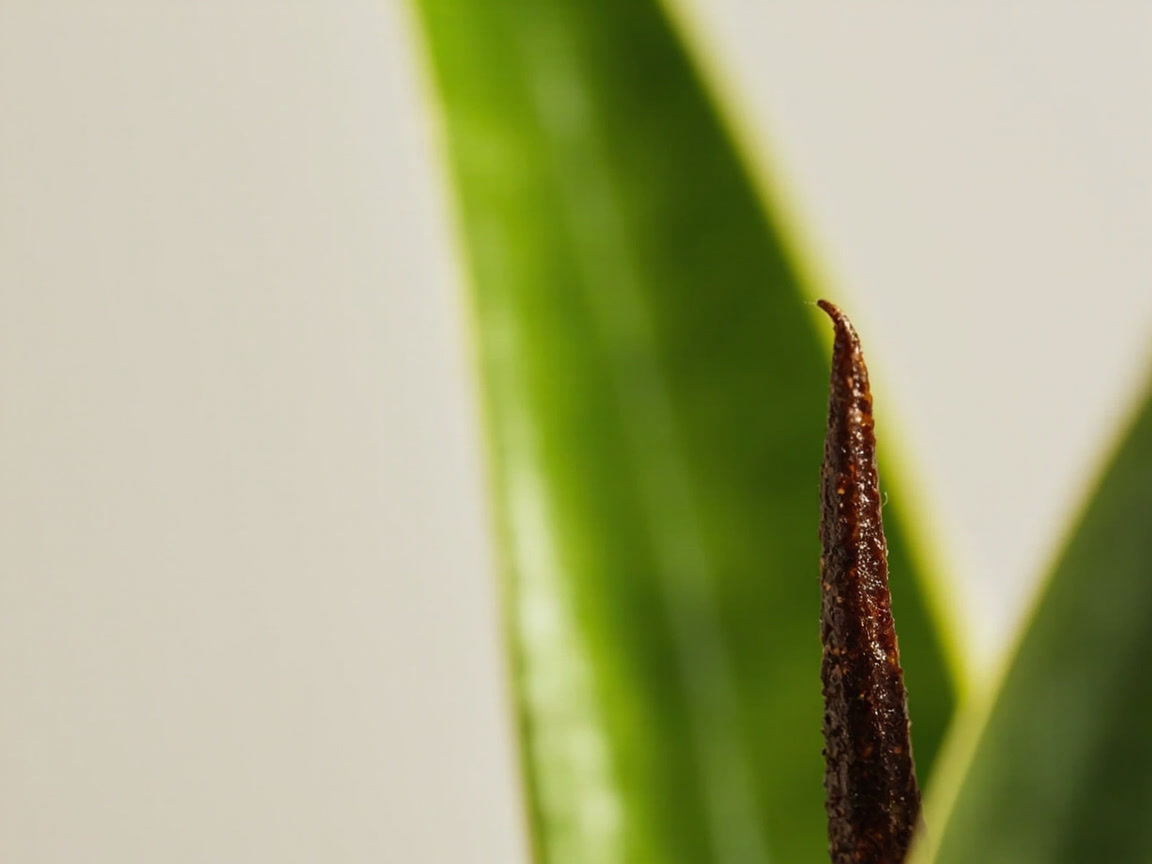
Brown Leaf Tips and Crispy Patches: Underwatering or Root Damage
Brown, crispy leaf tips that appear on multiple leaves at once usually mean the roots are not delivering enough water. This can be caused by underwatering, but it is more often caused by root rot, which destroys the root system while the soil stays wet. If the plant wilts despite moist soil, or if the pot smells sour when you lift it, check the roots immediately.
Healthy African violet roots are white or light tan with fine root hairs. Rotten roots are dark brown or black, slimy, and break apart easily. If more than half the root mass is rotten, the plant is unlikely to recover. If some healthy roots remain, trim away the rot, repot in fresh mix, and reduce watering frequency.
Fertilizer burn can also cause crispy brown patches, usually on the upper surfaces of middle-aged leaves. This happens when full-strength fertilizer is applied to dry soil. Always water before feeding, and always dilute to one-quarter strength.
What to Do First When You See Brown Leaves
- Identify the pattern: edges, spots, tips, mushy base, or whole-leaf browning.
- Check the soil moisture. Stick your finger into the top inch. If it is soggy, stop watering and let it dry. If it is bone dry, water thoroughly and drain.
- Check the light. If the plant is against a south or west window with no curtain, move it back or add a sheer curtain.
- Check the humidity. If the room is below 40% relative humidity, set up a pebble tray or group the violet with other plants.
- Flush the soil with plain room-temperature water to clear any salt buildup.
- Remove fully brown or mushy leaves. Leave partially green leaves in place.
Work through the list in order. Most brown-leaf problems are resolved by steps two through four. If the problem persists after correcting water, light, and humidity for three weeks, check the roots for rot.
When to Remove Brown Leaves and When to Leave Them
Remove leaves that are more than two-thirds brown, fully mushy, or clearly diseased. Use a clean, sharp blade or snap the leaf off at its base with a clean motion. Do not tear partially attached leaves, which can damage the crown.
Leave leaves that are less than half brown. They are still photosynthesizing and feeding the plant. Removing too many leaves at once stresses the plant and slows recovery.
After removing affected leaves, dust the cut ends with ground cinnamon as a natural fungicide. This is not a cure for crown rot, but it helps prevent secondary infection on fresh cuts.