Pothos root rot develops faster than most houseplant diseases. It is the leading cause of Pothos decline in cultivation, and by the time the first yellow leaf appears, the root system is already 40 to 50 percent compromised.
The single cause is soil that stays wet longer than the roots can absorb it. Watering on a fixed schedule — every week, every Sunday, the way you always have — is what tips a Pothos from thriving to yellowing within three to four weeks.
This guide walks through what Pothos root rot looks like inside the pot, the four variables that make it spread, a five-step decision tree for diagnosing it, the recovery procedure, and the hard limit on when a Pothos cannot be saved. The variables covered below — pathogen type, moisture-temperature relationship, root damage entry points, and soil-versus-water transmission — together determine whether your plant survives the next four weeks.
The recovery is straightforward when you catch it early. It is not always possible when you do not.
Why Pothos Root Rot Is More Common Than It Should Be
Pothos is often described as a plant you can neglect. That is partially true — it survives long periods without water.
What it does not survive well is wet roots. The tropical forest floor where Epipremnum aureum evolved has alternating heavy rain and dry periods. The roots are adapted to cycles — wet, then completely dry.
What the roots do not expect is sitting in damp soil for days. When soil stays saturated, oxygen in the root zone is depleted. Roots begin to suffocate within 48 to 72 hours of saturation, and opportunistic fungi colonise the dead tissue.
The two fungal genera responsible for most Pothos root rot are Pythium and Phytophthora, with Fusarium species contributing in warmer conditions. These pathogens are present in virtually all potting soil at low levels because they survive as spores in organic matter.
They become a problem only when soil moisture stays above 70 percent and root oxygen drops below the threshold the plant can tolerate. Once that threshold is crossed, the infection rate doubles every 24 to 48 hours until drainage is restored.
University of Florida IFAS Extension research confirms that this moisture-temperature relationship is the single dominant variable predicting root rot outbreaks in container-grown tropicals.
Root Rot Variables: What Makes It Spread
Four variables determine whether Pothos root rot stays contained or takes the whole plant. Most readers fix one and miss the other three. Breaking the disease down by the variables that drive it is what separates a 50 percent recovery from an 80 percent recovery.
Pathogen. Pythium species attack fine feeder roots first — the white root hairs that absorb water and nutrients. Phytophthora moves faster through larger root tissue and into the stem base, often reaching the crown within 7 to 10 days of infection.
Fusarium colonises already-stressed roots and is the most common pathogen in warm indoor conditions above 24°C (75°F). All three produce spores that survive in soil for months, which means infected soil cannot be reused.
Moisture and heat. Pythium and Phytophthora spores germinate most aggressively when soil moisture is above 70 percent and temperatures sit between 18°C (64°F) and 27°C (81°F). This is the room-temperature band of most homes, year-round.
Below 13°C (55°F), the pathogens slow dramatically — but the roots also slow. Cold plus wet is its own failure mode with different symptoms.
Root wounds. Pathogens enter through wounds and stress points. Repotting damage, broken roots during division, fertilizer burn on fine root tips, and overwatering-induced tissue death are all open doors for infection.
A healthy root system in well-drained soil resists colonisation. A compromised root system invites it.
Soil transmission. Pythium and Phytophthora spread through soil water movement. When you water an infected plant, excess drainage carries spores to neighbouring pots that share a saucer.
The Royal Horticultural Society (RHS) advises isolating suspected root rot plants and never letting drainage water from one pot reach another. These pathogens do not transmit through the air — only through shared moisture.
How to Recognise Root Rot in Pothos
The signs of Pothos root rot follow a recognisable pattern. Each sign corresponds to a different stage of root compromise.
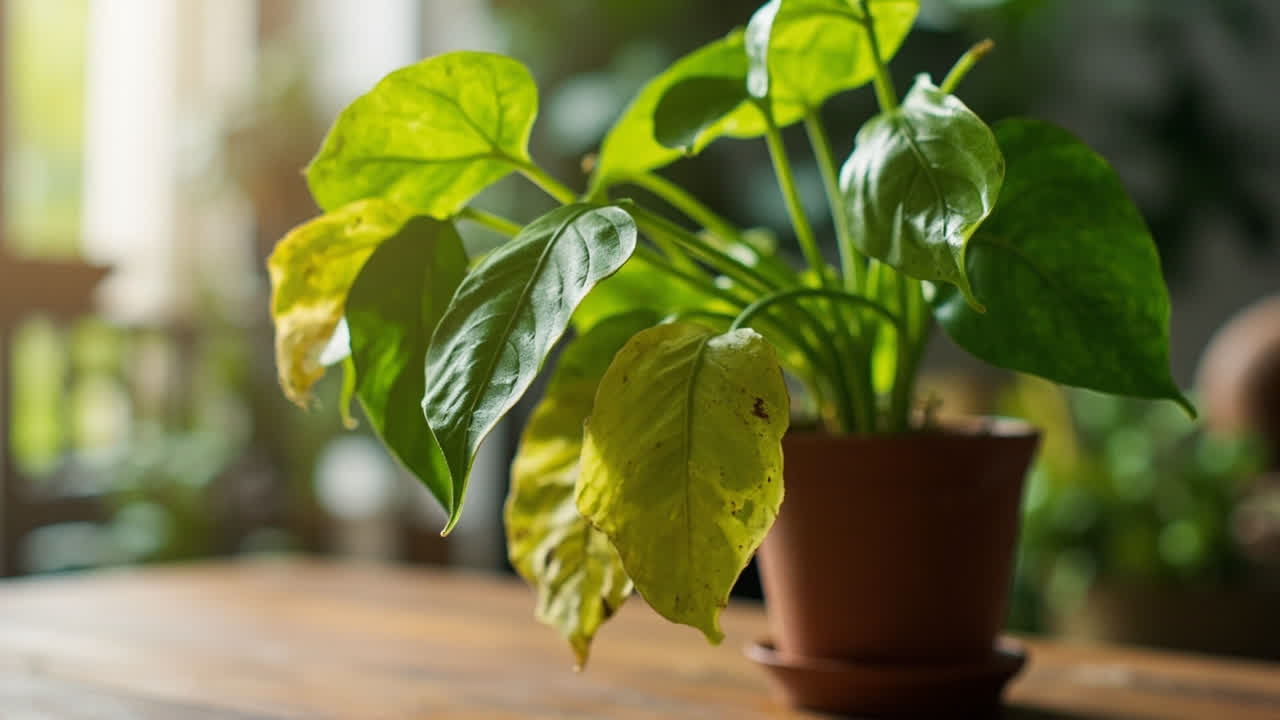
Yellow base. The oldest leaves at the base of each vine begin yellowing before any other leaves. This is the plant moving nutrients away from older tissue as the root system’s capacity to absorb them drops.
The yellowing is typically uniform across the leaf blade — not interveinal, not tip burn. Just a soft, diffuse yellow spreading across an older leaf.
Wet soil. If your soil is still damp 7 to 10 days after watering, the soil is staying wet too long.
Possible causes: the pot is too large for the root ball, the soil mix is too moisture-retentive, the pot has inadequate drainage, or the plant is in too little light to draw water efficiently.
Mushy stems. Press gently on the stem just above the soil line. A healthy Pothos stem is firm and slightly waxy.
A stem with root rot is soft, gives way under pressure, and may be dark brown or black at the base.
If the stem is soft at the base, rot has moved into the plant’s structural tissue. This is the critical stage.
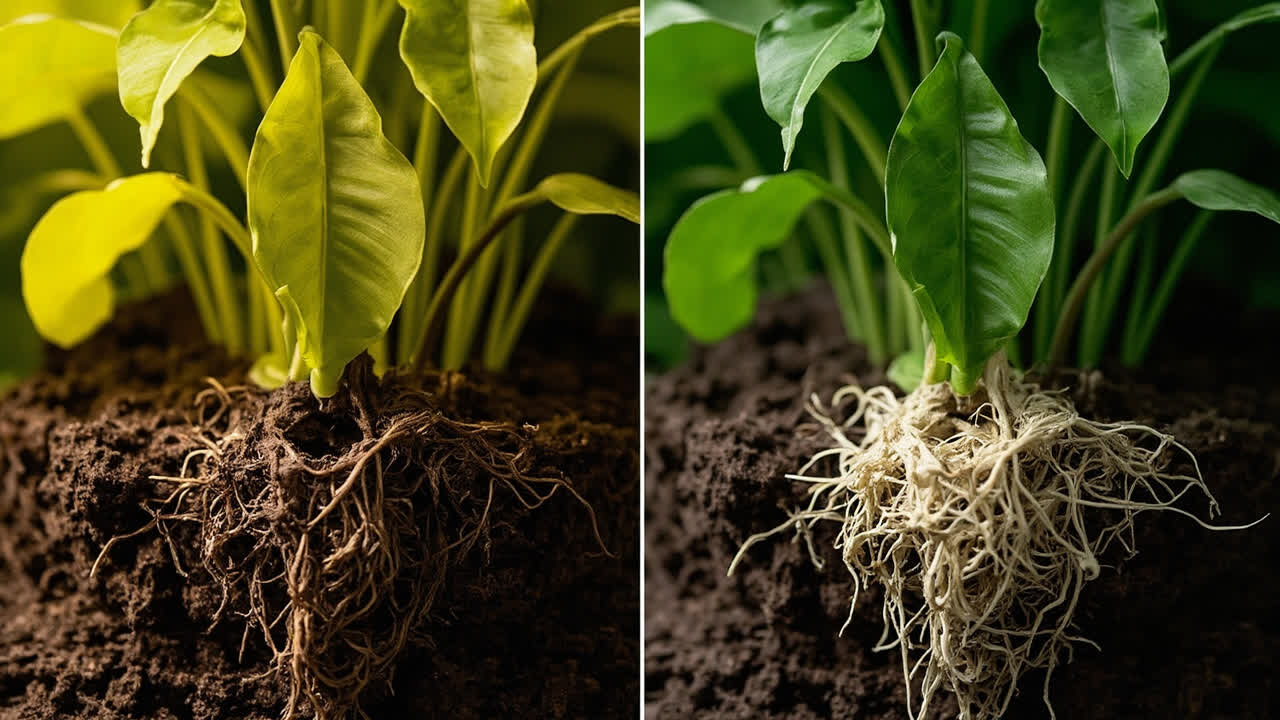
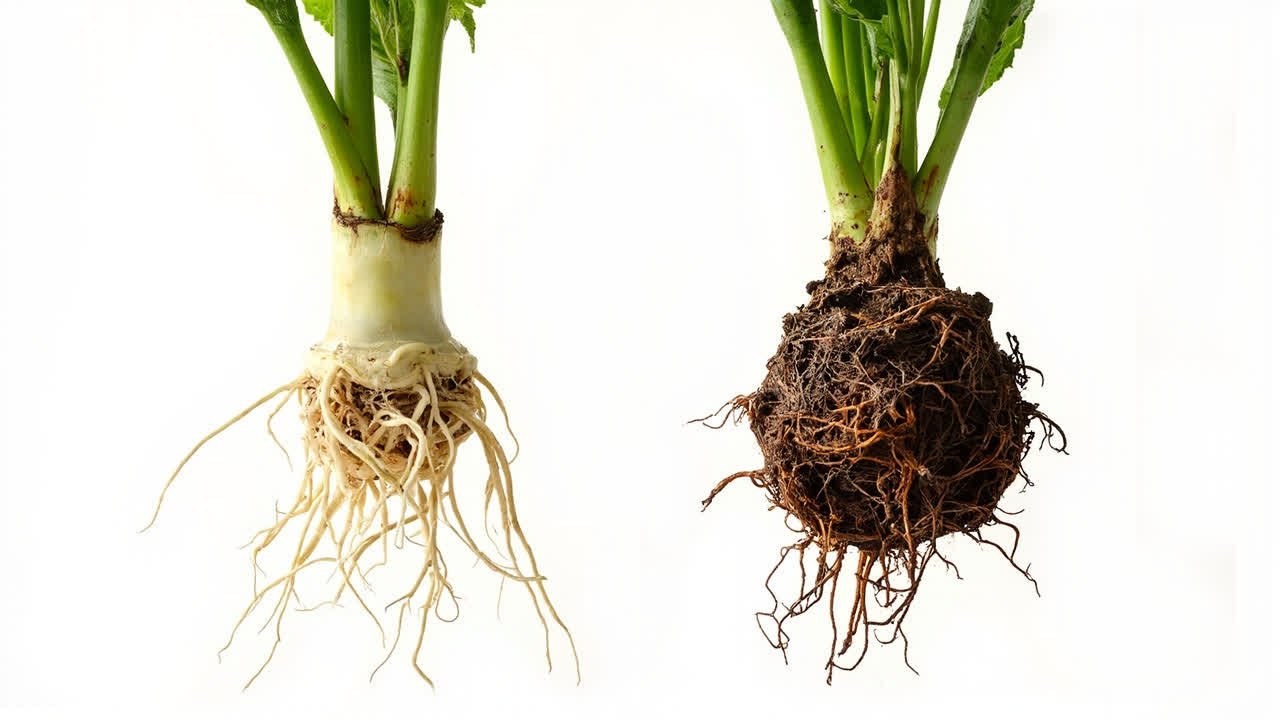
Root check. Remove the plant from its pot. Healthy Pothos roots are firm, white to light tan, and look slightly fleshy.
Rotting roots are dark brown to black, mushy, slimy, and break apart easily between your fingers. They usually smell musty or sour. If most of the root system looks like this, the plant is severely compromised.
Diagnosis Decision Tree: Is It Root Rot or Something Else?
Five checks, in order, separate Pothos root rot from three look-alike problems. Run them before you cut into the root system — and apply the rule “if you see X, the next check is Y” at each stage.
Smell. Smell the soil close to the drainage holes and the root crown. Rotting roots produce a sour, swampy, or musty odour — the same smell as decaying vegetation in a ditch.
Healthy roots and normal wet soil smell earthy, never sour. If the soil smells sour, rot is active.
Tug test. Pull gently on a few roots. Healthy roots resist; rotting roots slip off in your fingers or break cleanly with no resistance.
Healthy roots are white to tan and firm. Rotting roots are brown to black and mushy. Look for the boundary — where firm tissue meets mushy tissue marks how far the rot has progressed.
Leaf pattern. Natural leaf yellowing affects one or two leaves at a time, always the oldest. Root rot yellowing hits several older leaves at once, within days, with newer leaves often still green at the tips.
If only one leaf is yellow and the rest of the plant is pushing new growth, it is natural drop. If multiple older leaves yellow together, expect rot.
Stem firm. Press the stem 2 to 4 cm above the soil line with your thumb. Firmness here is the cleanest signal.
Mushy, dark, or collapsing stem tissue means rot has moved from the roots into the vascular system. This is the boundary between “save the parent” and “propagate the cuttings.”
Watering log. Review the last 3 to 4 weeks of watering. Has the soil ever felt dry at the second knuckle between waterings?
If yes, root rot is unlikely — the cycle was working. If the soil has stayed damp for most of that window, rot is the probable cause. This single check rules out about 40 percent of suspected cases because the cause was actually underwatering or normal leaf drop.
How to Save a Pothos With Root Rot
The recovery is seven steps. Each one is non-negotiable once rot is confirmed.
Step 1. Stop watering immediately. Do not water again until the entire recovery process is complete and the plant is showing new growth.
Step 2. Remove the plant from its pot. Tip the pot and slide the root ball out.
Gently remove as much soil as possible — soil from a root-rotted plant may be contaminated with fungal spores and cannot be reused.
Step 3. Trim all rotted roots. Cut away every root that is dark, mushy, or broken.
Cut back to firm, light-coloured tissue. If more than two-thirds of the root system is gone, the plant is best saved by propagating the healthy vine sections as cuttings.
Step 4. Rinse the remaining roots. Run water over the remaining root system to remove soil particles that contain fungal spores.
If the base of the stems is discoloured or soft, trim that section too. You need firm, healthy tissue above the rot line.
Step 5. Treat with a fungicide. Drench the remaining roots and the lower stems with a copper-based or broad-spectrum houseplant fungicide diluted as directed on the label.
This prevents the remaining fungus from re-invading compromised tissue.
Step 6. Repot in fresh, fast-draining soil. Use a clean pot with at least one drainage hole.
Use a fresh potting mix — never reuse old soil. Add perlite or orchid bark to improve drainage.
A standard peat-based potting compost holds too much moisture for a recovering Pothos. The pot should be only slightly larger than the remaining root ball.
Step 7. Place in bright indirect light and wait. The reduced root system cannot handle water demand.
Wait until the soil is completely dry at the top 3 to 5 cm before watering lightly. Once new growth appears at the vine tips — expect this within 3 to 6 weeks if recovery succeeds — resume normal watering. If no new growth appears by week 8, the root system is unlikely to recover.
Treatment Limits: When the Plant Cannot Be Saved
Most Pothos root rot cases are recoverable. Some are not. Knowing the boundary saves you a week of futile repotting.
Root loss. If more than 80 percent of the root system is dark, mushy, or absent, the plant is past the point where fungicide treatment alone recovers it.
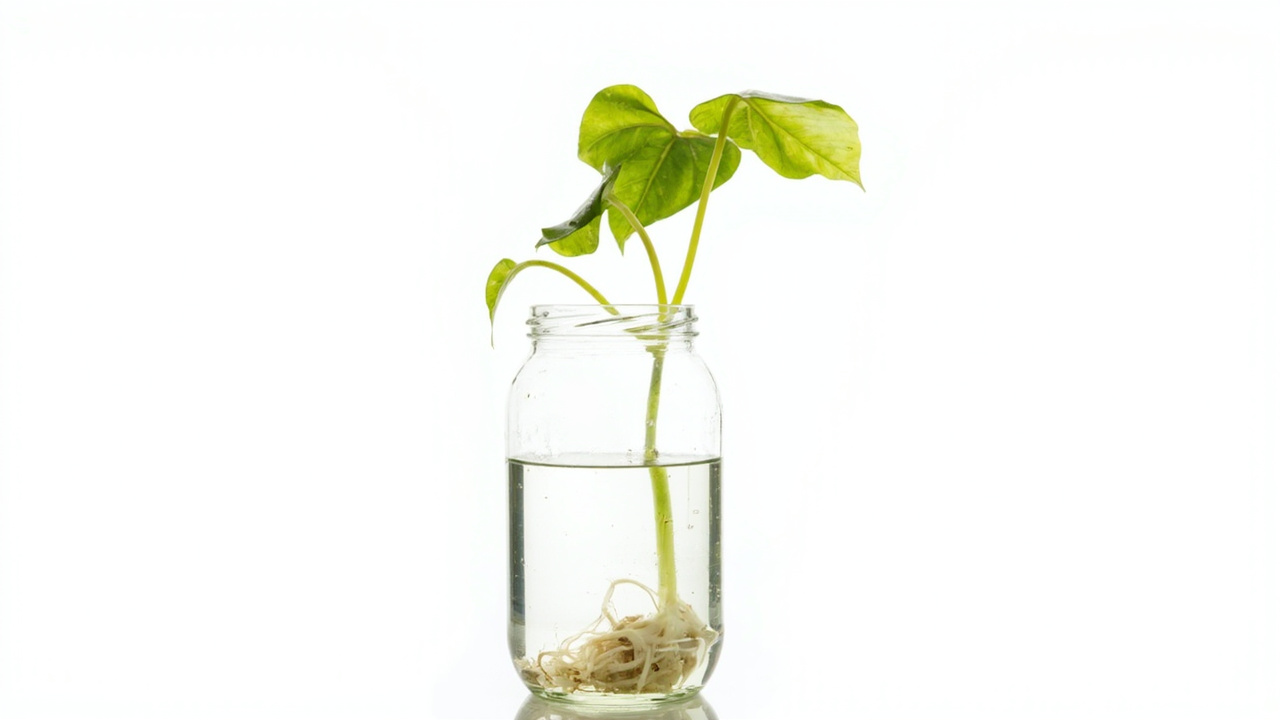
The remaining fine root mass is too small to sustain the foliage above. At that point, propagation is the more reliable path — take 8 to 12 cm cuttings from healthy stem sections with at least one node and root them in water.
This produces a new plant from the parent and has a higher success rate than trying to save the original root crown, since saved plants often relapse within 4 to 6 weeks if even a small reservoir of infection remains.
Fungicide limits. Indoor use of broad-spectrum fungicides carries drawbacks worth weighing. Copper-based products are safer than systemic options but can build up in the soil over repeated applications, suppressing beneficial microbial activity.
Systemic fungicides containing mefenoxam or fosetyl-Al are restricted in some regions and are not labelled for edible plants in the home. For Pothos specifically, copper-based drenches at label rates are the practical choice.
Heavy reliance on stronger chemistries is a sign the cultural conditions need correcting, not that a stronger chemical is missing.
Cost trade-off. When 50 to 80 percent of the root system is gone, both treatment and propagation are valid.
Treatment requires one fungicide application, fresh soil, and a 4 to 6 week recovery window. Propagation requires cuttings, a water vessel, and 3 to 4 weeks to root.
Treatment fails in roughly 30 percent of borderline cases. Propagation succeeds in roughly 80 percent of healthy-stem cuttings. The honest limit is clear: when in doubt and stem tissue is still firm, treatment first; when stem tissue is mushy, propagate and discard the parent.
Soil discard. Infected soil cannot be reused for any plant. The pathogen spores survive for months even when the soil dries out.
Bag and bin it — do not add it to outdoor garden beds. Sanitise the pot with a dilute bleach solution (1 part bleach to 9 parts water) and rinse thoroughly before reuse.
The RHS explicitly recommends this sanitisation step for any container that held a root-rotted plant.
How to Distinguish Root Rot From Other Problems
Three Pothos problems are commonly confused with root rot. Each has a different cause and a different fix.
Natural drop. Pothos naturally drops its oldest leaves as it grows. Natural drop affects one or two leaves at a time, always the oldest at the base of each vine, while the rest of the plant looks healthy and is actively growing.
Root rot causes simultaneous yellowing across multiple leaves and the plant shows overall decline — slower growth, smaller new leaves, duller colour.
Overwatering. Overwatering is the cause of root rot. The distinction is between the symptom (yellowing from water stress) and the underlying disease (fungal infection of damaged root tissue).
Overwatering without root rot causes wilting and yellowing from oxygen deprivation at the root level, but without fungal colonisation. In both cases, the immediate fix is identical: stop watering, improve drainage, repot if necessary.
Nutrient deficit. Nitrogen deficiency yellowing starts in the oldest leaves and causes gradual, uniform yellowing across the entire plant as growth slows.
Root rot yellowing is more localised to the oldest leaves and progresses faster, accompanied by soil that stays wet rather than dry. A plant in dry, well-drained soil showing yellowing is more likely nutrient deficient than rot-stressed.
Preventing Root Rot in Your Pothos
Prevention is five rules. Each one addresses a failure mode that allows root rot to establish.
Finger test. Water only when the top 3 to 5 cm of soil is dry. Use the finger test every time.
If the soil is dry at your second knuckle, water. If still damp, wait.
This single habit prevents the majority of Pothos root rot cases in cultivation.
Drainage holes. Decorative pots without holes are the leading cause of Pothos root rot in cultivation.
If you love the look of a closed pot, use it as a cachepot — keep the plant in a practical plastic nursery pot with drainage holes inside the decorative one, and lift it out to water.
Empty saucer. Empty the drainage saucer within 30 minutes of watering. Standing water in the saucer keeps the root zone saturated.
After watering, return and tip out any collected water.
Fast mix. Use a fast-draining soil mix. Add perlite or orchid bark to standard potting mix.
The mix should not stay wet for more than 5 to 7 days after watering in average room conditions.
Winter drop. Reduce watering in winter. Pothos slows growth significantly in cooler months.
Water needs drop by 30 to 50 percent from November through February. Apply the same “check the soil” rule but expect longer intervals between waterings. The cooler soil temperature also reduces pathogen activity — winter is the one season where overwatering is less catastrophic than in summer.
For the full Pothos care routine that prevents the conditions root rot needs to establish, see the Pothos Plant Care guide. For how to propagate from healthy cuttings of an affected plant, see the propagating Pothos from Cuttings guide. For other Pothos leaf problems that look similar to root rot damage, see the Pothos yellow leaves guide.
Turn That PDF Into a Spreadsheet in Minutes
You've seen how to do it manually — now let the tool handle the heavy lifting. Upload your bank statement and get Excel, CSV, or QBO in a few clicks.
Try It Free