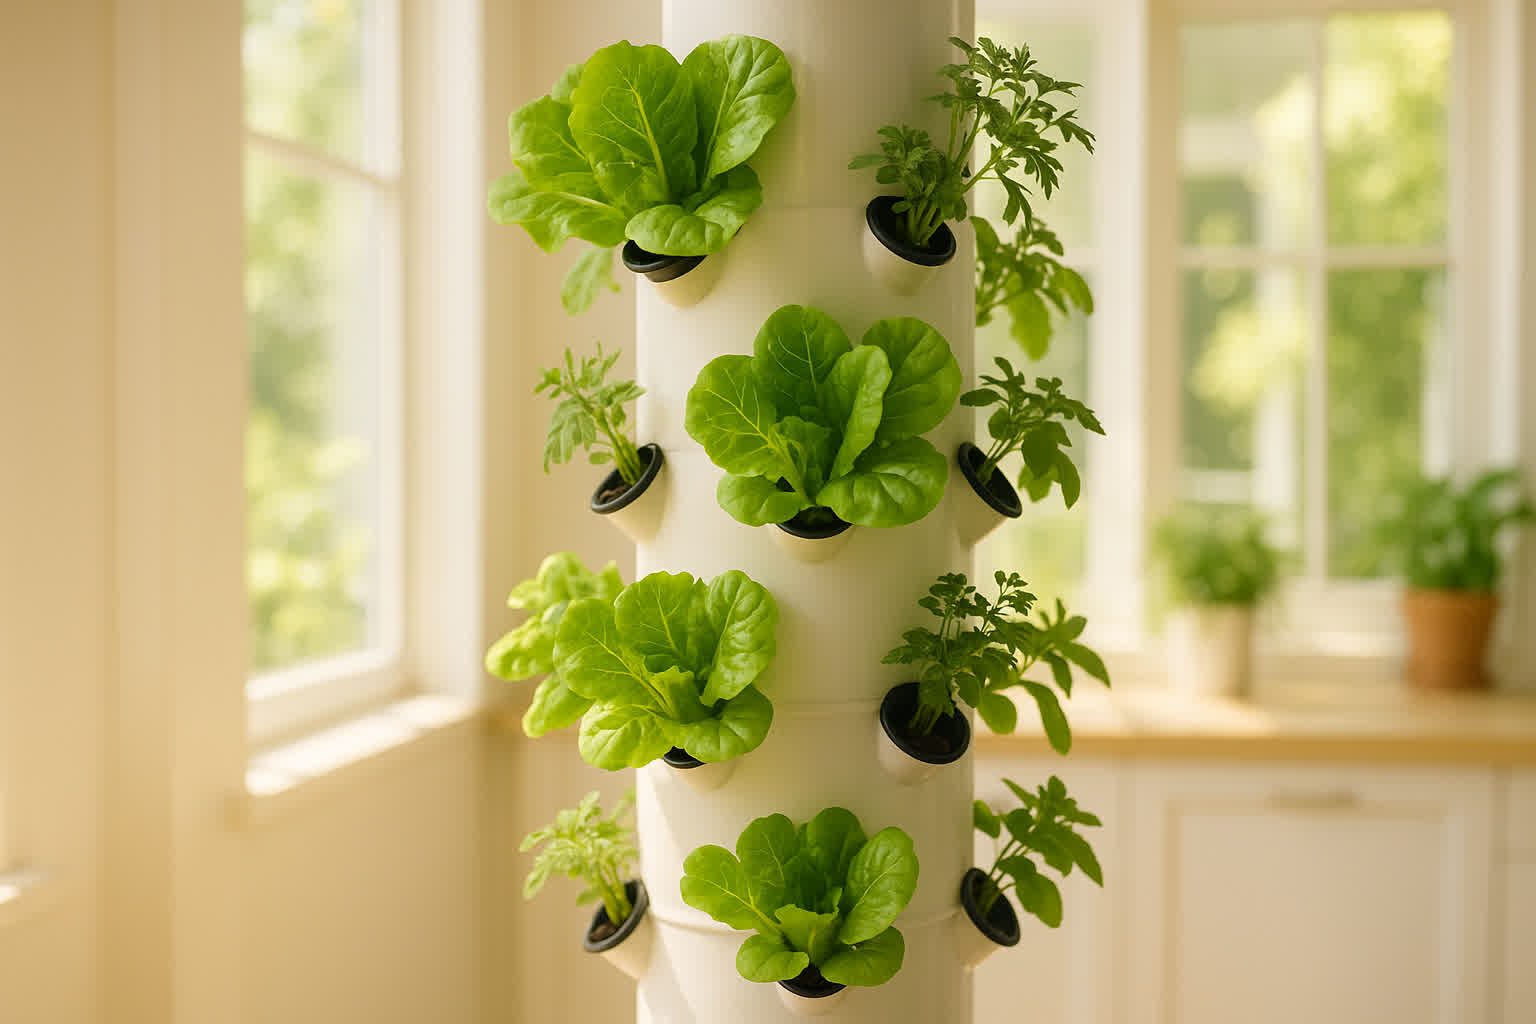

Most hydroponics beginners start with a single container on a countertop and never think about going vertical. That works fine for herbs, but once you want to grow more food in less space, a vertical hydroponics system changes everything. Stacking plants upward instead of outward cuts your grow footprint by up to 90% compared to traditional soil gardening, which is exactly why balcony gardeners, apartment dwellers, and anyone working with limited square footage keep building them.
The concept isn’t complicated: nutrient-rich water flows through vertical towers, feeding plants at every level. Gravity does most of the distribution work, so you don’t need high-pressure pumps or complex plumbing to make it happen. A basic PVC tower system costs under $75 in materials and can produce roughly 20–30 plants per square foot of floor space per year — numbers that soil gardening simply can’t match indoors.
This guide walks you through the complete build process for a 6-foot PVC vertical hydroponics tower that holds 30 plants. Every step is measured, every material listed, and every decision explained. By the end you’ll know exactly what to cut, how to mount it, and what to plant first.
What Is a Vertical Hydroponics System (and Why Build One)
A vertical hydroponics system is a soilless growing method that arranges plants in stacked tiers or towers, with water and nutrients delivered to the top and distributed downward through each level — a classic vertical take on how hydroponic farming works. The vertical hydroponics system design uses gravity to move nutrient solution through the root zone of every plant in the column, eliminating the need for multiple pumps or separate irrigation lines.
The most common design is the tower-style system, where PVC pipes or specialized grow towers are mounted vertically and cut with evenly spaced plant holes. A single submersible pump at the base pushes solution to the top reservoir, where it trickles down through each pot or net cup. This method works especially well for leafy greens, herbs, and strawberries — crops that don’t need heavy structural support and produce well in vertical arrangements.
How Vertical Systems Differ from Horizontal Hydroponics
Horizontal systems like NFT channels or DWC buckets spread plants across a flat surface. A vertical tower concentrates the same number of plants into a narrow column. That distinction matters because vertical layouts reduce the land or floor space required by a factor of roughly 10, according to comparative trials with lettuce grown in both orientations under identical light and nutrient conditions.
The trade-off is light distribution. Lower tiers in a vertical column receive less light than the top tier unless you add supplemental LED strips or rotate plant positions weekly. Horizontal systems distribute light more evenly across all plants, but they consume significantly more floor space. If your grow area has vertical clearance and you can manage light supplementation, the vertical approach wins on space efficiency every time.
Yield Comparison: Vertical vs. Traditional Soil Gardening
Yield per square foot is where vertical hydroponics demonstrates its strongest advantage. A single 6-foot tower with 30 plant slots can produce approximately 150–200 lettuce heads per year, depending on cultivar and climate. Traditional soil beds in the same floor footprint might yield 20–30 heads annually under comparable indoor conditions. That represents a roughly 6–8x increase in annual output, making vertical hydroponics particularly attractive for anyone growing food in urban environments where space commands a premium.
The premium comes in setup complexity and dependency on electricity. A soil garden survives a power outage with no intervention. A vertical hydroponics system stops functioning the moment the pump loses power — within hours, plants begin experiencing stress from interrupted nutrient delivery. This is the core trade-off to understand before you build, and it shapes many of the decisions in this guide.
Materials and Tools Needed
Every item on this list serves a specific function. The total cost comes to approximately $65–$85 depending on where you source your PVC and whether you already own any of the tools. Prices are based on 2025 hardware store averages for a single-tower build.
Pipe and Structure
The central column is a 4-inch diameter PVC pipe cut to 6 feet long. You can use white or grey PVC — colour doesn’t affect function, but avoid black PVC as it absorbs heat and can raise root zone temperatures above the optimal range. You’ll also need a 4-inch PVC cap for the bottom to contain the nutrient solution pool, and a 4-inch PVC elbow at the top to direct water back toward the return path.
Mount the tower using two wall-mounted PVC pipe brackets spaced evenly along the height. These attach to any solid surface — a wall, a sturdy shelf frame, or a custom wooden stand. For a freestanding option, a simple A-frame made from 2×4 lumber works well and costs under $20 in lumber.
Pump and Irrigation
A 400 GPH (gallons per hour) submersible pump sits in the base reservoir and pushes solution upward. This pump size delivers enough flow to feed 30–40 plant slots without excessive pressure. You need approximately 3–4 feet of 1/2-inch vinyl tubing to connect the pump to the top of the tower, plus a タイマー (timer) — use an inexpensive mechanical or digital outlet timer set to run the pump on a 15 minutes on / 15 minutes off cycle for most leafy greens.
The return path uses gravity: solution exits the tower through a 1-inch drain elbow at the base and flows back into the reservoir below. This creates a closed-loop system that uses approximately 90% less water than equivalent soil gardening over a growing season.
Plant Containers and Growing Medium
Each plant site uses a 3-inch net cup — a plastic basket with slotted sides that holds the growing medium and the plant root mass. You’ll need 30 net cups for a full tower at 2-inch vertical spacing. The spacing matters: 2 inches center-to-center gives plants enough room to develop canopy without excessive crowding, while 3-inch spacing works better for larger plants like basil or peppers where you want more biomass per slot.
Fill each net cup with hydroton (expanded clay pebbles) or a 50/50 mix of hydroton and perlite. These media provide excellent root aeration and drainage, which is critical in vertical systems where water moves continuously downward. Avoid using rockwool cubes at the base of net cups in vertical towers — the downward water movement tends to compress and degrade rockwool faster than clay-based media.
Nutrients and pH Testing Kit
A vertical hydroponics system requires liquid hydroponic nutrients formulated for the growth stage of your plants. For leafy greens, use a formula with an N-P-K ratio of 3-1-2 during vegetative growth, switching to 1-3-2 if you grow fruiting crops. You’ll also need a digital pH meter or liquid pH test kit to maintain solution pH between 5.8 and 6.5 — the range where most hydroponic crops absorb nutrients most efficiently.
A 5-gallon bucket makes a suitable reservoir for a single tower. Two 5-gallon buckets connected in parallel work better if you run two towers from one pump, though you’ll need to upgrade to a 750 GPH pump to maintain adequate flow across both columns simultaneously.
From Bank Statement to QuickBooks-Ready File
That manual cleanup you just read about? This tool skips it. Turn your PDF into QBO for QuickBooks without storing your data anywhere.
Start ConvertingStep-by-Step Build Instructions
Building the tower takes 2–3 hours for a first build, less once you understand the layout. Gather all materials before starting so you don’t interrupt the process mid-step.
Step 1: Cut the PVC Tower and Drill Plant Holes
Cut the 4-inch PVC pipe to exactly 6 feet using a PVC saw or a rotary tool with a cutting disc. Mark hole positions every 2 inches along one face of the pipe using a marker and a measuring tape. For a 6-foot pipe, this gives you 36 potential positions, though you’ll typically use 30–32 holes for practical growing — leaving the bottom 6 inches open for the drain section and the top 6 inches for the irrigation inlet.
Drill each hole with a 2.75-inch hole saw or step drill bit designed for PVC. The hole must be large enough for a 3-inch net cup to sit flush against the pipe wall with approximately 1/8 inch of clearance on each side. After drilling all holes, sand the edges smooth with 120-grit sandpaper to remove burrs that could damage plant stems or cut your hands during maintenance.
This step sets the foundation for the entire system. A hole drilled at the wrong angle — tilted inward rather than facing straight out — causes net cups to sit at an angle, which leads to uneven light exposure and awkward plant orientation. Check each hole with a torpedo level before moving to the next one.
Step 2: Assemble the Base Reservoir and Pump Setup
Place your 5-gallon bucket reservoir on a stable surface directly beneath where the tower will stand. Cut a 4-inch diameter hole in the bucket lid sized to accept the bottom of the tower pipe — the pipe should pass through the lid and extend approximately 2 inches into the reservoir where the pump will sit. Alternatively, set the tower pipe into a U-shaped PVC drain bracket mounted at the lip of the reservoir so the bottom 2 inches of pipe sits inside the bucket.
Position your 400 GPH submersible pump at the bottom of the reservoir. Attach 1/2-inch vinyl tubing to the pump outlet and run the tube up the exterior of the tower to the top. Secure the tubing to the tower pipe every 12 inches using zip ties or pipe clips. At the top, direct the tube through the elbow fitting so water flows into the tower opening and distributes across the top net cups first.
Set your timer to run the pump for 15 minutes every 30 minutes during the light period for lettuce and spinach. For basil and herbs that prefer slightly drier root conditions, switch to 10 minutes every 30 minutes. Monitor plants for the first 48 hours after setup — wilting despite moist media indicates either too much flow (root saturation) or too little (dry stress).
Step 3: Install Net Cups and Growing Medium
Rinse hydroton thoroughly before use — the clay pebbles often arrive with fine dust that can cloud your nutrient solution and clog pump intake screens. Place a single hydroton pebble in the bottom of each net cup as a plug to prevent smaller media from washing through the slits, then fill the cup approximately 3/4 full with additional hydroton.
Insert each filled net cup into its hole from the outside of the tower, pressing until the rim of the cup sits flush against the PVC pipe wall. The cup should remain held in place by friction — no glue or clips needed for a standard setup. If cups feel loose, wrap the rim with a single layer of Teflon plumber’s tape to increase grip.
Pre-soak your growing medium in pH-balanced water (pH 6.0) for 24 hours before planting. This stabilizes the medium’s pH and prevents it from altering your nutrient solution pH during the critical first week of plant growth. Newly transplanted seedlings should sit in the net cup with their roots touching — but not fully submerged in — the nutrient solution flowing past the bottom of the cup.
Step 4: Set Up the Nutrient Solution
Fill your reservoir with 4 gallons of filtered or reverse-osmosis water — tap water works in most municipalities, but if your tap water has a chlorine level above 4 ppm, let it off-gas for 24 hours or use a dechlorinating agent before adding nutrients. Mix your hydroponic nutrient concentrate according to the manufacturer’s instructions for the gallon volume, starting at approximately 1/4 strength for the first week to avoid burning young transplant roots.
Check the solution pH with your meter or test kit. The target range is 5.8–6.5, with 6.0–6.2 being ideal for most leafy greens. If pH drifts above 7.0, add phosphoric acid in small increments — 1 ml at a time per gallon — until stabilized. If it drops below 5.5, add potassium hydroxide or sodium hydroxide in similarly tiny amounts. The goal is to make small adjustments and retest before adding more.
Top up the reservoir with plain water (no nutrients) as water evaporates between top-ups — typically every 3–5 days depending on ambient humidity and temperature. Never let the reservoir run dry. When the reservoir does eventually empty, that’s your signal to fully replace the nutrient solution rather than just topping up, since nutrient concentrations become unbalanced as plants draw different ions at different rates.
Step 5: Install Plants and Begin the Growth Cycle
Transplant seedlings that have developed at least 2–3 true leaves and a root system visible through the bottom of their starting cell. Gently remove each seedling from its nursery pot, rinse soil from the roots under lukewarm water, and insert the root ball into the hydroton-filled net cup. The transition from soil to hydroponics stresses plants if done incorrectly — the most common mistake is leaving any soil residue on roots, which introduces pathogens into the closed hydroponic environment.
Position your tower under a light source. For indoor growing, LED grow lights placed 12–18 inches above the top plant tier and angled slightly downward cover the full height of a 6-foot tower reasonably well. If you notice the bottom tier plants stretching toward the light or showing pale yellow leaves, your light penetration is insufficient at that level — add a supplemental 24-watt LED strip mounted at the halfway point on the tower.
Run the system for a full 72 hours before evaluating plant response. Some wilting in the first 24–48 hours is normal as transplants adjust to the hydroponic environment. If wilting persists beyond 72 hours, check for root damage during transplant, pump malfunction, or a pH spike above 7.0 that is locking out nutrient uptake.
Which Plants to Grow
The vertical hydroponics system suits some crops far better than others. Understanding root structure, canopy weight, and growth rate helps you select plants that will thrive rather than struggle in a column format.
Best Crops for Vertical Towers
Leafy greens dominate vertical hydroponics for good reasons. Lettuce varieties — butterhead, romaine, and oak leaf — mature in 30–45 days from transplant and tolerate the relatively compact spacing of a 2-inch tower layout. Spinach grows well vertically but requires slightly cooler root temperatures (below 75°F / 24°C) to avoid bolting prematurely. Basil, particularly Genovese basil, produces heavily in towers and benefits from the improved air circulation that vertical spacing provides.
Strawberries perform exceptionally well in vertical towers because their roots are shallow and the hanging fruit stays clean and accessible. A single tower planted with strawberry can yield 1–2 pounds of fruit per plant per season, making vertical strawberry cultivation one of the most productive space-efficient growing methods available to home gardeners. Plant strawberry runners in early spring for summer harvest, or in late summer for a fall crop in mild climates.
Microgreens and baby salad mixes work in vertical towers but require dense seeding — up to 6–8 seeds per net cup — because they’re harvested before plants need their full spacing allocation. This approach maximizes tower productivity during the first 2–3 weeks of a cycle before slower-growing crops like lettuce take over the same space.
Plants to Avoid in Vertical Systems
Large fruiting vegetables like tomatoes, cucumbers, and squash need structural support, deep root systems, and significantly more vertical space per plant than a tower column provides. A single indeterminate tomato plant in a 5-gallon bucket can produce 10–20 pounds of fruit in a season — but it cannot do so suspended in a vertical tower. Trying to force these crops into tower slots leads to broken stems, crushed root systems, and disappointing yields.
Root vegetables like carrots, radishes, and beets require soil depths of 6–12 inches to develop properly. The limited media volume in a net cup and the continuous downward water movement in a tower combine to create an environment where taproots cannot extend normally, resulting in deformed, stunted harvests.
If you want to grow fruiting crops hydroponically, the aeroponics system handles them better — or use a larger hydroponic systems for beginners setup with 5-gallon buckets or NFT channels. The best plants for hydroponics article covers crop selection in more depth, including recommendations for plants that work across multiple system types.
Common Mistakes to Avoid
Every one of these mistakes appears repeatedly in beginner vertical hydroponics builds. Knowing them in advance saves you from losing plants and rebuilding your system from scratch.
Ignoring Root Zone Temperature
One of the most overlooked variables in vertical hydroponics is root zone temperature. When PVC pipes sit under grow lights, they absorb heat and transfer it directly to the nutrient solution flowing past the roots. Solution temperatures above 78°F (26°C) cause root oxygen depletion — warm water holds less dissolved oxygen than cool water, and roots in warm solution effectively drown even though they’re technically submerged. The fix is straightforward: insulate the PVC pipe with reflective foam insulation or run the system in a cooler part of the room. Keeping root zone temperature between 65–75°F (18–24°C) dramatically improves plant health and nutrient uptake.
Skipping the pH Check Routine
pH drift happens faster in hydroponic systems than in soil because there’s no substrate buffer to moderate changes. A solution that starts at pH 6.0 can climb to pH 7.5 within 48 hours as plants absorb calcium and magnesium ions preferentially. At pH 7.5, iron becomes largely unavailable to plant roots even if your nutrient formula contains adequate iron — resulting in classic interveinal chlorosis (yellow leaves with green veins) that beginners often misdiagnose as a nitrogen deficiency.
Test pH every 2–3 days minimum, and always after adding fresh nutrients or water to the reservoir. Keep a pH adjustment kit within arm’s reach of your system — the small effort of consistent testing prevents most nutrient lockout problems before they affect plant growth.
Overfeeding with Nutrients
More nutrients do not equal faster growth. Beginners frequently exceed the recommended nutrient concentration because they assume that if some plant food is good, more must be better. The result is nutrient burn — a brown or scorched appearance on leaf edges caused by excess soluble salts drawing moisture out of leaf tissue. In a properly functioning system, EC (electrical conductivity) readings should stay between 1.2–2.0 mS/cm for lettuce and leafy greens during vegetative growth. If leaves show burn symptoms and your EC reads above 2.5, dilute the solution with plain water and retest before adding more nutrients.
Building your own nutrient solution from simpler components can also save money and improve understanding. The DIY hydroponic fertilizer guide walks through cost-effective recipes using readily available ingredients, which is especially useful if you’re running multiple towers and want to reduce ongoing input costs.
Failing to Plan for Light Distribution
Plants on lower tiers receive roughly 40–60% less light than the top tier in a 6-foot uncovered tower under a single overhead grow light. The result is uneven growth: top plants are robust and dark green, lower plants are pale, leggy, and slow-growing. The solution isn’t a more powerful light — it’s better light placement. Position your primary LED panel to illuminate the entire tower face at roughly 200–400 µmol/m²/s, which is the typical photosynthetic photon flux density range for leafy greens. Alternatively, mount two smaller LED strips at one-third and two-thirds of tower height, pointing inward toward the center.
If you’re growing in a room with ambient window light, rotate the tower 180 degrees once per week so that all plant positions receive roughly equal exposure over time. This doesn’t fully solve the light gradient problem but reduces the growth disparity between tiers significantly.
Not Having a Backup Pump
Pump failure is not a question of if — it’s a question of when. Submersible pumps typically last 1–3 years with continuous use, but failure can happen without warning. A tower without a functioning pump dries out within 2–4 hours in warm conditions, and lettuce roots begin dying within 6 hours of complete drying. Keep a spare submersible pump (a $15 backup) in your growing supplies. When the primary pump fails, swap it immediately rather than scrambling to find a replacement.
A battery-backup timer is another low-cost insurance investment. In the event of a power outage, a small 12V battery keeping the timer running for even 4–6 hours can be the difference between minor wilting and a total crop loss. These battery-backup systems cost under $30 and are worth installing on any hydroponic system you care about.
Starting a vertical hydroponics system requires an upfront investment of time and money, but the long-term payoff in fresh produce makes it worthwhile for anyone serious about growing food in limited space. The nutrient solution guide covers how to keep your solution performing at peak efficiency throughout the growing season, which is the single biggest factor in determining whether your tower produces abundantly or barely survives.