Growing tomatoes in pots is the single most reliable way to get a heavy harvest from a small space — a single well-tended tomato plant in a 5-gallon container can outproduce the same variety planted in the ground, because the pot gives you complete control over soil quality, drainage, water delivery, and root-zone temperature. Most home gardeners who struggle with tomatoes in the ground succeed almost immediately when they move the same tomato variety into a container, because the failure modes of in-ground tomato growing — nematodes, soil-borne wilt, inconsistent moisture, and competition from tree roots — largely disappear. The trade-off is that container-grown tomatoes demand more frequent attention: a tomato in a pot cannot send roots deeper to find water during a heat wave, so the gardener becomes the rain. This guide walks through the whole process from picking the tomato variety and pot, through planting, watering, fertilizing, and harvesting, with the specific numbers and timing that make the difference between a pot of wilted stems and a pot heavy with fruit.
Why Tomatoes Grow Well in Pots
Tomatoes grow well in pots because the plant is, biologically, a tropical perennial that evolved in environments with poor soil and intense sun — the same conditions a well-managed container reproduces. A pot gives the tomato plant three things the open garden rarely does: a root zone that warms up to 70 to 80°F (21 to 27°C) early in the season (tomato roots stop growing below 55°F / 13°C), a soil volume the gardener can fully control for drainage and fertility, and physical isolation from soil-borne pathogens like Fusarium and root-knot nematodes that can survive in garden soil for 5 to 7 years. The honest limitation: a pot also creates three new failure modes the gardener must actively manage — faster drying out, faster nutrient depletion, and faster temperature swings in the root zone. A tomato plant in a 5-gallon pot on a 95°F (35°C) afternoon can have root-zone temperatures above 100°F (38°C) within an hour, which stops fruit set even when the leaves look fine. Container tomato growing is not lower-maintenance than in-ground growing — it is different-maintenance, and the difference rewards gardeners who water and feed on a schedule.
The reader’s recognition signal that a pot is the right choice: limited space, contaminated soil, a desire to move the tomato plant with the sun through the season, or a need to keep the plant away from deer and rabbits. Each of these is a reason a pot outperforms the open garden for tomatoes.
Picking the Right Tomato Variety for Pots
Variety choice drives 60% of the outcome for a potted tomato, and the rule is simple: choose a determinate or compact-indeterminate variety, not a full-size indeterminate cherry or beefsteak. Determinate tomato varieties stop growing at a genetically determined height (usually 3 to 4 feet), set all their fruit in a 4 to 6 week window, and finish the season — they are the right choice for a single 5-gallon pot where you want a harvest all at once. Compact indeterminate tomato varieties like ‘Tumbling Tom’, ‘Patio Princess’, or ‘Bush Early Girl’ grow to 4 to 5 feet but produce continuously through the season in a pot, and they are the right choice if you want to harvest tomatoes over 3 months rather than 6 weeks. Full-size indeterminate tomatoes (Sungold, Cherokee Purple, Brandywine) can grow 8 feet tall and need a 10 to 15 gallon pot minimum, plus a serious staking system, before they will produce well in a container. A potted tomato of a large variety in a small container sets 3 to 5 fruit and then collapses — the gardener concludes the variety does not work in pots, when the real problem is pot size.
Expect: a determinate tomato in a 5-gallon pot produces 8 to 12 pounds of fruit in a season. A compact indeterminate in the same pot produces 4 to 6 pounds spread over a longer window. A full-size indeterminate in a 10-gallon pot produces 12 to 20 pounds but needs daily attention and a 6-foot stake. Pick the variety to match the pot you actually have, not the pot you wish you had.
Choosing the Best Pot for Tomato Plants
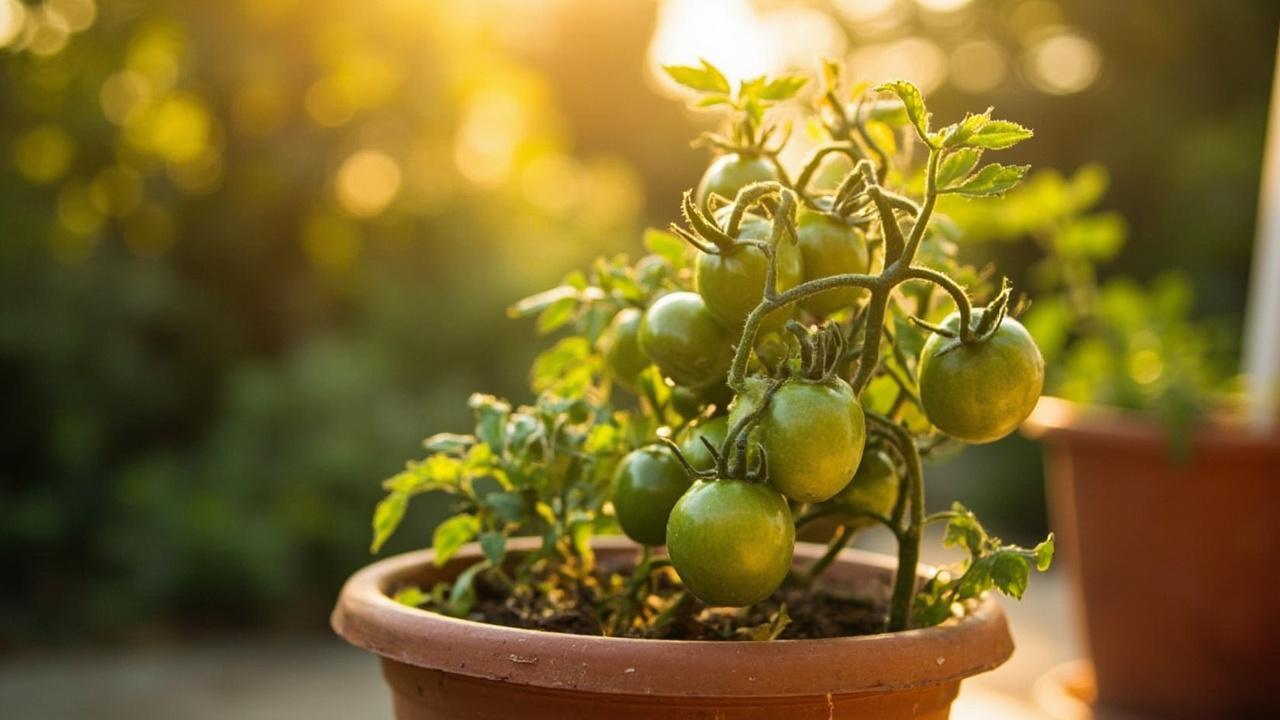
Pot size is the second decision that drives everything, and the minimum for a single tomato plant is 5 gallons (about 12 inches in diameter at the top). A 3-gallon pot will grow a tomato plant for 4 to 6 weeks and then it will decline — the root volume is too small to support fruiting. A 5-gallon pot supports a full season for a determinate or compact indeterminate. A 10-gallon pot supports a full-size indeterminate and gives a 10 to 15% yield bonus because the root volume stays cooler and moister. Fabric pots (also called smart pots or grow bags) outperform plastic or terracotta in summer because the fabric wicks excess moisture and breathes, keeping root-zone temperatures 5 to 10°F (3 to 6°C) cooler than plastic in direct sun. The trade-off: fabric pots dry out 30 to 50% faster, so watering frequency increases. Terracotta pots look beautiful and breathe well but they dry out the fastest of all and crack in freezing weather.
Whatever pot you choose, drainage holes are non-negotiable. A tomato in a pot without drainage will develop root rot within 7 to 10 days of the first overwatering, and the rot will not be visible until the lower leaves yellow and the plant wilts at midday despite wet soil. If you fall in love with a decorative pot that has no holes, drill three or four half-inch holes in the bottom, or use it as a cachepot with a functional nursery pot inside. Expect the potted tomato to need water every 1 to 2 days in summer (every day above 90°F / 32°C), every 2 to 3 days in spring and fall, and to be checked daily regardless — pots hide moisture loss from the gardener’s eye, and a tomato plant that wilts from drought takes 24 to 48 hours to recover even after a thorough watering.
Potting Soil and Drainage for Potted Tomatoes
Garden soil does not work in pots — it compacts, drains poorly, and introduces weed seeds and pathogens. The right potting mix for a tomato in a pot is a soilless blend of peat moss or coco coir, perlite, and compost in roughly equal parts, plus a slow-release fertilizer mixed in at planting. A commercial potting mix labeled for vegetables or tomatoes is the easiest choice and runs $4 to $8 per 2-cubic-foot bag, enough for one 5-gallon pot. The honest trade-off of soilless mixes: they hold less native nutrition than garden soil, so the tomato plant depends entirely on the gardener for fertilizer from week 4 onward. That is a feature, not a bug — you are controlling exactly what the tomato eats, which is why container tomatoes can outperform in-ground ones once the feeding schedule is right.
Drainage is the difference between a thriving tomato and a dead one in a pot. The single biggest mistake gardeners make with potted tomatoes is putting a layer of gravel at the bottom of the pot “for drainage” — this actually raises the water table inside the pot and makes root rot more likely, not less. The correct approach is to use a well-draining mix throughout the pot, ensure the drainage holes are unblocked (a piece of landscape fabric or a coffee filter over the holes keeps the mix from washing out without impeding drainage), and empty the saucer under the pot within 15 minutes of watering so the pot does not sit in standing water. A potted tomato sitting in a saucer of water for more than an hour after watering is on its way to root rot — pour the saucer out before you walk away.
Planting Tomatoes in Pots Step by Step
Plant a potted tomato deeper than it sat in its nursery pot — bury the stem up to the first set of true leaves, because every part of the buried stem will grow roots and the plant will develop a stronger root system in the pot. This is the one piece of tomato planting advice that contradicts what works for most other vegetables, and it works for tomatoes because the stem has the genetic capacity to grow adventitious roots wherever it touches moist soil. Pinch off the lower leaves that will be buried, dig a hole in the potting mix deep enough to lay the root ball on its side with the top of the root ball at soil level, and backfill. Water thoroughly until water runs from the drainage holes — this settles the mix around the roots and eliminates air pockets. Stake or cage the tomato at planting time, not later — driving a stake into a pot after the plant is established damages roots and the plant never quite recovers from the shock.
Expect: the potted tomato will look slightly wilted for 2 to 4 days after transplant even with careful watering. This is transplant shock, not a problem with the pot or the plant. Water once daily for the first week, then begin the regular watering schedule based on the weight of the pot (lift it — heavy means wet, light means water). New growth at the top within 7 to 10 days confirms the tomato has established in the pot. No new growth within 14 days means the root zone has a problem — usually a drainage issue, occasionally a stem buried too deep in cold soil.
Watering Tomatoes in Containers
Watering is the single most frequent task for a potted tomato, and the rule is deep and infrequent rather than shallow and frequent. A 5-gallon pot in summer needs 1 to 1.5 gallons of water per day in peak heat, delivered in one morning watering rather than three light sprinklings. A light daily sprinkling wets only the top inch of soil and trains the tomato roots to grow upward toward the moisture — exactly the opposite of what you want. A deep daily watering pulls the moisture all the way through the pot, and the tomato roots grow downward to chase it, building a more drought-tolerant root system. Water in the morning so the foliage dries before nightfall (wet foliage overnight invites fungal disease), and water at the base of the plant rather than overhead — water on the leaves of a potted tomato in humid summer is the most common cause of early blight and Septoria leaf spot.
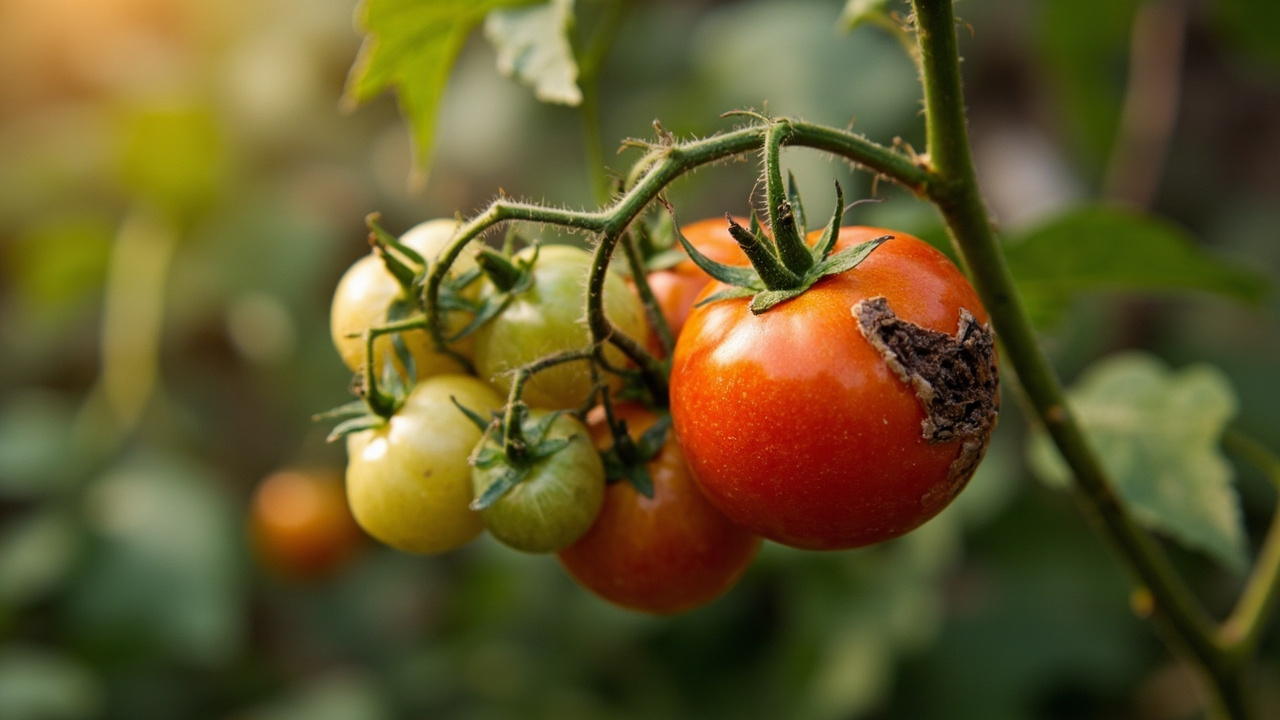
The failure mode to watch for: blossom end rot. The tomato fruit develops a black, leathery patch on the bottom (blossom end) when calcium cannot reach the developing fruit — usually because watering is inconsistent, not because the soil is calcium-deficient. A tomato in a pot that goes from bone-dry to soaking wet and back again develops blossom end rot within 2 to 3 weeks. Fix it by watering on a schedule, mulching the top of the pot with 1 inch of straw or wood chips to slow evaporation, and accepting that the affected fruit will not recover — the new fruit set after watering stabilizes will be clean. If your potted tomato is producing fruit with blossom end rot and you are watering daily, the problem is usually pot size (too small — the moisture swings are too fast) or drainage (too aggressive — water runs through before the roots can take it up).
Light, Temperature, and Fertilizer for Potted Tomatoes
Tomatoes need 6 to 8 hours of direct sun to set fruit, and a potted tomato on a patio that gets 4 hours of sun will produce leaves but no fruit. The honest limitation: a pot is mobile, and the single biggest yield booster for a potted tomato is moving it to follow the sun through the season — morning sun on the east side of the house in June, full sun on the south side in July and August, then back to the east side in September. Gardeners who plant a tomato in a pot and leave it in one spot for the whole season often conclude tomatoes “don’t fruit well in containers” when the actual problem is they picked a bad spot once and never moved the pot. If you cannot move the pot, choose the sunniest spot you have and accept 4 to 6 hours of direct sun as the realistic maximum — the tomato will produce, just less than its full potential.
Fertilizer schedule for a potted tomato: mix a balanced slow-release fertilizer (5-10-10 or 6-12-12) into the potting mix at planting, then begin liquid feeding 4 weeks after transplant with a water-soluble tomato fertilizer (typically 3-1-2 or 4-2-4 ratio) at half label strength every 7 to 10 days. The slow-release fertilizer handles weeks 1 to 4, the liquid feed handles weeks 5 onward. Stop liquid feeding 4 weeks before your expected first frost to let the plant harden off — late-season soft growth is more frost-sensitive than hardened growth. A potted tomato that gets no fertilizer after week 4 will produce leaves and 3 to 5 fruit before running out of nutrients and declining; one that gets weekly feeding through the season will produce its full yield potential. The trade-off with over-fertilizing: lush leaves and few fruit. If your tomato is huge and green with no flowers, cut the fertilizer in half — you are growing leaves, not fruit.
Pruning, Staking, and Supporting Potted Tomatoes
Stake or cage a potted tomato at planting time. The stake should be at least 4 feet tall for a determinate variety, 6 feet for a compact indeterminate, and 8 feet for a full-size indeterminate. Drive it at least 12 inches into the potting mix (or use a stake anchored to the pot rim with ties) so it does not tip as the tomato plant gains weight. Tie the main stem to the stake every 12 inches with soft plant tie or strips of old t-shirt — never wire, which cuts into the stem as it thickens. A potted tomato with no support will lean, snap at the crown under fruit weight, or fall over the pot rim within 6 weeks of first fruit set.
Pruning is optional but increases yield for indeterminate varieties in pots. Remove the suckers (the small shoots that grow in the joint between the main stem and a leaf branch) up to the first flower truss — these suckers become full stems that compete with the main stem for the limited root volume of a pot. Removing them concentrates the plant’s energy on the main stem and the fruit it sets. For a determinate variety in a pot, do not prune — the plant sets a fixed number of fruit and pruning reduces yield. For an indeterminate in a pot, prune suckers below the first flower truss only, and stop pruning once the plant has set 4 to 5 trusses (the plant needs its leaf surface to ripen fruit above that point). Expect the first ripe tomato 65 to 80 days after transplant for most varieties — earlier for small cherry types, later for large beefsteak types.
Common Problems with Tomatoes in Pots
The four problems that account for most failures with potted tomatoes are: blossom end rot (inconsistent watering), leaf curl (heat stress or herbicide drift), yellow lower leaves (nitrogen deficiency), and sudden wilting (root rot from overwatering or a pot too small for the variety). Each has a recognizable signature and a fix that does not require chemicals. Blossom end rot is a smooth black patch on the bottom of the fruit — fix by stabilizing watering and mulching the pot top. Leaf curl is leaves rolling upward along their length while staying green — usually heat stress, fix by moving the pot to afternoon shade for 2 to 3 days and watering deeply. Yellow lower leaves with green upper growth is nitrogen deficiency, fix with one application of balanced liquid fertilizer at half strength — the lower leaves will not turn green again, but the upper growth will stay green. Sudden wilting with wet soil is root rot — fix is to pull the plant, inspect the roots, and replant only if more than half the roots are still white.
The honest failure: a potted tomato that wilts and does not recover within 24 hours of deep watering has root rot, and root rot in a pot is almost always fatal. Prevention is the only cure — drainage holes, well-draining mix, water in the morning, empty the saucer after 15 minutes. If you keep losing potted tomatoes to sudden wilting, the problem is one of those four things, and the fix is mechanical, not chemical. For a complete rescue playbook on a dying potted tomato — including the same diagnostic steps in a recovery sequence — see the how to save a dying tomato plant guide.
Harvesting Tomatoes from Pots and What to Expect Next
Harvest tomatoes when they have developed full color but are still slightly firm — a tomato picked fully soft has already started breaking down on the vine and will not keep. The “shoulder test” works for most varieties: the area around the stem should be fully colored and slightly yielding to gentle pressure. Cherry tomatoes are best picked when they slip off the vine with a gentle twist. Beefsteak tomatoes are best picked when the bottom is fully colored even if the shoulders are still green — they will finish ripening on a kitchen counter at room temperature over 2 to 4 days, and a tomato that has already started to color on the vine has done most of its sugar development, so the off-vine ripening does not cost you flavor. Never refrigerate a fresh-picked tomato — cold temperature destroys the volatile compounds that give a tomato its flavor, and the tomato becomes mealy within hours.
After harvest, the potted tomato has two paths. A determinate variety that has finished its crop is done — pull the plant, empty the pot, and refresh the potting mix for the next season (old mix loses structure and fertility after one tomato crop). A compact indeterminate that is still flowering in late summer can be moved indoors before first frost and kept producing for another 4 to 8 weeks on a south-facing window — the yield will be lower than outdoor, but a fresh tomato in November from a pot you carried inside is worth the effort. Once the plant finishes indoors, pull it and start the next cycle. Expect to refresh the potting mix every year — reusing old mix for a second tomato season invites root rot and nutrient deficiency in the new plant. For ongoing variety-specific watering adjustments through the season, the tomato watering guide covers the schedule in detail.
Turn PDF Bank Statements Into Workable Spreadsheets
Your bank statement is a mess of numbers, but your books shouldn't be. Use our converter to get Excel, CSV, or QBO files — ready for QuickBooks.