A ZZ plant (Zamioculcas zamiifolia) is one of the easiest houseplants to keep alive, but the watering is where most people get it wrong. They either water on a schedule that ignores the soil, or they panic the moment a leaf looks thirsty. Both responses come from treating the ZZ like a plant that wants regular drinks. It does not.
The honest rule is simple: water thoroughly, then let the soil dry out almost completely before you water again. That single habit solves about 90% of the watering problems people run into with this plant.
This page walks through what that actually means in practice — how to test the soil, how to read the leaves, what to do in winter versus summer, and what to avoid at all costs. By the end, you should be able to water a ZZ with confidence instead of guessing.
What a ZZ Plant Wants From Watering
ZZ plants evolved in dry, rocky soils in East Africa. Their rhizomes (those potato-like structures under the soil) store water for long stretches. This is the most important fact about watering a ZZ: it is built to survive drought, and it is much more sensitive to excess water than to a forgotten watering day.
What that means in practice is that the plant tolerates underwatering far better than overwatering. A missed watering shows up as a slightly droopy leaflet, and the plant recovers in a day or two after you water it. An overwatered ZZ, on the other hand, develops root rot in the rhizome, which is much harder to come back from.
If you take only one thing from this guide, let it be this: when in doubt, wait another week. The rhizome will hold the plant over. Standing water in the pot will not.
How to Tell When a ZZ Plant Actually Needs Water
Forget the calendar. The reliable test is in the soil itself. Stick a wooden chopstick or your finger about 2 inches (5 cm) into the soil. If it comes out with damp soil clinging to it, do not water. If it comes out dry and mostly clean, it is time.
For a small pot in average indoor conditions, that usually means watering every 2 to 3 weeks in summer and every 3 to 4 weeks in winter. But pot size, light, and humidity all change the actual interval, which is why the soil test matters more than the schedule.
There are also visual cues. Slightly wrinkled or soft leaflets on a few stems, especially lower ones, often mean the plant is using its rhizome reserves and could use a drink. But wait for the soil to confirm. Wilted-looking leaves combined with wet soil point to root rot, not thirst.
What happens after a thorough watering: the leaves firm back up within 24 to 48 hours. If they stay limp even though the soil is moist, the problem is not watering — it is the roots.
How to Water a ZZ Plant the Right Way
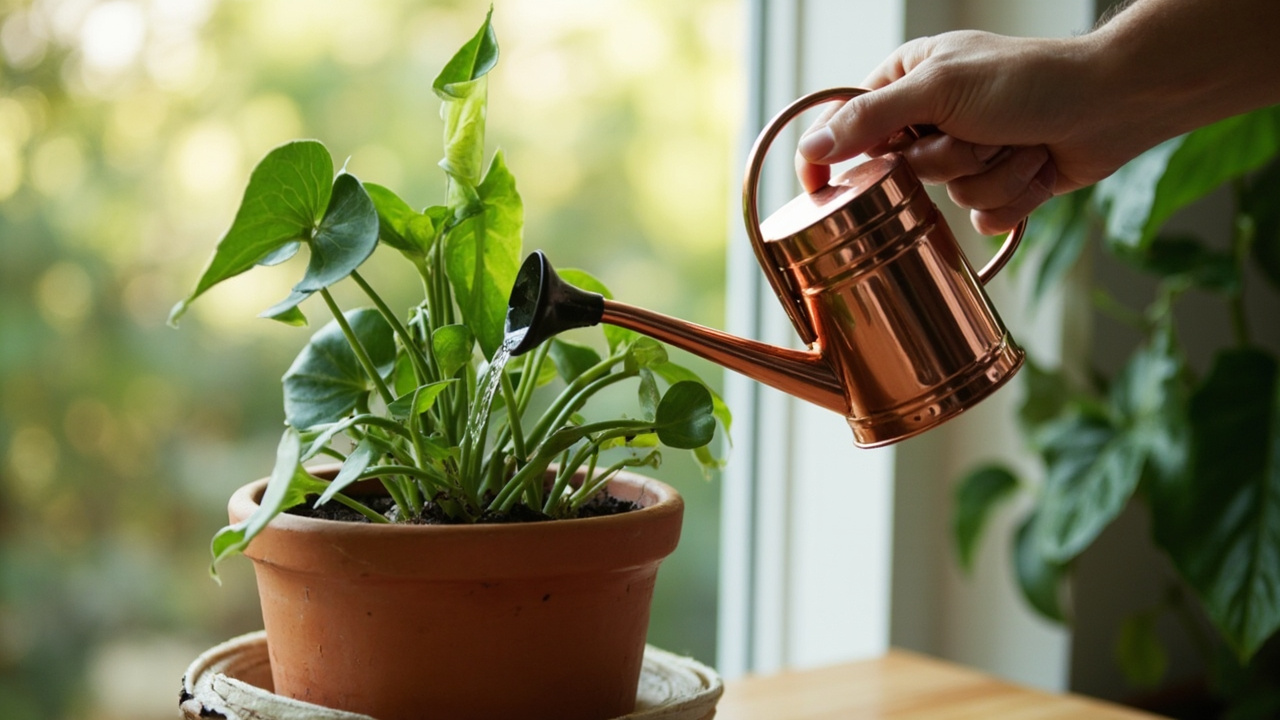
When the soil test says go, water deeply. Pour slowly at the base of the stems until water runs out of the drainage hole at the bottom of the pot. That deep drink encourages the roots to grow down, which makes the plant more stable and more drought-tolerant over time.
After watering, let the pot drain for a few minutes. Then empty the saucer. A ZZ sitting in a saucer full of water is the most common cause of root rot, and it is the easiest mistake to avoid. If you tend to forget, use a pot with a deep saucer you can check, or set the pot on pebbles so the drainage hole never touches standing water.
Top watering versus bottom watering both work. Bottom watering (setting the pot in a few centimeters of water and letting the soil wick it up) is useful if the soil has dried out and shrunk away from the sides of the pot. Top watering is fine for routine use and is what most people do. The key is the same either way: water thoroughly, let it drain, and let the soil dry before the next round.
For water type, ZZ plants are not picky. Tap water is fine in most areas. If your tap water is very hard or heavily chlorinated, leaving it out overnight before using it is a small kindness but rarely essential. The plant will tolerate average tap water for years.
Common Watering Mistakes With ZZ Plants
The first mistake is watering on a fixed weekly schedule. A ZZ in a bright window in summer uses water very differently from a ZZ in a low-light corner in winter. Schedules ignore that. The soil test does not.
The second mistake is watering a little bit at a time. Shallow, frequent sips keep the surface of the soil moist while the deeper roots stay dry. That encourages weak root growth and can lead to salt buildup on the surface. Soak the soil deeply, then leave it alone.
The third mistake is leaving the pot in a saucer of standing water. Even an inch of standing water at the base of the pot will, over time, suffocate the roots and invite rot. Drainage and emptying the saucer are not optional.
The fourth mistake is treating every yellow leaf as a watering signal. Yellowing on a ZZ is more often a sign of overwatering than underwatering. If the leaves are yellow and the soil is wet, the answer is to let the soil dry out fully, not to add more water. For a deeper look at yellowing causes and fixes, the why is my ZZ plant turning yellow page is the next read.
Watering in Winter and in Low Light
In winter, the plant uses less water because growth slows and daylight shortens. The soil also dries out more slowly because the air tends to be cooler. A typical indoor ZZ may only need water every 3 to 4 weeks in winter, and sometimes even longer if the room runs cool.
If your ZZ is in a low-light spot, expect to water even less. Plants in low light photosynthesize less, grow less, and drink less. A ZZ tucked into a hallway corner can easily go a month or more between waterings during the cooler months.
Watch for one specific cold-weather mistake: watering a plant that is sitting in a cold draft. Cold wet soil is the fastest path to root rot. If your ZZ is near a window that gets chilly at night, move it back from the glass in winter, or wait for a warmer day to water. For more on this, the ZZ plant temperature tolerance page has the specifics on cold stress.
What to Do If You Have Overwatered
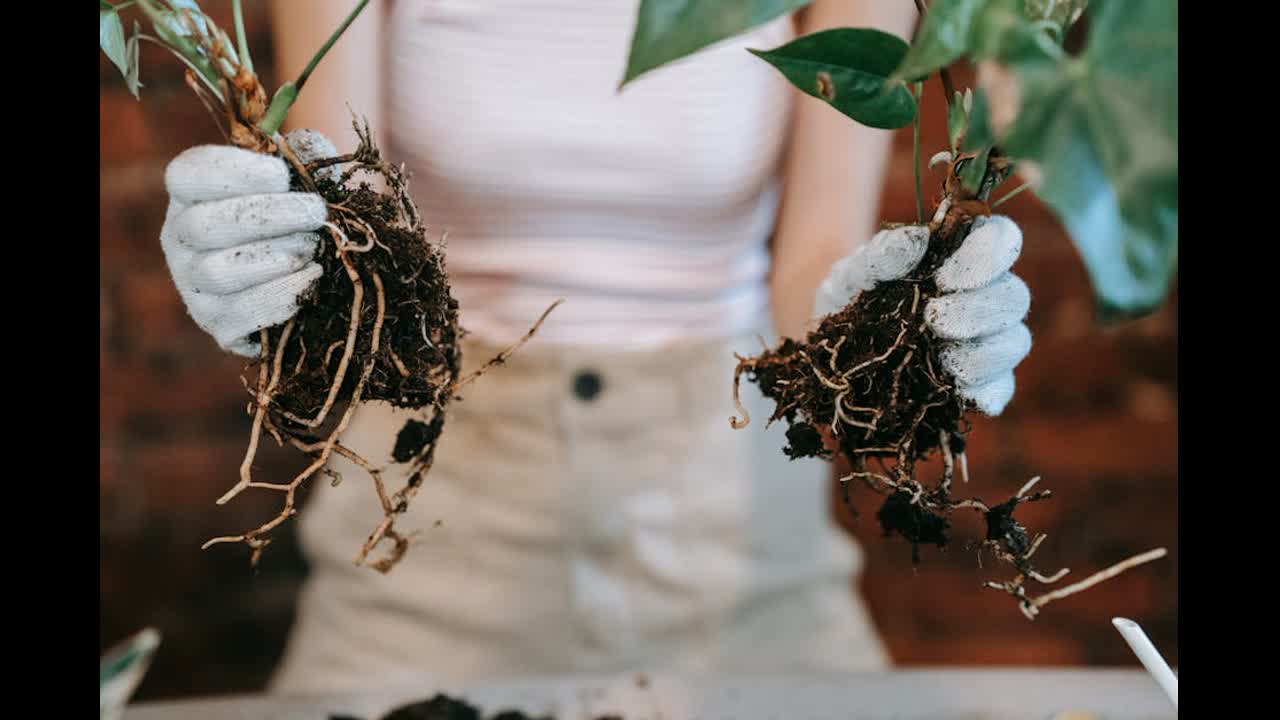
If the soil has been wet for a long time and the plant is starting to yellow, drop leaves, or smell faintly sour at the base, root rot is the likely cause. The honest truth is that recovery is not guaranteed, but acting fast improves the odds.
Take the plant out of its pot, shake off the wet soil, and inspect the rhizomes. Healthy rhizomes are firm and pale. Rotted ones are soft, dark, and may collapse when you squeeze them. Cut away anything that looks or feels rotted with a clean knife, leaving only firm tissue. Let the cut rhizomes air-dry for a few hours so the cuts callus over, then repot in fresh, dry, well-draining soil. Do not water for at least a week after repotting, and treat it as a stressed plant until you see new growth.
This is also where a well-draining soil mix earns its keep. Standard houseplant soil holds too much water for a ZZ. A mix with plenty of perlite, pumice, or coarse sand dries out faster and gives the roots air. If you want a soil recipe that works, the complete ZZ plant care guide walks through the mix I use, and the light requirements page covers how light and watering interact.
What to Do If You Have Underwatered
An underwatered ZZ is actually an easy fix. The signs are soft, slightly wrinkled leaflets, sometimes on a few stems at a time, and bone-dry soil. Water thoroughly until it drains from the bottom, then let the soil dry out and resume your normal wait-until-dry cycle.
The plant will usually firm up within a day or two. The lower leaves that wrinkled the most may not fully recover, but new growth will replace them over time. There is no need to compensate by overwatering afterward — return to the wait-until-dry rhythm and the plant will settle in.
The Short Version
Water thoroughly when the soil 2 inches (5 cm) down is dry, let the pot drain fully, and never let the pot sit in standing water. In summer that might be every 2 to 3 weeks. In winter it might be every 3 to 4 weeks or longer. When in doubt, wait.
That single rule — wait for the soil to dry, then water deeply — is the entire watering job. If you want to go deeper into the broader care routine, the ZZ plant care guide is the place to start, and if a problem is already showing up the common problems page is the diagnostic hub.