Stem cuttings outperform seed by a wide margin for flavor, and the only practical reason to start oregano from seed is volume.
A cutting is a clone — same root system, same leaf chemistry, same carvacrol and thymol content as the parent plant. NC State Extension notes that seed-grown oregano often has little to no aroma because Origanum vulgare is open-pollinated with significant genetic variation; seeds germinate readily but the resulting plants vary unpredictably in oil content. Three methods actually work for home gardeners, ranked: stem cuttings for flavor and genetic fidelity (10–15 per plant per season), division for speed on established clumps (3–6 divisions, also rejuvenates woody centers), seeds only when you need volume cheaply.
Our oregano plant care guide covers what to do with new plants once they are rooted; this guide covers how to produce them.
Stem Cuttings — Step by Step
Timing matters. Take oregano cuttings in late spring or early summer when the plant is in active growth and stems are flexible but not soft. Early morning is ideal — the stems are fully hydrated and the plant has maximum energy reserves. Choose non-flowering stems: cuttings taken from flowering stems root poorly because the plant has shifted energy from vegetational growth to reproduction. Look for stems that are bright green, firm, and at least 10 cm (4 inches) long with several pairs of leaves.
Step one: make a clean cut just below a node — the point where leaves attach to the stem — using sharp scissors or a razor blade. The node is where roots will emerge, and a clean cut heals faster than a crushed or torn one. Step two: remove the lower 2-3 sets of leaves to expose 2-3 bare nodes. This is the rooting zone. Step three: optionally dip the cut end in rooting hormone powder or gel (IBA at 0.1-0.3%). Rooting hormone is not essential for oregano — it roots readily without it — but it speeds root initiation by 3-5 days and increases success rates from roughly 85% to 95%. Step four: insert the cutting into your rooting medium, burying at least one node.
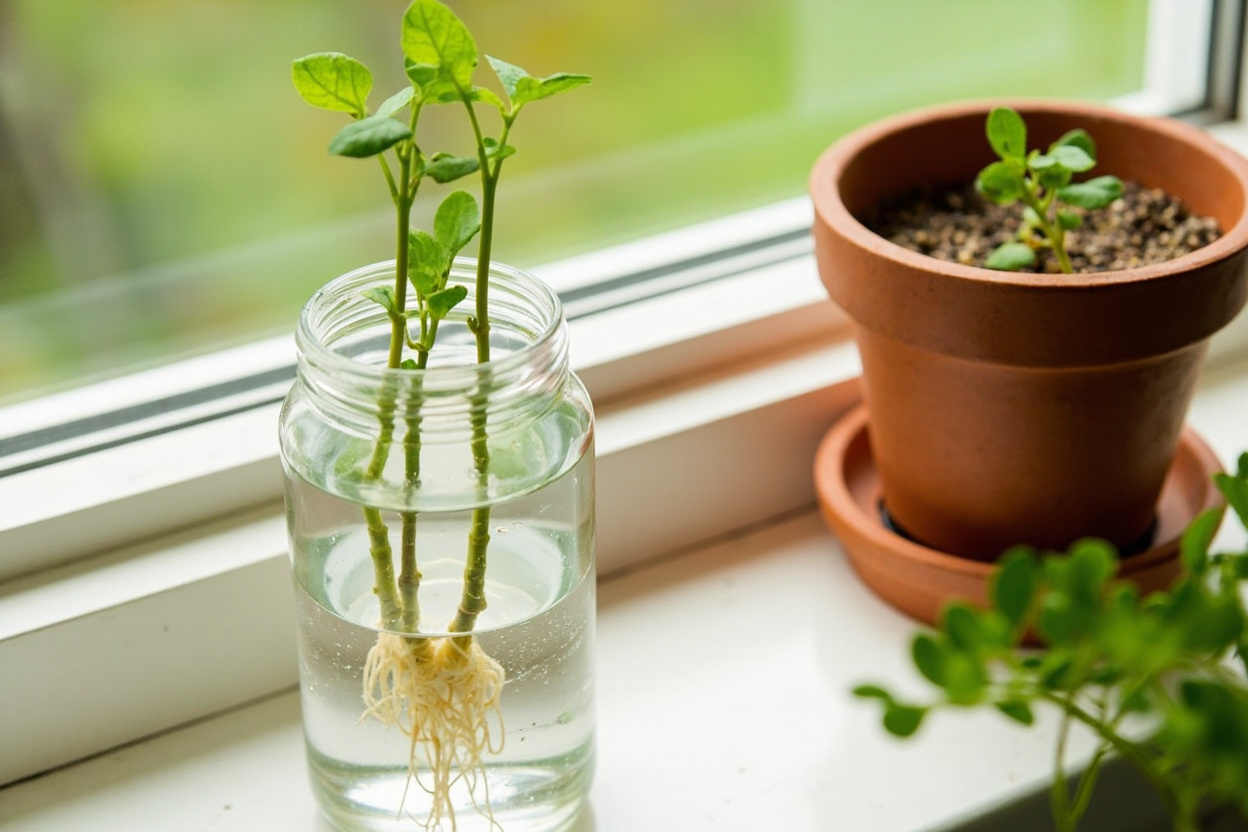
You have three rooting medium options, each with trade-offs. Water is the simplest: place the cutting in a glass of room-temperature water with at least one node submerged. Change water every 3-4 days. Roots appear in 10-18 days. The downside: water roots are fragile and must adapt to soil after transplant. Perlite and peat (1:1) is the professional standard: moisten the medium, insert the cutting, and cover with a clear plastic bag or dome to maintain humidity. Roots appear in 14-21 days. Straight coarse sand is the lowest-maintenance option: it drains well, resents fungal growth, and produces sturdy roots. Keep any medium lightly moist — never wet. Soggy medium causes stem rot before roots form.
During rooting, place cuttings in bright indirect light — an east-facing windowsill or a spot 1-2 feet from a south-facing window. Direct sun will overheat the cutting and cause wilting before roots can form. Maintain humidity around 70-80% if using a soil-based medium; the plastic bag dome handles this automatically. Remove the dome for 10 minutes daily to prevent fungal buildup. Roots are ready when you see white roots emerging from the nodes and new leaf growth at the cutting tip — typically 2-3 weeks.
Division — Multiplying Established Clumps
Division is the right method when your oregano is three or more years old, the center has become woody and unproductive, or you simply want more plants from one. The best time is early spring, just as new growth emerges from the base — typically March in zones 7-8, April in zones 5-6. The plant is exiting dormancy, root growth is accelerating, and divisions establish quickly.
Start by watering the plant lightly the day before division — moist soil holds together better than dry. Dig up the entire clump with a garden fork, keeping as much root mass intact as possible. Shake off excess soil so you can see the natural divisions: oregano clumps typically separate into 3-6 sections, each with its own root system and growing points. Pull the clump apart by hand where it naturally separates, or use a sharp knife or spade through tough root masses. Each division should have healthy white roots and at least 3-4 growing stems. Discard the woody center if it has no active growth.
Replant divisions immediately at the same depth they were growing before — burying the crown deeper invites rot. Water once to settle the soil, then treat the plant as established: do not water again until the top 5 cm (2 inches) of soil is dry. Divisions recover quickly — you will see new growth within 2-3 weeks, and the plant is harvestable within 4-6 weeks. Unlike cuttings, divisions do not need a rooting phase; they are already full plants, just smaller.
The rejuvenation benefit is significant. Oregano plants that have become woody and sparse at the center produce dramatically more new growth after division. The discarded woody center is replaced by vigorous young growth from the outer sections. Plan to divide every 3-4 years as routine maintenance, even if you do not need more plants — it keeps the parent plant productive and delays the inevitable decline.
Seed Starting — When and How to Grow Oregano from Seed
Growing oregano from seed comes with an important caveat: the resulting plants will not reliably match the flavor of the parent. Origanum vulgare is open-pollinated, and seed-grown plants show significant variation in carvacrol content. Some will be excellent; some will be bland. If flavor consistency is your priority, propagate from cuttings instead. Seeds are appropriate when you need many plants for ornamental use, ground cover, or a kitchen garden where perfect flavor is not critical.
Start seeds indoors 6-8 weeks before your last expected frost date. Oregano seeds need light to germinate, so surface-sow them: press the tiny seeds onto moist seed-starting mix and do not cover them, or cover with a very thin layer of vermiculite no deeper than 1 mm. Mist the surface with water. Maintain soil temperature at 20-22°C (68-72°F) — a heat mat helps in cool conditions. Germination takes 8-14 days. Once seedlings emerge, remove any covering and move the tray to bright light: a south-facing windowsill or a grow light positioned 5-8 cm (2-3 inches) above the seedlings on a 16-hour timer.
Thin seedlings when they have two sets of true leaves, keeping the strongest plants at 2-5 cm (1-2 inch) spacing. Overcrowded seedlings become leggy and weak. Water from below by pouring water into the tray rather than overhead — this prevents damping-off fungus, which kills seedlings at the soil line. When seedlings have 4-6 true leaves and are 5-8 cm (2-3 inches) tall, transplant them into individual pots with lean, well-draining mix. Our oregano varieties guide covers which cultivars are worth growing from seed versus which should be cloned from cuttings.
Harden off seedlings before transplanting outdoors: over 7-10 days, gradually increase their exposure to direct sun and outdoor temperatures. Plant outdoors after all danger of frost has passed and soil temperature reaches 15°C (60°F). Space plants 20-30 cm (8-12 inches) apart. First harvest is possible 8-10 weeks after transplanting outdoors, once the plant has established roots and shows active new growth.
Troubleshooting — When Cuttings Fail
Most propagation failures come down to three correctable mistakes. Cutting rotted at the base means the medium was too wet or the stem was damaged during cutting. Use a sharper blade, let the cut end callus for 1-2 hours before inserting, and ensure the medium drains freely. Cutting wilted and shriveled means too much light or too little humidity. Move to bright indirect light and cover with a humidity dome. Cutting grew a callus but no roots after 3 weeks means the cutting lacked a node, was taken from old woody growth, or was rooted in temperatures below 18°C (65°F).
The most common structural mistake is taking a leaf without a node. Oregano cannot root from a leaf alone — it needs stem tissue with at least one node, which contains the meristematic cells that produce roots. If you propagate from a stem that has only old, brown wood at the base, rooting will be slow or fail entirely. Always take cuttings from the current season’s green growth, ideally from the outer sections of the plant where growth is most vigorous.
Seasonal timing also affects success rates. Cuttings taken in late spring and early summer root fastest because the parent plant is in peak vegetative growth. Cuttings taken in late autumn or winter — when the plant is dormant or semi-dormant — root slowly or not at all. If you need to propagate in autumn, bring a parent plant indoors to a bright, warm location two weeks before taking cuttings to break dormancy. Our save dying oregano guide covers emergency propagation when the parent plant is in decline and you need to rescue genetics before it dies.
If cuttings consistently fail despite correct technique, the parent plant may be the problem. Oregano that has been over-fertilized produces soft, sappy growth that rots easily. Oregano that has been overwatered may have early root rot that is not yet visible. Take cuttings from the healthiest, most compact growth on the plant, and consider whether the parent plant needs the corrective care described in our oregano light and watering guide before you attempt propagation.
From PDF to Excel in one click
Forget retyping line by line. Upload any bank statement, get a spreadsheet you can actually use. Your files are never stored, and you can test the converter with 3 free conversions.
Try it free