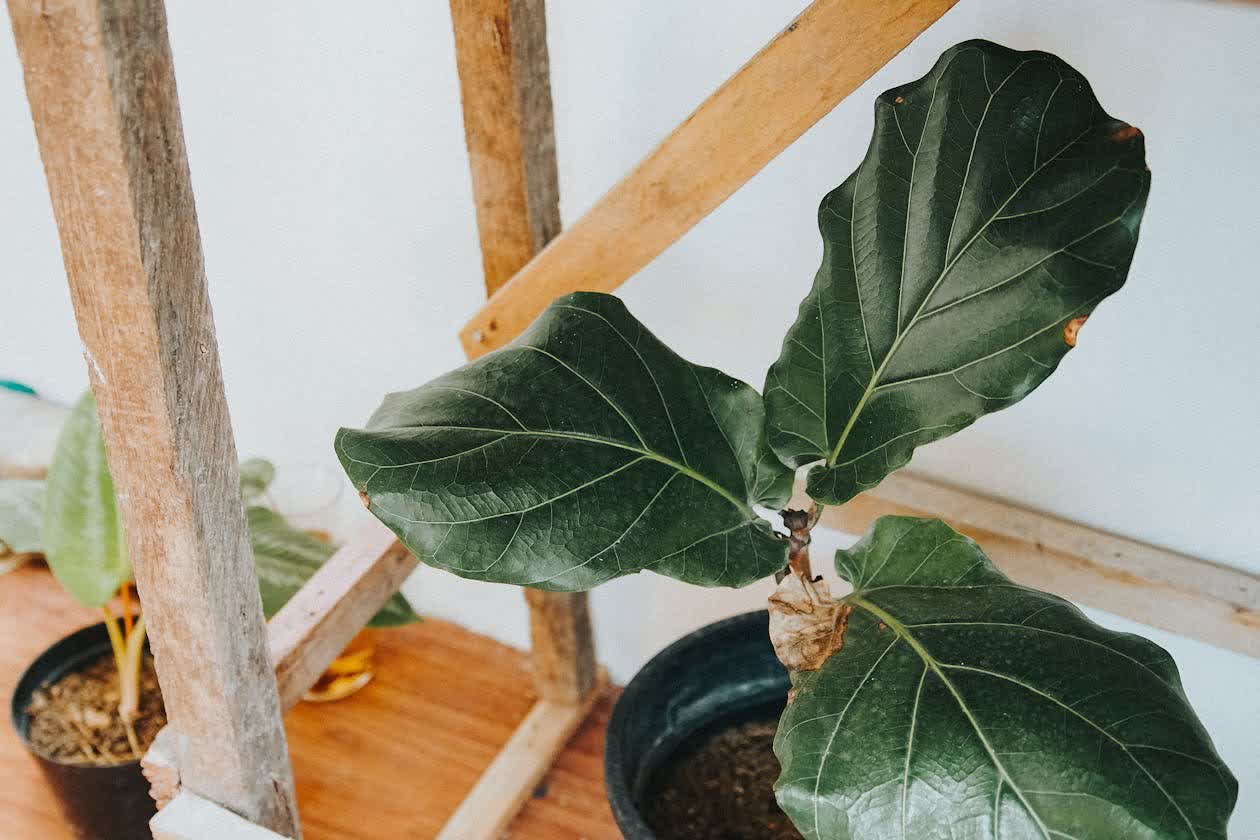
You’ve tried to propagate a fiddle leaf fig before. You cut a stem, put it in water, watched it do nothing for two months, and then the cutting turned black. It wasn’t your fault. Most guides just tell you to cut “a stem” and hope. But fiddle leaf fig propagation success comes down to one thing: which node you cut below.
The node is where the leaf meets the stem — it’s a joint, a ridge, a slightly swollen section. That’s where the dormant growth buds sit, and that’s where new roots will form if given the right conditions. Cut below a node with at least one healthy leaf above it, and you’ve set yourself up for success. Cut in the middle of a stem section with no node exposed, and no amount of rooting hormone will save it.
Why Water Propagation Works Better for First-Timers
You can root fiddle leaf fig cuttings in soil or in water. Both work, but water propagation has one major advantage for beginners: you can see the roots developing. With soil propagation, you’re guessing what’s happening underground until you gently excavate the cutting weeks later — usually at the worst possible moment. Water propagation shows you exactly when roots appear, how fast they’re growing, and when it’s time to move the cutting to soil.
The trade-off is that water roots are different from soil roots. They develop faster and are more fragile — adapted to life in water rather than soil. When you eventually move a water-rooted cutting to soil, the plant needs a transition period. If you plant a water-rooted cutting directly into dry soil without adjustment, the roots can shock. More on how to handle that transition in Step 5.
The Timing Question
Spring and early summer are ideal for fiddle leaf fig propagation. The plant is actively growing, which means the cutting has the energy reserves to push roots rather than just sitting there. A cutting taken in December might technically survive, but it will root much slower and is more likely to rot before doing so.
That said — if you have a fiddle leaf fig that’s about to be thrown out because of a disease or severe damage, propagate immediately regardless of season. A desperate cutting taken today in proper conditions will often outperform a lazy cutting taken in optimal season.
What to Cut: The Node-by-Node Method
The node is only half the picture. Once you know where to cut, you still need to decide which part of the vine gives you the best cutting — one that has enough stored energy, enough dormant buds, and enough structural integrity to survive rooting. Here is what to look for before you make the cut.
Identifying the Right Cutting
Look at your fiddle leaf fig and identify a stem section that has at least one healthy node with a leaf attached. The node is where the petiole — the little stalk that holds the leaf — meets the main stem. At that junction, you’ll feel or see a slight swelling. That’s the node. You want at least one, preferably two or three nodes visible below where you plan to cut, and one or two healthy leaves above the cut.
The cutting should be 6–12 inches long. Shorter than 6 inches and the cutting lacks enough stored energy to push roots before running out of steam. Longer than 12 inches and the cutting loses water faster through its leaves than it can replace through roots.
A cutting with 2–3 leaves is easier to manage than one with only 1 leaf, because you can always trim a leaf in half to reduce moisture loss. A single-leaf cutting can work but is slower and more fragile — I’d avoid it unless you’re propagating a rare variegated form where every leaf counts.
The Cut Itself
Use clean, sharp scissors or a blade. Disinfect with rubbing alcohol between cuts if you’re working with multiple plants. Cut horizontally across the stem about 1 inch below a node. Not at an angle — flat cut. The flat cut gives the maximum surface area for root emergence at the node site.
Remove the lowest leaf closest to the cut — the one that would sit below the water line. Leave the other leaves intact. If the remaining leaves are very large, cut each one in half across the width — this reduces water loss through transpiration, which is critical in the early weeks when there are no roots to replace lost moisture.
Rooting the Cutting: Water Method
Step 1: Prep the Cutting
Immediately after cutting, wipe the cut end with a clean, damp cloth. No need for rooting hormone for water propagation — it’s optional and not strictly necessary if the cutting is healthy and the conditions are right. If you use it, dip the bottom half inch in rooting hormone and tap off any excess powder before placing in water.
Step 2: Set Up the Container
Use a clear glass jar — a mason jar, test tube, or drinking glass. Fill with room-temperature water, enough to submerge the bottom node but not the leaves. Tap water works fine for most areas, but if your tap water is heavily chlorinated, let it sit uncovered for 24 hours first. Chlorine can slow root development.
Place in bright indirect light. Not direct sun — the glass container can heat up and cook the developing roots. A spot near an east or west window with filtered light is ideal. Change the water every 3–4 days, replacing with fresh room-temperature water each time. Between changes, the water will go slightly cloudy — that’s normal from the wound surface and the cutting’s own metabolism.
Step 3: Wait for Roots to Appear
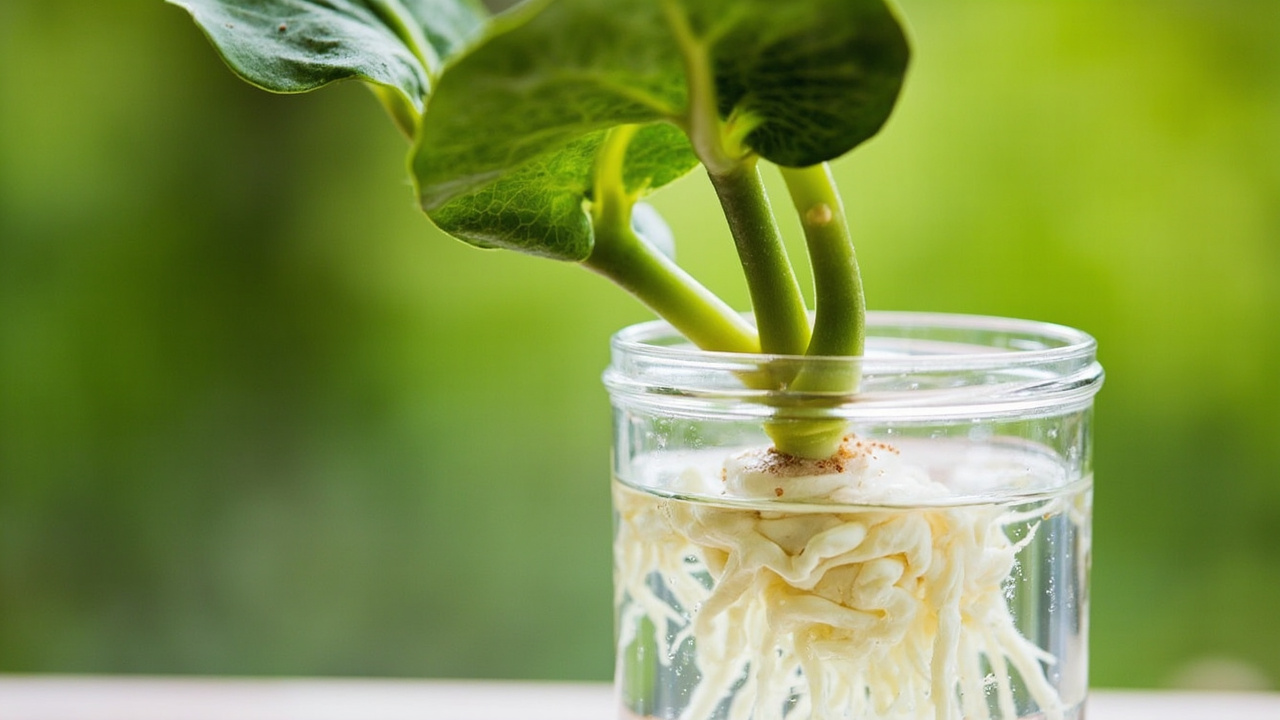
Within 2–4 weeks in active growing season, you should see small white bumps forming at the node sites — these are root initials. Within another 2–4 weeks, those bumps develop into visible roots 1–2 inches long. The exact timing depends on temperature and light. The warmer and brighter, the faster. If you’re in a cool room below 65°F (18°C), root development slows significantly or stops.
What happens next: when the roots reach about 2 inches and you have at least 3–4 distinct root branches, it’s time to move to soil. Don’t wait until the roots are 5 inches long — long water roots that get tangled are harder to transfer successfully.
Moving to Soil: The Transition That Makes or Breaks Rooted Cuttings
Step 4: The Soil Mix
Use the same mix you’d use for an adult fiddle leaf fig — well-draining but moisture-retentive. Standard indoor potting mix amended with perlite works well: roughly 70% potting mix to 30% perlite. Avoid straight perlite or very fast-draining mixes for newly potted cuttings — the roots haven’t developed the root hairs that make efficient use of fast-draining soil yet.
Use a small pot — 4 to 6 inches is plenty for a single cutting. The cutting needs to establish in soil that dries out at a moderate pace. Too-large a pot means the soil stays wet for weeks and the roots rot before they can take hold.
Step 5: Planting the Rooted Cutting
Fill the pot with dampened soil (moisten it first, then drain), make a small hole with your finger, and gently place the rooted cutting in. The roots should sit in the hole without excessive bending or compaction. Backfill gently — firm the soil just enough to hold the cutting upright.
Do not water immediately. The soil is already damp, and the roots need a few days to adjust from water to soil before dealing with a saturated environment. Water lightly after 4–5 days, then resume normal watering only when the top 2 inches feel dry.
Step 6: The First Month in Soil
Expect the cutting to look a little shocked for the first 2–3 weeks — possibly a bit droopy, possibly a lower leaf yellowing and dropping. This is normal. The plant is redirecting its energy from root growth to leaf and stem production. As long as the new leaves are still turgid and the stem feels firm, the cutting is establishing.
Keep the cutting in the same spot it rooted in — bright indirect light, no direct sun. Maintain the same temperature range. Once you see new leaf growth at the apex, the cutting has successfully established in soil and can be treated as a normal plant.
Common Propagation Problems and How to Fix Them
Three failure patterns show up most often: the cutting that will not root at all, the one that turns black at the base, and the rooted cutting that collapses after going into soil. Each has distinct causes and fixable causes. The fix only works if you identify which one you are dealing with.
The Cutting Isn’t Rooting at All
If four weeks pass with no root initials showing, the most common causes are temperature too low, light too weak, or the cutting was taken from a non-growing part of the plant. Check the room temperature — below 65°F (18°C) root development stalls. Try moving to a warmer spot. Also check that the cutting has at least one viable node below the cut. If the cutting was taken from old wood with no node exposed, it cannot root.
Another issue: the water got too stale. Change it every 3–4 days regardless of how it looks.
The Cutting Turned Black at the Base
This is usually rot from too much moisture or the cut end sitting in water that’s too cold. If the blackened area is small, trim it back to clean white tissue with a sterile blade, let the cut air-dry for 30 minutes, and start again with fresh water in a clean container. If the entire stem below the node is black and soft, that cutting is done — take a new one.
Why the Leaves Are Dropping on a Rooted Cutting
A rooted cutting using its stored energy to support leaves while establishing new roots will sometimes drop a leaf or two. This is normal if the stem stays firm and green. If the stem gets soft or the leaves turn black before dropping, that’s rot — address it as described above.
For more on diagnosing what is going wrong with your fiddle leaf fig before propagation, see our fiddle leaf fig problems guide. And for full care details before you start, our fiddle-leaf fig care guide has everything you need to know about light, water, and ongoing maintenance.
From PDF to Excel in one click
Forget retyping line by line. Upload any bank statement, get a spreadsheet you can actually use. Your files are never stored, and you can test the converter with 3 free conversions.
Try it free