Chlorosis is the word plant care guides use when a leaf has turned yellow but they do not always explain what it means, why it happens, or how to fix it. The result is that most people see chlorosis and panic — they assume the plant is dying, they overcompensate with fertiliser or more water, and they make the problem worse. Here is a clear, practical breakdown of what chlorosis actually is and what to do about it.
What Chlorosis Is
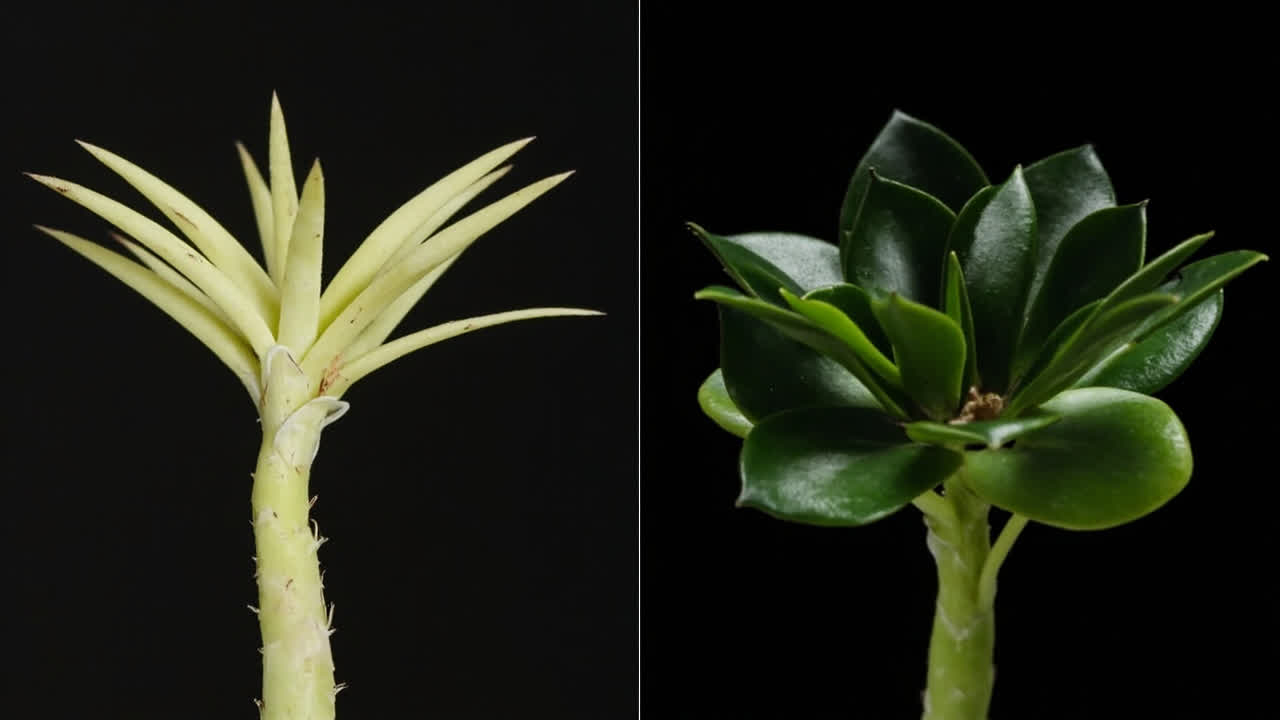
Chlorosis is the technical term for a loss of chlorophyll — the green pigment in plant cells that enables photosynthesis. Chlorophyll is what makes leaves green. When a leaf loses chlorophyll, it turns yellow. This is chlorosis. The yellow colour itself is not the disease; it is the visible symptom of something interrupting the plant’s ability to produce or maintain chlorophyll.
Chlorosis is not a diagnosis. It is a description of a symptom that can be caused by many different underlying factors. The treatment for chlorosis depends entirely on what is causing it. Treating chlorosis without knowing the cause is like taking pain relief without knowing what is causing the pain — it may reduce the symptom while the underlying problem continues.

The Different Types of Chlorosis and What Each Means
Interveinal chlorosis — yellowing between the leaf veins while the veins stay green.
This is the most recognisable pattern and is typically caused by a deficiency of iron (iron chlorosis) or manganese. The leaf veins remain green because these nutrients are mobile — the plant concentrates what it has at the growing points and veins, and the tissue between them loses colour first. Interveinal chlorosis typically appears on the newest leaves first — the growing tip — because that is where the plant’s limited iron supply is directed.
In alkaline soils and potting mixes — common in many commercial potting composts — iron and manganese become less available to plant roots even when they are present in the soil. This is called induced deficiency. The soil has the nutrients but the pH locks them out. The fix is often a foliar iron spray, which bypasses the soil pH issue entirely, applied directly to the affected leaves.
General chlorosis — the entire leaf turns yellow uniformly.
This pattern typically indicates a nitrogen deficiency. Nitrogen is the most mobile nutrient in plants — the plant moves it from older leaves to newer growth when supply is limited. The result is that the oldest leaves at the base of the plant yellow first while the newer leaves at the tip remain green. This is sometimes called “bottom-up chlorosis” as a memory aid.
General chlorosis from nitrogen deficiency is fixed by applying a balanced liquid fertiliser or a nitrogen-rich fertiliser. The plant recovers visibly within two to three weeks — the new growth comes in green and the yellowing stops spreading upward.
Chlorosis starting from leaf tips and margins — burning and yellowing together.
If the leaf yellows from the tip inward and the margin turns brown and crispy while the base of the leaf stays green, the cause is usually one of three things: fluoride or salt burn from tap water or over-fertilising, excessive heat or direct sun exposure, or potassium deficiency. This pattern is distinct from the interveinal and general patterns — the margins and tips are the damaged part, not the whole leaf.
Fluoride sensitivity is common in a number of houseplants, including Dracaena, Spathiphyllum (Peace Lily), and Cordyline. If the leaf tips and margins of your plant are browning and yellowing while the rest of the leaf looks okay, switch to filtered or rainwater for watering and reduce fertiliser concentration.
Chlorosis in the oldest leaves — bottom of the plant, always the lowest leaves.
One or two yellowing leaves at the base of the plant while the rest looks perfectly healthy is almost always natural leaf senescence — the plant is simply shedding its oldest leaves as part of normal growth. This is not chlorosis in the problematic sense. It is a normal lifecycle event. The leaf is at the end of its functional life and the plant reabsorbs what nutrients it can before dropping the leaf.
Environmental Causes of Chlorosis
Nutrient deficiency is one category. Environmental conditions are the other major category of chlorosis causes:
Overwatering and poor drainage. When the roots are oxygen-deprived, the plant cannot take up nutrients efficiently even when those nutrients are present in the soil. The result is chlorosis that looks like a nutrient deficiency but does not respond to fertiliser — because the problem is not a lack of nutrients in the soil but an inability of the roots to absorb them. Fix the root environment first.
Underwatering. Severely drought-stressed plants also develop chlorosis — the leaf yellows as the plant conserves resources by shutting down less-critical tissue. Underwatering chlorosis is usually accompanied by crispy, dry leaf edges and a dry, contracted soil surface.
Root bound. When a plant has been in the same pot for too long and the roots have circled and compressed the soil into a dense mass, water and nutrients cannot penetrate the root ball effectively. The plant shows chlorosis and general decline despite being watered and fertilised. The fix is repotting into a larger container with fresh soil.
How to Diagnose and Fix Chlorosis
Work through this checklist every time you encounter chlorosis:
Step 1 — What pattern is the yellowing? Interveinal on new leaves = iron/manganese deficiency. Uniform on old leaves = nitrogen deficiency. Tip and margin burn = fluoride/salt/heat stress.
Step 2 — Check the soil moisture. Soggy soil = overwatering as the root cause. Bone dry = underwatering. Normal moisture + good drainage + still chlorotic = move to Step 3.
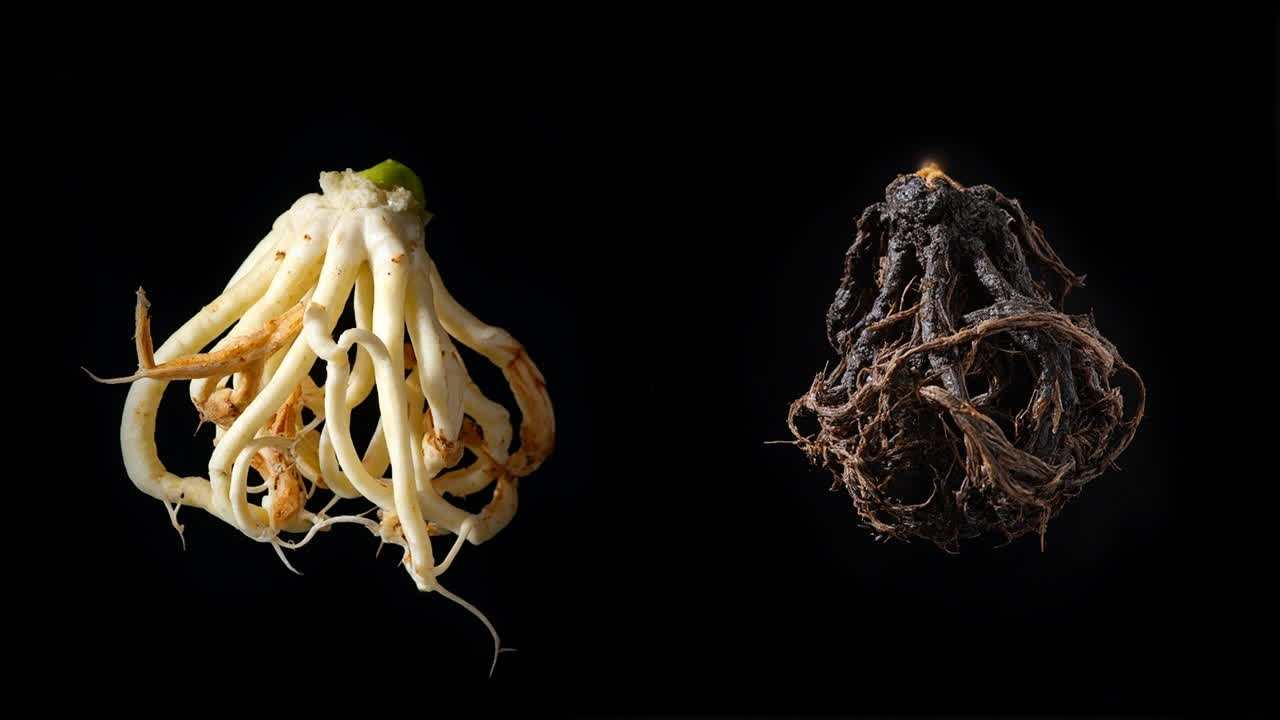
Step 3 — Check the roots. Remove the plant from the pot and examine the roots. If they are brown, mushy, and smell bad = root rot causing nutrient lockout. If they are circling the pot = root bound causing nutrient lockout. If they look healthy and the soil is okay = move to Step 4.
Step 4 — Test and treat for nutrient deficiency. If the plant is not root-bound and not overwatered, apply a balanced liquid fertiliser at half strength. If interveinal chlorosis is present, apply a foliar iron spray as well. Observe for improvement in two to three weeks.
For chlorosis specifically on Dracaena and other tropical houseplants, the root rot guide and the soil guide cover the most common underlying causes in those species.