
A leggy jade plant with a thick, woody stem is the easiest air layering job in any houseplant collection, because the cambium just under the bark is permanently ready to push adventitious roots whenever it is exposed to moisture and darkness during vegetative propagation.
Most jade cuttings fail in water because the same thick cane that gives the plant its bonsai look also resists rooting from a severed end. The wood is dense, the vascular plumbing is built to feed a tall trunk, and the cut surface sits in water long enough to rot before any root initials form.
That rot is the classic failure mode that makes water propagation unreliable as a clone method for thick woody stems, including Crassula ovata.
Air layering flips the sequence. You root the section you want to keep while it is still drawing water and energy from the mother plant, then sever it only after a white root mass has already formed inside the moss ball.
The result is a clone identical to the mother plant, propagated vegetatively without ever severing first. The same cambium mechanism works on rubber plant, fiddle leaf fig, dracaena, schefflera, dieffenbachia, money tree, magnolia, camellia, azalea, and holly (Ilex).
Why air layering is the most reliable method for a leggy jade plant
A jade plant (Crassula ovata) pushes new leaves from the apex during active growth in spring and summer, drops the lower leaves it no longer needs, and slowly converts a bushy starter plant into a tall, bare cane with a tuft of foliage at the top.
The same leggy pattern shows up on rubber plant (Ficus elastica), fiddle leaf fig (Ficus lyrata), and money tree (Pachira aquatica) once they pass the seedling stage.
Once the cane passes about one centimeter in diameter, stem cuttings from that section will sit in water or moist soil for weeks without rooting. The cut end calluses over with a callus layer, sometimes pushes a few pale bumps that never elongate, and eventually turns black at the base as rot sets in.
The leaves above the cut stay plump on stored water, so the cutting looks alive right up until the rot travels up the stem.
Air layering works on jade because it never severs the cutting until roots are already formed. A clean girdle plus damp sphagnum moss replicates the wounding signal that triggers aerial roots in succulents adapted to drop and regrow branches in dry conditions. The girdling exposes the cambium without severing the xylem, and the moss keeps the exposed cambium humid enough to push adventitious roots into the substrate.
For a side-by-side of those two methods on jade specifically, see jade plant propagation water vs soil. For the broader case for air layering over water on any woody houseplant, the cluster pillar at air layering propagation guide walks through the cambium mechanism in more depth. For a deeper dive into diagnosing stalled air layers across species, see air layering troubleshooting guide.
What you need before you start the air layer
The tool kit for air layering a jade plant is small, and most of the items are already in a typical succulent or houseplant kit. Lay them out on a clean tray before you cut anything, because once the girdle is open you want to work quickly so the cambium does not dry out before the sphagnum moss goes on.
- A sharp, sterilized blade. A grafting knife or a fresh utility blade works better than pruning shears because you want a single clean cut, not a crushing squeeze that cracks the woody cane.
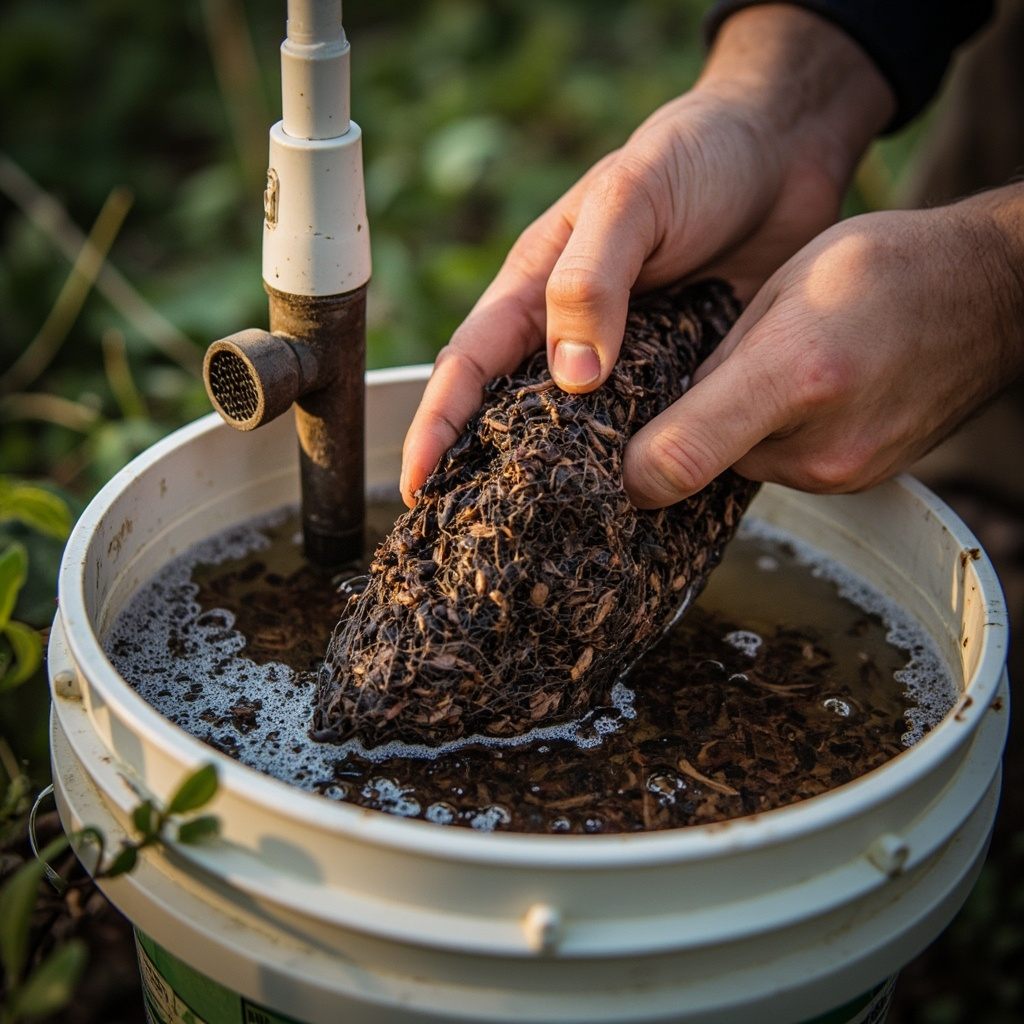
- Long-fiber sphagnum moss. Roughly one to two handfuls soaked in clean water and squeezed until it is damp but not dripping.
- Rooting hormone, ideally a gel or powder containing 0.3 to 0.8 percent IBA (indole-3-butyric acid). Jade will root without hormone, but the success rate and root speed both improve with it.
- Plastic wrap, cling film, or a small clear plastic bag to hold the moss against the stem and keep humidity inside the bundle.
- Twist ties, electrical tape, or grafting tape to seal the top and bottom of the wrap so the moss does not dry out during the rooting window.
- Aluminum foil, recommended. Wrapping the outside of the plastic bundle blocks light from reaching the cambium and prevents algae growth inside the moss ball.
- A spray bottle with clean water for re-wetting the moss if it dries out during the 4 to 8 week rooting window.
Pick the right stem before you do anything else. The ideal candidate for air layering is a section of cane that is at least as thick as your index finger, woody rather than green, and positioned between two healthy leaf nodes along the main trunk or a primary branch. Avoid the soft green tip, which is too immature to root quickly and lacks the stored carbohydrate reserves to push roots.
For more on which species respond reliably to air layering and which tend to fail, see best plants for air layering. Jade ranks in the top tier for thick-stemmed succulents because the cambium is responsive and the wood is dense enough to hold moisture inside the moss ball for weeks without cracking.
How to girdle a jade stem without cracking it
The girdle is the single most important step in the entire process. The goal is to remove a one to two centimeter band of bark, cambium, and phloem all the way around the stem without cutting so deep that you sever the xylem. The xylem is the woody inner core that carries water up from the roots, and cutting into it is what snaps the stem at the girdle.
Cut too shallow and the phloem bridges will reconnect, the wound heals over with a callus layer, and no adventitious roots form. Cut too deep and the stem snaps off before the roots can support it. This is the same girdle depth that works on rubber plant, fiddle leaf fig, dracaena, schefflera, dieffenbachia, and money tree canes during vegetative propagation.
Make two parallel cuts around the stem, one to one and a half centimeters apart, just deep enough to slice through the green or brown bark. On a young green jade stem you will see pale green or white tissue underneath. On an older woody stem you will see cream or pale yellow wood. Stop cutting as soon as you reach that pale layer.
Slide the blade between the two cuts and peel off the ring of bark between them. If small flecks of green or brown tissue remain, scrape them away with the back edge of the blade so the cambium is fully exposed all the way around. A properly girdled jade stem should look like a clean pale band with no dark tissue left in the middle.
Jade wood cracks easily along the grain if you twist the blade. Work the ring off in small pieces rather than trying to peel it in one continuous strip. If you hear any cracking sound, stop and recut a fresh band slightly higher on the stem; a cracked cane will snap off at the girdle within weeks regardless of how well the sphagnum moss is wrapped.
Wait two to five minutes after scraping. Jade exudes a thin watery sap rather than the milky latex of Ficus elastica or Ficus lyrata, but letting the wound sit open for a few minutes drains any sap that could seal the cambium and prevents the rooting hormone from making direct contact.
Once the surface looks dry, dust or paint the girdle with rooting hormone. The hormone sits on the exposed cambium and signals the cells to switch from wound-healing mode to root-producing mode during active growth in spring and summer. A dry, hormone-coated girdle is the trigger that starts root formation inside the moss ball.

Wrapping the moss ball and sealing the bundle
Take the pre-soaked sphagnum moss and squeeze out the excess water until it is the consistency of a wrung-out sponge. For jade specifically, err on the dry side: succulent cambium rots faster than tropical cambium when the moss holds too much water, so the ball should feel damp rather than soggy.
This is the key moisture difference between jade air layering and rubber plant or fiddle leaf fig air layering on the same cambium mechanism.
Form a fist-sized moss ball that is roughly two to three times the diameter of the stem. Press the moss ball around the girdle so it covers the entire wounded band and extends one to two centimeters above and below the cuts. The moss should be in direct contact with the cambium all the way around, with no gaps or air pockets where the cambium could dry out.
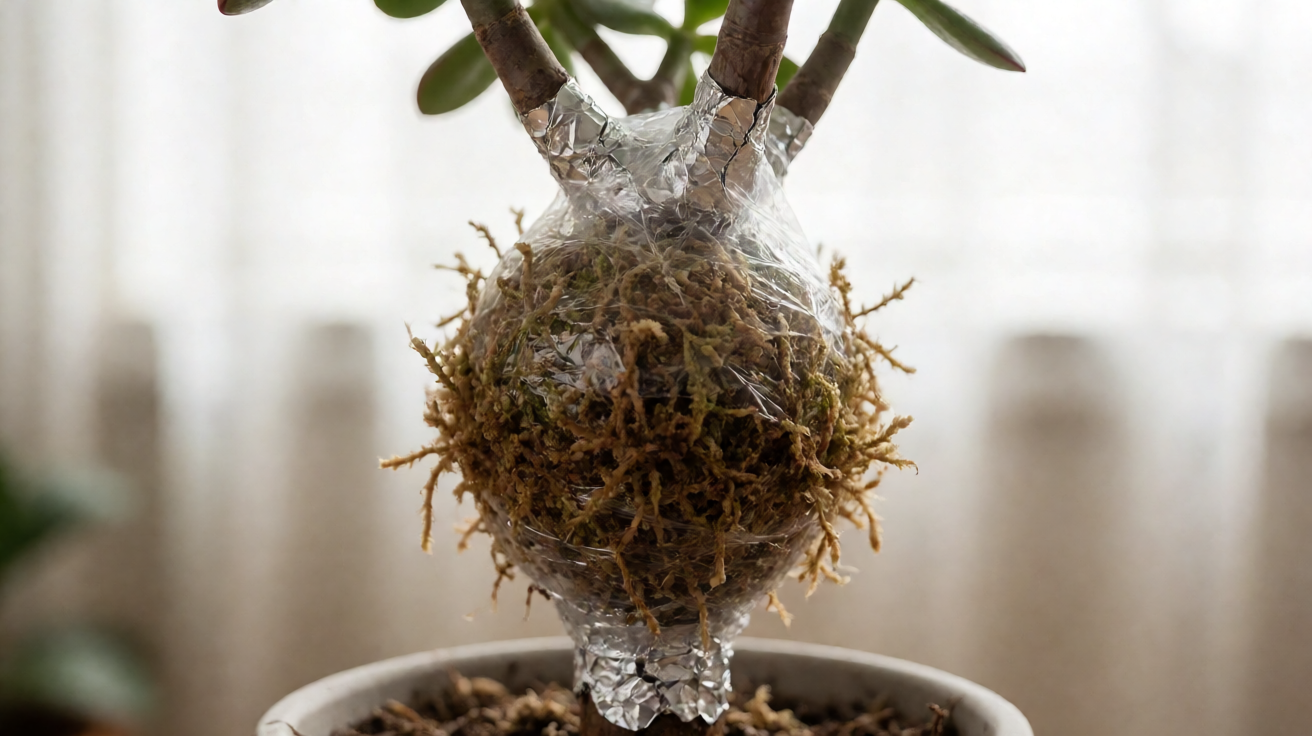
Wrap the moss ball tightly with plastic wrap or a clear plastic bag. The wrap should overlap itself several times and extend two to three centimeters beyond the moss on both ends. Twist or fold the top and bottom edges snug against the stem and secure them with twist ties, electrical tape, or grafting tape.
A loose seal is the most common reason jade air layers dry out and fail to root.
Wrap the outside of the plastic bundle with a single layer of aluminum foil. The foil blocks light, which encourages adventitious roots to grow toward the darker cambium surface, prevents algae from colonizing the inside of the moss ball, and moderates the temperature inside the bundle so the cambium does not cook in direct sun. Once the foil is in place, the air layer is complete.
How long roots take and how to check without breaking the seal
Jade typically produces visible white roots inside the moss ball within four to eight weeks when air layered in spring or early summer during active growth. Warm temperatures between 21 and 27 degrees Celsius speed up root formation, and bright indirect light on the leaves above the wound provides the energy the cutting needs to push roots.
Active growth on the mother plant, indicated by a new leaf pair unfurling at the apex, signals that the cambium is biologically primed to root. If the mother plant is dormant in winter, the air layer will stall until active growth resumes.
You can check progress without unwrapping the bundle. Squeeze the moss ball gently: a well-developed root mass will make the bundle feel firm and resist compression, while a soft and squishy bundle means the roots have not filled out yet. You can also hold the bundle up to a bright light and look for fine white threads branching through the dark sphagnum moss.
If the eight-week mark passes with no roots, do not panic. Jade is slow to wake up in cooler months, and a bundle that fails in winter will often succeed if you simply re-wrap with fresh moist sphagnum moss and wait until spring active growth.
The most common reason for failure on jade is moss that stayed too wet and rotted the cambium. Re-wet the bundle by injecting water through a small puncture in the plastic every two to three weeks rather than soaking it from the outside.
Severing and potting the new jade plant
Once the root mass is dense and white, sever the stem just below the bottom of the moss ball with a clean sterilized blade. Make a single cut at a slight angle, which sheds water away from the wound and reduces rot risk.
Remove the plastic wrap and foil but leave the moss ball intact, because the fine white feeder roots are fragile and will snap if you tease them apart.
Pot the new plant in a container that is one size larger than the moss ball, typically an 8 to 12 centimeter terracotta pot for a single-stem cutting. Use a fast-draining well-draining mix of two parts cactus soil, one part perlite or pumice, and one part coarse sand, and confirm the pot has working drainage holes before potting up.
Pre-moisten the mix with clean water so it is damp but not soggy. Plant the cutting deep enough that the moss ball is fully buried and the stem stands upright without a stake. Firm the mix gently around the stem to eliminate air pockets.
Water thoroughly once until it runs from the drainage holes, then let the top two to three centimeters of mix dry out completely before watering again. Place the new plant in bright indirect light, ideally near a south or east facing window.
A newly potted jade with a dense root mass needs less water than the mother plant, and overwatering is the most common reason a successfully rooted air layer dies within the first month.
Skip fertilizer for the first six weeks. The fresh root mass is adapted to the low-nutrient environment inside the sphagnum moss, and pushing fertilizer onto it before the roots have anchored will burn the fine feeder roots.
Resume a diluted balanced fertilizer at half strength once new leaf growth is visible. For ongoing care, see the broader jade plant care guide, and for rescue context if the cutting wilts in the first month, see how to save a dying jade plant.
What to do with the mother plant after the air layer
A jade plant that has been air layered will respond with vigorous new growth from below the girdle, because the apical dominance of the removed top releases the dormant buds along the stem. In most cases the mother plant will push two or three new leaders within four to six weeks during active growth in spring and summer, giving you a fuller, bushier plant in the same pot.
The new leaders emerge from nodes just below the girdle and from dormant leaf scars further down the cane, and they branch naturally because the parent plant is now feeding a shorter canopy with the same root system. The same lateral shoot response shows up on rubber plant, fiddle leaf fig, and money tree after their tops are removed.
Do not fertilize the mother plant for a month after the cut. Fresh fertilizer on a freshly wounded root zone can burn new feeder roots, so resume normal feeding at half strength once new growth is visible.
If the mother plant looks leggy after the cut, you can air layer a second section lower down on the stem eight to twelve weeks after the first cut. For the salvaging sequence on partial-root air layers that did not fully root the first time, see air layering recovery salvage partial roots.
When air layering on jade fails and what to try next
If the moss ball dries out and the cambium never roots, the most likely cause is a poor seal at the top or bottom of the plastic wrap. Lift the bundle, re-soak fresh sphagnum moss, and re-wrap.
If the girdle has already started to callus over, recut the wound to expose fresh cambium before re-wrapping. Rooting hormone at the recut stage doubles the chance of success on the second attempt.
If the stem snaps at the girdle before roots form, the cut was too deep and severed the xylem, or the wood cracked during the girdling step. There is no reliable way to rescue this.
The mother plant will usually push a new lateral shoot from the nearest node below the snap, but the air layer itself is lost. Cut cleanly above the nearest healthy node, dust the wound with ground cinnamon as a natural fungicide, and let the mother plant heal.
If roots form but turn brown or black instead of white, the moss was too wet and the roots rotted before they could branch. Cut below the rotted section, recut the girdle higher up the stem where the wood is fresher and drier, and re-wrap with moss that has been squeezed out much more thoroughly.
The rule of thumb for jade specifically is that the moss should feel like a barely damp kitchen sponge; if you can squeeze a stream of water out of the ball with light pressure, it is too wet.
The bottom line is that air layering a jade plant is the highest-success method for rescuing a leggy, woody-stemmed specimen. The same approach scales to rubber plant, fiddle leaf fig, dracaena, schefflera, dieffenbachia, money tree, magnolia, camellia, azalea, and holly (Ilex) on the same cambium mechanism.
With clean tools, fresh sphagnum moss kept on the dry side of damp, and a four to eight week rooting window in spring or early summer, even first-time propagators will see a dense white root mass ready for potting in a fast-draining well-draining mix.
From Bank Statement to QuickBooks-Ready File
That manual cleanup you just read about? This tool skips it. Turn your PDF into QBO for QuickBooks without storing your data anywhere.
Start Converting