
Mixing a hydroponic nutrient solution at home is not the eight-bottle chemistry experiment the fertilizer industry has made it look like; a complete feed for lettuce, basil, or tomato is two or three ingredients, a kitchen scale, and a $20 EC meter. The recipes that home growers actually use are short, repeatable, and cost a fraction of pre-mixed bottles once you are past the third reservoir fill.
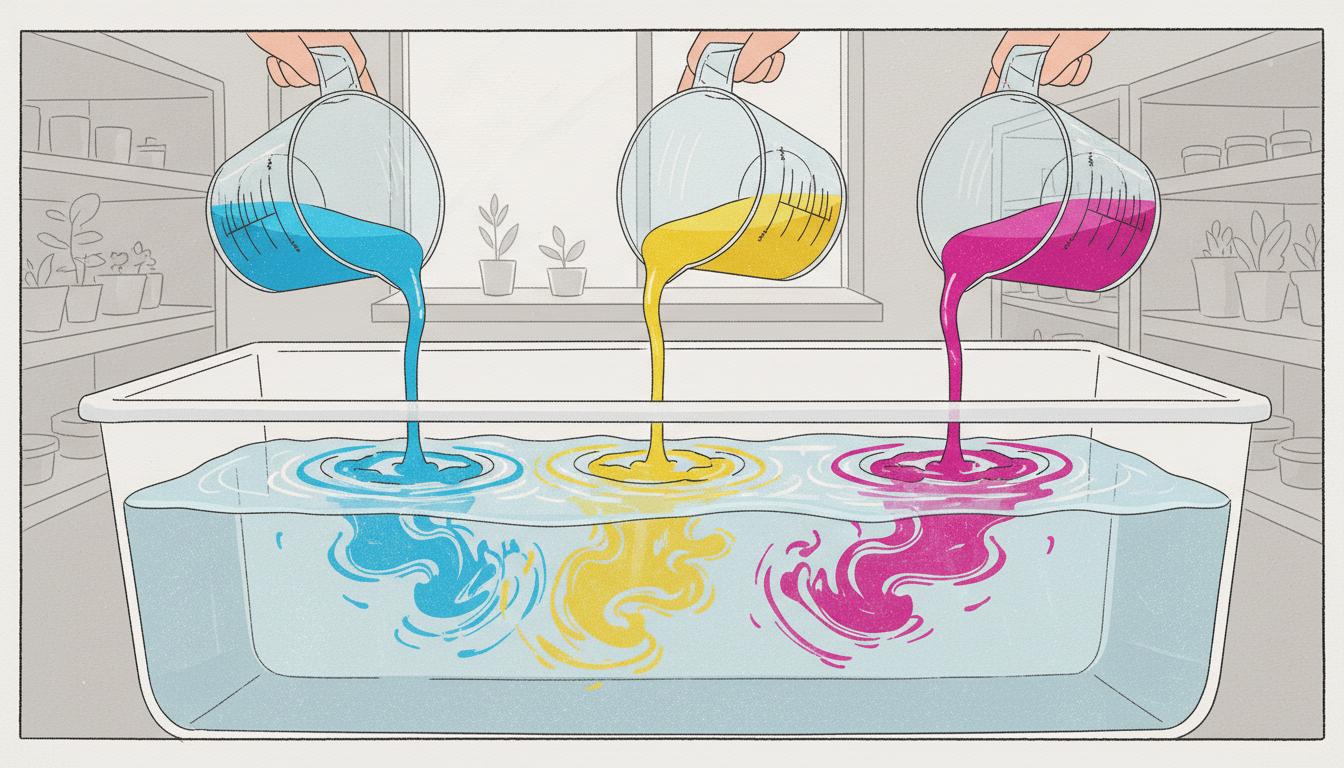
The catch is the order in which the salts dissolve. Calcium and phosphate react instantly into calcium phosphate, an insoluble precipitate that falls out of solution. Every reliable DIY recipe keeps calcium nitrate in one container and the phosphate-bearing salts in another, then dilutes them into a much larger volume of water where the concentration is too low for precipitation to win. This is what the industry means by a “two-part” nutrient, and it is the only structural rule a beginner actually has to internalize.
Two recipes cover every crop a home grower is likely to attempt. The first is the Masterblend trio (4-18-38 tomato formula, calcium nitrate, and Epsom salt), which is the most documented DIY recipe in the Penn State Extension and University of Florida IFAS literature and is what commercial growers and home growers alike use for leafy greens and tomatoes. The second is Jack’s Hydro FeEd (a single-bag 16-4-17 with calcium already in the mix), which is what Cornell University recommends for growers who want one container instead of three. The choice between them is mostly about your water source, your crop, and how much measuring you want to do per batch.
The Two Beginner Recipes That Cover Every Crop
The Masterblend trio recipe is the right starting point for most home growers because the ingredients are cheap, the recipe scales linearly from a 5-gallon bucket to a 50-gallon reservoir, and the formula is published in the Penn State Extension’s nutrient solution programs and recipes sheet, which is the most cited hydroponic reference in North American extension publications. Per gallon of finished solution, the formula is 2 grams of Masterblend 4-18-38, 2 grams of calcium nitrate (15.5-0-0), and 1 gram of magnesium sulfate (Epsom salt). For a 5-gallon batch, that is 10 grams of each of the first two and 5 grams of Epsom salt.
Jack’s Hydro FeEd is the right starting point if you want a single bag and a single measurement. Cornell University’s hydroponic recipe sheet lists Jack’s 16-4-17 at 1 teaspoon per gallon for lettuce and 1.5 teaspoons per gallon for tomato, with no separate calcium nitrate because the calcium is already chelated into the mix. The trade-off is that Jack’s is roughly twice the price per gallon than the Masterblend trio, and it is harder to tweak the NPK ratio for crops that want more nitrogen (leafy greens) or more potassium (fruiting crops).
The other recipes you will see online (Flora Series 3-part, Botanicare CNS, Advanced Nutrients pH Perfect) are designed for commercial growers who want a complete vegetative and bloom program in a single bottle line. The beginner hydroponic systems comparison covers the system-size decision that comes with picking a recipe. For a home grower with one reservoir and one crop at a time, those lineups add cost and complexity without adding yield. The Masterblend trio and Jack’s Hydro FeEd together cover 90 percent of the questions a beginner actually has.
Both the Masterblend trio and Jack’s Hydro FeEd include chelated iron (EDTA or DTPA) in the base mix, so beginners do not need to add it separately. Cal-Mag supplements (calcium-magnesium blends like Botanicare Cal-Mag Plus) are added on top of the base recipe only when the tap water is genuinely deficient, which most municipal supplies are not. Adding Cal-Mag on top of a complete base nutrient is the most common beginner mistake and pushes the EC into lockout range without adding any nutrient the plant actually needed.
The last choice before mixing is the water source. Rainwater and RO water start with an EC near zero and a neutral pH, which gives a clean slate. Tap water varies by municipality; some supplies come out at 0.3 mS/cm (soft) and others at 0.9 mS/cm (hard), and the recipe has to be tuned to whatever your tap delivers. Hard water above 0.7 mS/cm already carries calcium and magnesium that you are about to add on top, which is when lockout and precipitation risks spike.
Tools and Ingredients You Actually Need
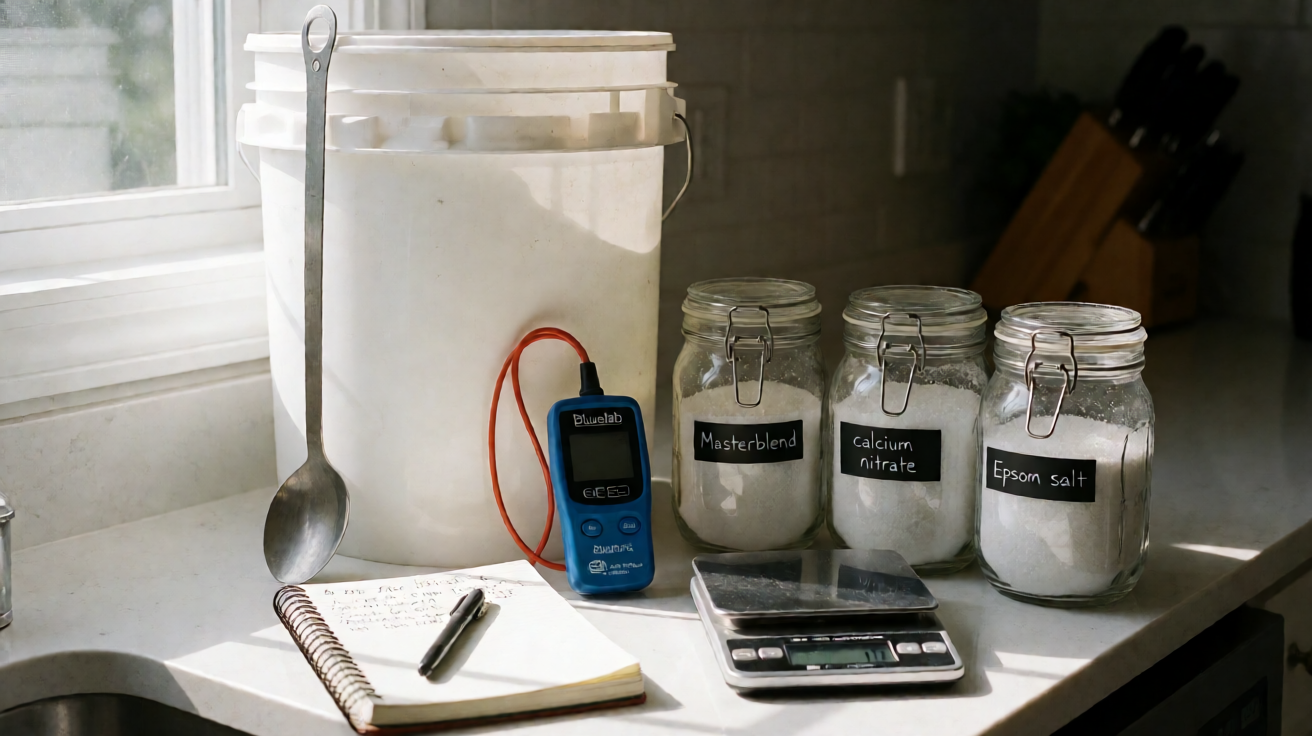
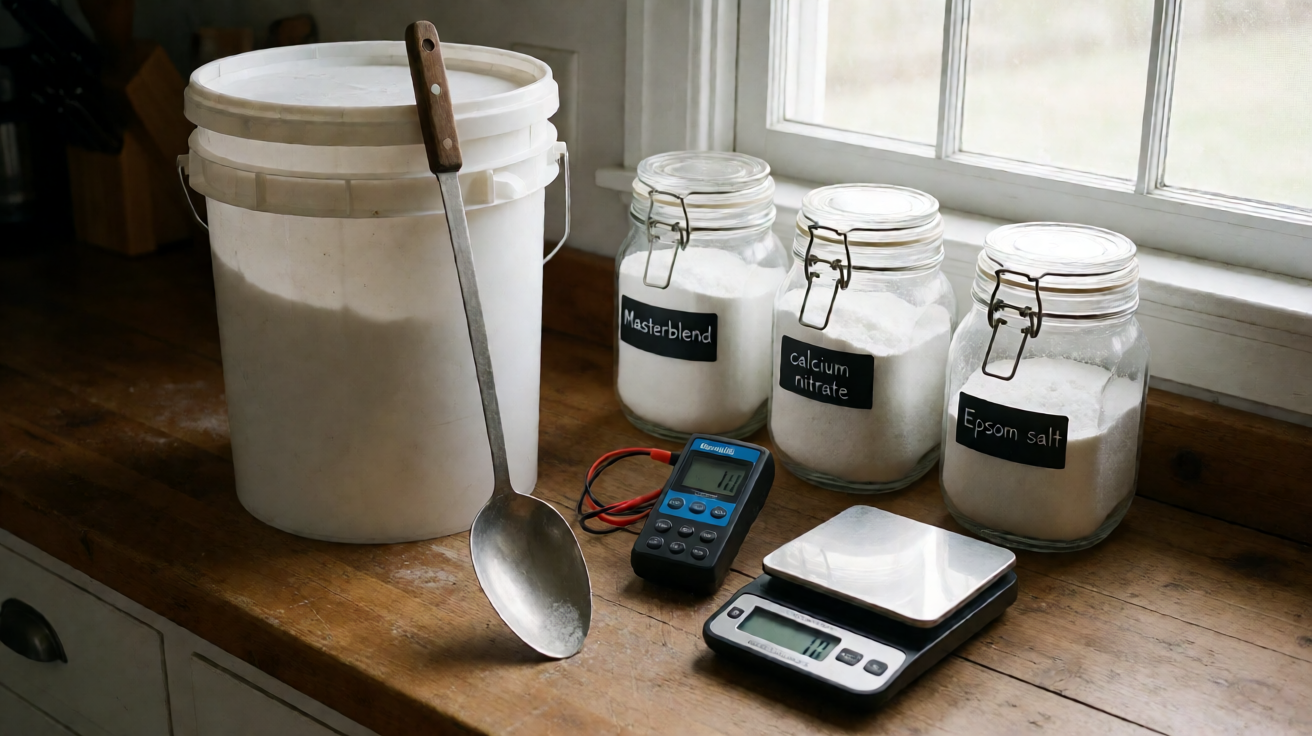
The minimum kit is a $10 kitchen scale that reads to the gram, a $20 EC meter (Bluelab Combo or Apera EC60 are the most-recommended home units), a 5-gallon food-grade bucket dedicated to nutrient mixing, and a long-handled spoon. The home hydroponic system comparison covers the four common setups this recipe works with. A pH meter is helpful but optional for the first few batches because most beginners start with a base nutrient that is already pH-balanced to within 0.3 of the target range, and adjusting up or down is a small fix rather than a structural correction.
Masterblend 4-18-38 comes in 1-pound jars and 5-pound pails; calcium nitrate in 1-pound and 5-pound containers; Epsom salt is sold as a bath salt (look for USP-grade magnesium sulfate without fragrances). Jack’s Hydro FeEd comes in 1-pound and 5-pound bags; one 5-pound bag makes roughly 80 gallons of finished lettuce nutrient at the 1-teaspoon-per-gallon rate.
The total kit cost for the Masterblend trio is roughly $50 for the scale, $20 for the EC meter, and $30 for a starter set of salts that makes about 30 gallons of nutrient (6 reservoir fills of a 5-gallon home system, roughly three months of leafy greens). Pre-mixed Flora Series at the same rate would cost about $90, so the DIY recipe pays back inside the first 30 gallons and is roughly half the per-gallon price from there.
One ingredient not on most beginner lists is a pH adjustment kit: a small bottle of pH Up (potassium hydroxide solution) and pH Down (phosphoric or citric acid solution). You add one or two drops at a time, stir, retest, and stop when the pH reads between 5.5 and 6.5, which is the range where all six macronutrients are maximally available. The Missouri Botanical Garden and the Royal Horticultural Society both list 5.8 to 6.2 as the sweet spot for most leafy greens and herbs.
How to Mix a 5-Gallon Batch (Step by Step)
The mixing order is the part most beginners get wrong, and it is the source of most “my DIY nutrient precipitated” complaints. Calcium nitrate must never touch concentrated Masterblend or any phosphate salt in dry form. The correct sequence: fill the 5-gallon bucket with 4 gallons of room-temperature water, add 10 grams of Masterblend and stir until dissolved, add 10 grams of calcium nitrate and stir, add 5 grams of Epsom salt and stir, then top up to 5 gallons and stir once more.
The reason this order works: in 4 gallons of water (about 15 liters) the dilution is high enough that calcium and phosphate ions never reach the concentration threshold for precipitation. As long as both salts are fully dissolved in the full volume before they meet, the calcium phosphate equilibrium stays below the precipitation point. This is the same principle behind commercial two-part bottles; the home recipe just achieves it with kitchen-scale math.
For the Jack’s Hydro FeEd single-bag recipe, the order is simpler because there is only one ingredient. Fill the bucket with 4 gallons of water, add 5 teaspoons (about 25 grams) of Jack’s Hydro FeEd, stir until fully dissolved, top up to 5 gallons, and stir once more. The single-bag formulation puts calcium, magnesium, and micronutrients all in the same powder because the chelation chemistry prevents the precipitation reaction in dry form.
After mixing, measure the EC of the finished solution. The companion hydroponic nutrient solution recipe guide covers the same mixing principles with a slightly different ingredient stack for a second reference point. For the Masterblend trio at the rates above, a properly mixed 5-gallon batch in soft water should read between 1.6 and 2.0 mS/cm, which is the target range for vegetative-stage leafy greens. In hard tap water (0.5 mS/cm or higher), the finished EC will read higher than the salts alone would deliver, which is the second most common beginner trap. If your EC reads above 2.4 mS/cm right out of the bucket, your tap water is contributing too much of the total salt load and you either need to dilute with rainwater or RO water, or scale back the salt doses by 25 percent.
Label the bucket with the date and EC reading; use the mix within 7 days for vegetative formulas or 14 days for fruiting formulas stored cool and dark. Mixes older than that lose chelated iron to oxidation and develop a brown tint that signals iron falling out of solution. A fresh mix every week is the safer pattern for beginners.
EC Targets by Crop (The Number That Matters Most)
EC is the single most important measurement because it tells you the total dissolved salt concentration, which determines whether plant roots can pull water in or are losing water out into a hypertonic solution. Targets are crop-specific. Leafy greens (lettuce, spinach, arugula, microgreens) want 1.2 to 1.8 mS/cm during vegetative growth and tolerate the lower end better. Herbs (basil, mint, parsley, cilantro) want 1.6 to 2.0 mS/cm because the aromatic oils concentrate more with mild nutrient stress. Fruiting crops (tomato, pepper, cucumber, strawberry) want 2.0 to 2.6 mS/cm during fruiting and slightly less during early vegetative growth.
If your tap water reads 0.5 mS/cm or higher, subtract that baseline from the target EC and adjust the salt dose. A 5-gallon batch in tap water at 0.6 mS/cm should aim for finished EC of 1.8 mS/cm for lettuce, so the salts only need to contribute 1.2 mS/cm, roughly 60 percent of the standard recipe rate. This is why the EC meter is the first tool to buy, not the pH meter; without it you are guessing at the salt load.
PPM (parts per million) is the older North American measurement and is roughly EC times 700 for the 500-scale TDS meters that home growers tend to buy. The hydroponic PPM levels guide has the full conversion tables and the per-crop PPM targets if you are working from a 500-scale or 700-scale meter. EC of 1.5 mS/cm equals roughly 1050 PPM on the 700 scale or 750 PPM on the 500 scale. Most nutrient labels in the United States are still printed in PPM, so the conversion is useful even if you measure in mS/cm. The University of Florida IFAS hydroponic vegetable guide uses PPM as the primary unit because most US growers learned on PPM meters before EC meters became affordable.
The most common EC mistake is chasing the high end of the target range, which produces faster vegetative growth in the short term but creates salt buildup in the root zone that locks out calcium and potassium within 3 to 4 weeks. Aiming for the middle (1.5 mS/cm for lettuce, 1.8 mS/cm for herbs, 2.2 mS/cm for fruiting crops) is the safer pattern for a recirculating system where the salt load only goes up over time.
When and Why to Add Cal-Mag Separately
Cal-Mag is added on top of the base nutrient only when the tap water is genuinely deficient in calcium or magnesium, which most municipal supplies are not. A typical municipal water test shows calcium in the 30 to 80 ppm range and magnesium in the 10 to 30 ppm range, which already covers most crop needs. Adding Cal-Mag on top of a complete base nutrient in already-hard water is the most common beginner mistake: dark green leaves, then tip burn that looks like a calcium deficiency but is actually nutrient lockout from EC creeping above 2.6 mS/cm.
Calcium reacts with phosphate and sulfate to form insoluble precipitates that fall out of solution, which is why calcium is in a separate tank in commercial nutrients. Botanicare Cal-Mag Plus uses calcium nitrate and magnesium carbonate, incompatible with concentrated sulfate or phosphate but fine when added to fully diluted nutrient. The mixing order matters: base nutrient goes in first, fully diluted, then Cal-Mag on top, never the other way around.
The clearest signal that Cal-Mag is needed is a water test showing calcium below 20 ppm or magnesium below 5 ppm, both unusual for municipal water but common for rainwater or RO water. If you are growing with rainwater or RO water, dissolve an extra 1 gram of calcium nitrate per gallon (in addition to the base recipe’s calcium nitrate) and 0.5 grams of Epsom salt per gallon to bring calcium and magnesium up to municipal-supply levels before adding the base nutrient.
For most home growers using municipal tap water, the right move is to skip Cal-Mag entirely, measure the EC of the tap water, and adjust the base nutrient rate to land at the target EC for the crop. Cal-Mag is a real product with a real use case, but the use case is the 10 percent of growers on rainwater or RO water, not the 90 percent on municipal tap water.
pH Adjustment, Storage, and the Top Three Beginner Mistakes
pH adjustment is the final step and the most forgiving part of the recipe. The target range is 5.5 to 6.5, with 5.8 to 6.2 as the sweet spot for leafy greens and herbs. Most base nutrients come out at pH 6.5 to 7.5, so adjustment is almost always downward. Add pH Down (phosphoric acid or citric acid) one drop at a time, stir, retest, and stop when the pH hits 6.0. Each drop shifts pH by roughly 0.1 to 0.3 depending on buffer capacity, which is why one drop at a time is the safe pattern.
pH drift is the silent killer of mixes that sit in a reservoir for more than a few days. As plants take up nutrients selectively, the pH drifts up (cations like potassium and calcium are taken up faster than anions like nitrate and phosphate), and a reservoir that starts at pH 6.0 can drift to 7.5 within a week. The fix is to retest pH every 3 to 4 days and add pH Down as needed to bring it back into the 5.8 to 6.2 range. The Missouri Botanical Garden covers this drift pattern in detail; it is the most common reason a long-running reservoir develops deficiency symptoms in week 3 that were not present in week 1.
The top three beginner mistakes: (1) adding Cal-Mag to a complete base nutrient in already-hard tap water, which pushes EC into lockout without adding any nutrient the plant needed; (2) mixing salts in the wrong order, which produces calcium phosphate precipitate that looks like the nutrient “didn’t dissolve”; (3) chasing the high end of the EC target range, which produces fast vegetative growth followed by salt buildup and lockout. None are catastrophic; they all correct within a week of fixing the underlying issue and replacing the reservoir.
Storage: keep in a sealed food-grade bucket in a cool dark place, use within 7 days for vegetative mixes or 14 days for fruiting mixes. Do not store in direct sunlight (UV degrades chelated iron and shifts it out of solution, showing as a brown tint and interveinal chlorosis on new growth within a week). Do not store longer than 14 days even if clear, because micronutrient balance drifts over time.
This page is the recipe-level walk-through for a DIY hydroponic nutrient solution; the broader reservoir-management topic (when to top off vs drain and replace, how to recover from a salt-buildup episode, how to handle a system crash) lives in the dedicated Aqualogi reservoir maintenance guide; the broader reservoir-management topic (when to top off vs drain and replace, how to recover from a salt-buildup episode, how to handle a system crash) lives in the dedicated Aqualogi reservoir maintenance guide, and the system-selection decision (which hydroponic system to use with this nutrient) lives in the apartment-system buying guide.
From Bank Statement to QuickBooks-Ready File
That manual cleanup you just read about? This tool skips it. Turn your PDF into QBO for QuickBooks without storing your data anywhere.
Start Converting