
Air layering has its own working vocabulary, and most of it shows up in the first paragraph of any guide: girdle, cambium, callus, sphagnum, IBA. You can read three how-to posts in a row and still stop to Google the same word. This glossary fixes that. Every air-layering term you will meet in a home-grower guide is below, defined with the one practical detail that actually changes what you do: how deep to cut, how often to mist, how strong to mix the hormone. Skim the table, jump to the section you need, then head to the air layering step-by-step guide for the full procedure.
The vocabulary divides into four functional groups: the wound you make on the stem, the substrate and wrap that hold moisture around it, the hormone and root biology that drive the response, and the system hardware for higher-end setups. Plant-side timing terms (dormant, active growth, mother plant) decide whether any of it works, so they get their own section. Each definition below names the term, says what it means in plain language, and gives the practical threshold a home grower needs.
Air Layering Terms at a Glance
The table below is the index. Use it when a guide throws a word at you and you want a fast answer before you read on. Each row points to the section with the practical detail that matters.
The vocabulary divides into four groups: the wound, the wrap, the hormone and root biology, and the system hardware. Plant-side timing terms get their own section. Each definition below names the term, says what it means in plain language, and gives the practical threshold a home grower needs.
The Wound: How You Start an Air Layer
The wound is where the clone begins, and the words around it are the ones readers Google most. Every term below describes either the cut you make, the tissue you expose, or the plant’s biological response to that cut.
Girdle and Girdling
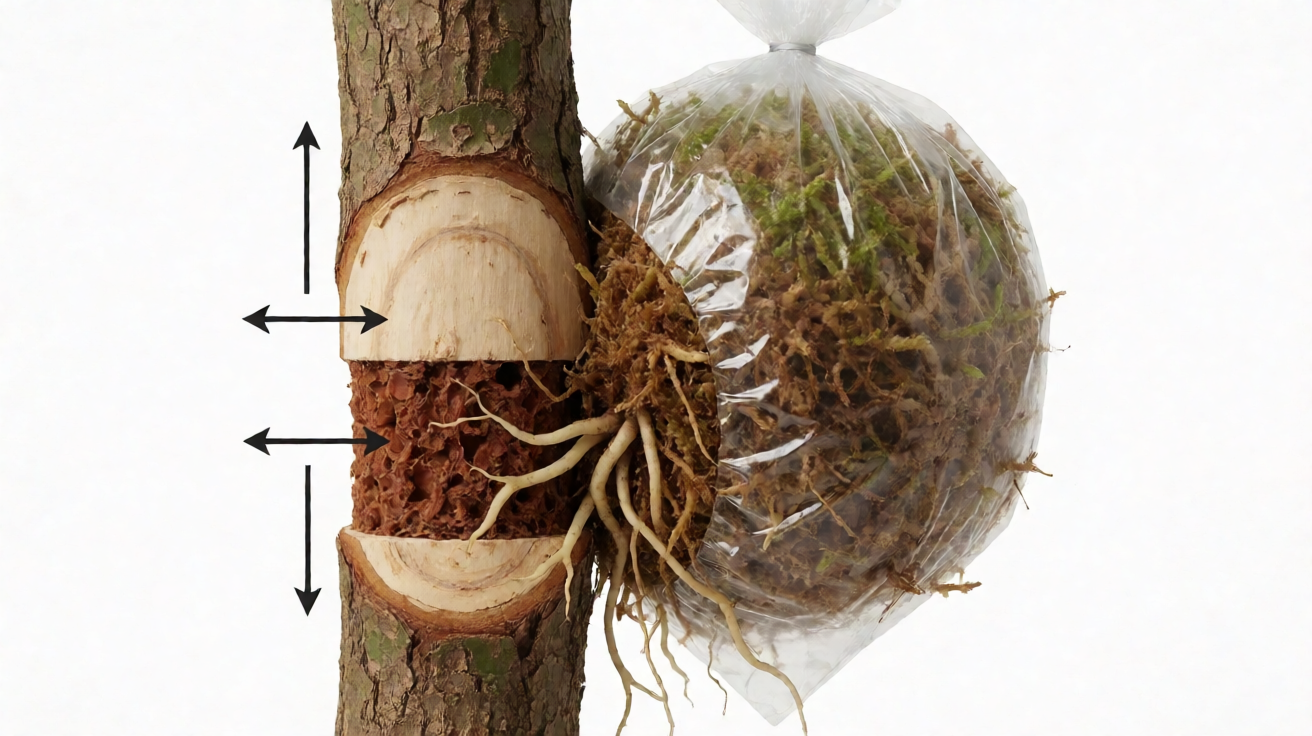
Girdling is the act of removing a complete ring of bark from the stem, typically 1 to 1.5 inches wide. The word is older than air layering itself: any time a tree’s bark is stripped all the way around, it has been girdled, and the tissue below the cut eventually dies because the phloem is severed. In air layering, the girdle is intentional. You want the phloem to be cut so sugars produced in the leaves above the wound cannot travel back down to the roots, because that backup of sugars is what triggers the stem to push out adventitious roots above the wound.
A girdle under about 1 cm often heals over before roots form. A girdle over about 4 cm can leave the stem unable to support the leafy top. Treat 2 to 3 cm as the safe middle.
Cambium
The cambium is the thin green or pale layer just under the bark. It is a meristem, which is botany for “the part of the plant that keeps dividing to make new cells.” When you wound a stem, the cambium is the tissue that responds by dividing rapidly and forming the callus that eventually produces roots. If you scrape the bark off cleanly with a sterilized knife or pruner blade, you have removed the outer bark and exposed the cambium. If you cut deeper than the cambium, you are into the xylem, and that is unnecessary.
Most home-grower guides say “scrape until you see green.” That green is the cambium. Leaving a continuous strip of cambium intact across the girdle is the most common reason an air layer fails to root, because the intact cambium simply heals over and reconnects the phloem. The girdle has to be complete, with no green strip left, for the trick to work.
Callus
A callus, in plant propagation, is a pale, firm mass of undifferentiated cells that forms over a wound. It is the plant’s generic repair tissue: it shows up over a cutting’s cut end, a graft’s union, or a wound on a trunk. Callus is not yet root, but it is the necessary precursor: roots emerge from cells inside the callus. In a healthy air layer, you will see a pale, slightly bumpy layer over the girdle within 2 to 4 weeks, and the actual roots emerge from inside that callus 4 to 12 weeks after the layer is applied, depending on species and temperature.
The Wrap: Substrate and Moisture Terms
Once the wound is open, you wrap something around it that holds moisture without becoming waterlogged, plus something that holds the wrap in place. The substrate vocabulary is short but loaded: sphagnum is the standard, perlite and peat are alternatives, and the wrap materials are common household items.
Sphagnum Moss and Substrate Choices
Sphagnum moss is the long-fiber moss harvested from bogs and sold in dried bricks or loose bags. It is the air-layering substrate for two reasons: it holds 10 to 20 times its weight in water, and it is naturally sterile and slightly acidic, suppressing bacterial and fungal growth that would otherwise rot the wound.
Perlite is the white porous volcanic glass sold as a soil amendment. Mixed into sphagnum at roughly 1 part perlite to 4 parts moistened sphagnum by volume, it keeps the moss ball from compacting into a soggy mass. Peat is the older alternative, used before sphagnum became widely available. Peat holds moisture but is more acidic and harder to re-wet when dry.
The substrate comparison is on the sphagnum vs perlite for air layering page.
A standard mix for the moss ball is 4 parts moistened sphagnum to 1 part perlite; some growers add a small amount of orchid bark to the mix for woody-stem layers on Magnolia or Camellia. The plastic wrap and twist ties hold the mix in place while letting you peek at root development. Avoid pure peat on its own: it is harder to re-wet once it dries out.
Plastic Wrap and Twist Ties
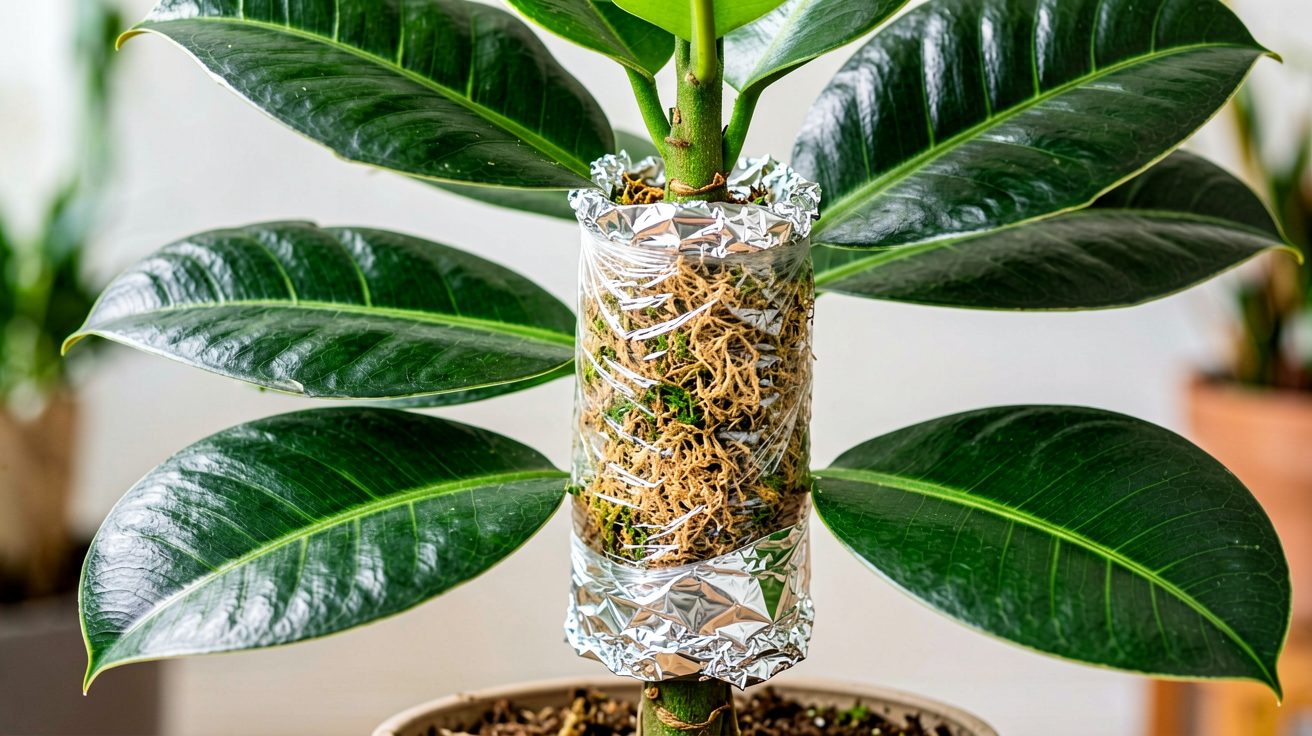
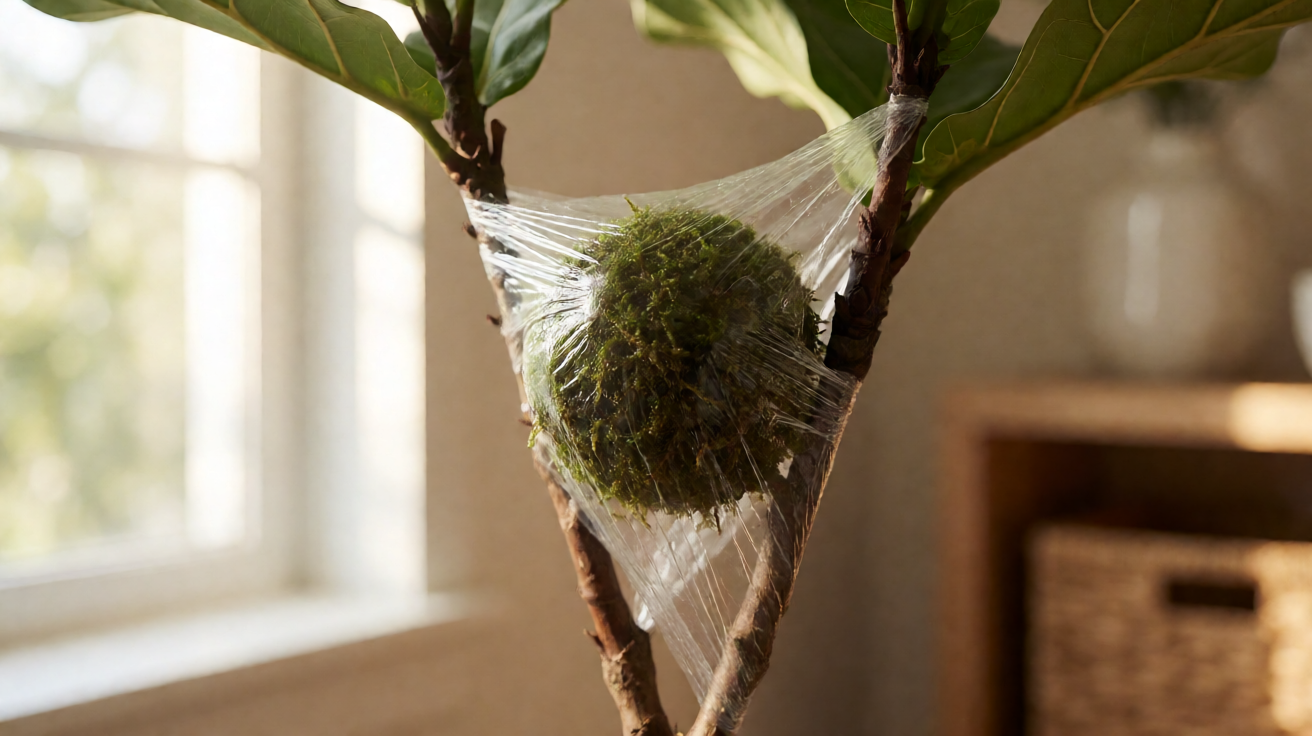
Plastic wrap (also called cling film or cling wrap) is the clear plastic film you wrap around the moss ball to hold moisture in and let you peek at root development without unwrapping the layer. Standard kitchen plastic wrap works, as do 2-inch-wide strips of clear plastic bag. Avoid opaque wraps, because the visual check is the only way to know when roots are ready without disturbing the layer.
Twist ties are short wire-coated paper or plastic ties that seal the plastic at both ends. Tight enough to hold moisture, loose enough to avoid a second girdle.
The Hormone and the Root Response
The wound and the wrap create the conditions. The hormone and the root biology are what actually trigger roots to form. These are the terms that show up most often in chemical product labels and in the diagnosis sections of troubleshooting guides.
Rooting Hormone and IBA
Rooting hormone is a commercial product (powder, gel, or liquid) that you apply to the wound before wrapping the moss ball. It is not strictly required: many species root from a clean girdle with moss alone. But it speeds things up, especially for slower species like Ficus lyrata. The active ingredient is almost always a synthetic auxin, and the most common synthetic auxin is IBA (short for indole-3-butyric acid).
Practical thresholds for home growers: powder IBA at 0.1 to 0.3 percent for soft cuttings, 0.4 to 0.8 percent for semi-woody, 0.8 to 1.0 percent for fully woody stems like magnolia. Gel formulations stay in contact with the wound better than powder. More is not better: concentrations above the recommended range damage the cambium and slow rooting.
For the full procedural context, including when to apply the hormone and how much moss to use, the air layering step-by-step guide walks through it in order.
Callus Formation
Callus formation is the window between applying the layer and seeing roots. It is the most frustrating part of the timeline for first-timers, because nothing visible is happening above the wrap and nothing visible is happening below the moss. Internally, the cambium is dividing and laying down the pale callus tissue that will eventually produce roots. On most woody houseplants, callus is visible through the plastic wrap as a slightly bumpy pale layer over the girdle by week 2 to 4.
Typical windows: Ficus elastica callus in 2 to 3 weeks, roots in 4 to 8. Ficus lyrata callus in 3 to 5 weeks, roots in 8 to 16. Magnolia and camellia can take 6 months. The rubber plant and fiddle leaf fig pages give the actual week-by-week ranges.
Adventitious Roots
Adventitious roots form from non-root tissue: a stem, a callus, or a leaf. They are the desired outcome of every propagation method that does not transplant an existing root system. In an air layer, adventitious roots emerge from the callus above the girdle (toward the leafy top) and are typically white, sometimes with pale yellow tips, branching outward into the moss ball.
Practical sign of readiness: a visible root mass at least golf-ball volume before severing. Severing earlier risks the clone losing its water supply.
System Hardware and Cycle Terms
Once you have done a few air layers by hand, the next vocabulary layer is hardware. These are the words used in higher-end DIY setups, in commercial propagation nurseries, and in any guide that references a “misting chamber” or a “fogger.” Most home growers never use this hardware; the section is here because the words show up in advanced guides and in the comparison with aeroponics and hydroponics.
Misting Hardware
A misting chamber is an enclosure (a plastic tote, a tent, a dedicated cabinet) where multiple air layers sit together under timed mist. The misting nozzle is the small orifice that breaks pressurized water into droplets. Nozzle clogging is the single most common hardware problem in any misting system, and the fix is routine cleaning with a small brush and a soak in vinegar.
Mist droplet size is measured in microns. High-pressure systems target 50 microns or smaller, which produces a fog-like mist that keeps the root zone wet without drowning it. The 50-micron target is the same one used in aeroponics, and it is the threshold below which roots can absorb water and oxygen simultaneously rather than alternating between wet and dry.
High-pressure pumps deliver 80 to 120 psi and produce droplets small enough for true mist. Low-pressure diaphragm pumps run at 30 to 40 psi, produce larger droplets (100 microns or more), and are what most DIY builds use. Ultrasonic foggers are vibrating discs that produce a cool fog without pressurized water; cheap, but they humidify the air more than they wet the moss.
Misting Cycle and Timer
The misting cycle timer is the controller that turns the pump on and off. The cycle is the heart of any misting system, because the roots need wet periods and dry periods. A typical cycle for an air-layer cabinet is on for 5 to 10 seconds, off for 4 to 6 minutes, with the exact timing tuned to the species and the humidity in the room. The “misting frequency” word in a guide usually means how often the cycle repeats (every 4 to 6 minutes), and “misting duration” means how long each on-period lasts (5 to 10 seconds). Set the off-period too short and the moss goes anaerobic; set it too long and the callus dries out.
Nozzle clogging is the most common hardware problem. Routine maintenance: remove the nozzle, soak in vinegar for 30 minutes, brush the orifice. The reservoir should be opaque, since a fungal bloom travels through the mist and rots the callus.
Plant Biology and Timing Terms
Even the cleanest girdle, the freshest hormone, and the best misting system will fail if you apply them at the wrong time of year to the wrong kind of stem. These are the plant-side terms that decide whether a layer takes.
Mother Plant and Parent Plant
The mother plant (also called the parent plant) is the original plant you are cloning from. It supplies water through the xylem and pulls sugars from the leaves above the wound, both of which keep the layer alive while it roots. A healthy mother plant is one that is well-watered, well-fed, and not under stress from pests or recent repotting. A mother plant under any of those stresses will not push roots from the layer, because it is using all of its energy to keep its existing foliage alive.
Hold off on air layering if the mother plant is recovering from pests or a recent repot. A layer on a stressed plant stalls before callus forms.
Practical check before starting: the mother plant should be in active growth, with new leaves visible at the stem tips. If it is in recovery from a recent move or repot, wait for a new leaf to push before starting.
Dormant vs Active Growth
Dormant describes a plant that has stopped active growth for the season, typically in winter for tropicals and in the cold months for temperate species. Active growth is the opposite: the plant is pushing new leaves and stems, typically in spring and summer for indoor plants and in late spring for outdoor woody plants. Air layers applied during active growth root faster and more reliably than layers applied during dormancy, because the cambium is already dividing in support of new shoots.
For indoor tropicals like Ficus, the practical window is spring to early fall, with the best results in late spring and early summer. For outdoor woody plants like magnolia, camellia, and holly, the window is late spring after the first flush of new growth has hardened off. Layers started too late in the season may not root before the plant goes dormant, and the layer sits through the winter without progress.
For species-specific timing on the two most common indoor air-layer targets, see the air layering rubber plant procedure and the air layering fiddle leaf fig procedure.
Species that respond well: Ficus elastica, Ficus lyrata, Magnolia, Camellia, Dracaena, Schefflera, Dieffenbachia, money tree (Pachira aquatica), azalea, holly (Ilex). All have woody stems with enough stored energy.
Recovery signs after potting up: new leaves from the apical bud in 4 to 6 weeks and lateral shoot branching below the cut. If no new growth by week 8, move the pot under a plastic bag tent (removed daily for fresh air) until growth resumes.
Two related terms: apical dominance (the topmost bud suppresses growth from lower buds) explains why the leafy top still grows while the wound below pushes roots; lateral shoot (a side branch from a leaf axil) is the kind of growth to leave on the upper stem, because every remaining leaf feeds the layer.
Practical atbts vocabulary for the post-procedure phase: pot up the rooted layer into a net pot with a well-draining mix of peat, perlite, and orchid bark. The pot must have drainage holes. Keep the new clone in bright indirect light and high humidity for the first 2 to 3 weeks, then acclimate to normal house conditions. Avoid transplant shock by not disturbing the root ball during pot-up.
From Vocabulary to Procedure
You now have the vocabulary. The next page you need depends on what you are actually trying to do.
If you want the full step-by-step procedure for any woody houseplant, start with the air layering step-by-step guide. It covers girdling, wrapping, misting, severing, and potting up in order, and it links out to the species-specific procedures when you need them.
If you are still deciding whether air layering is the right technique for your plant (versus water propagation, soil propagation, or division), the comparison on the air layering vs water propagation page lays out when each method wins and when each one fails. Air layering is best for thick, woody stems that would rot in water. Water propagation is faster for soft, green cuttings. Knowing which one matches your stem saves weeks of waiting.
After potting up, use a net pot if you want air-pruning of the new roots, and a well-draining mix (a blend of peat, perlite, and orchid bark) to avoid rot. The pot must have drainage holes: new clones have root systems that have never been waterlogged, and they rot fast in pots that hold excess water.
Turn That PDF Into a Spreadsheet in Minutes
You've seen how to do it manually — now let the tool handle the heavy lifting. Upload your bank statement and get Excel, CSV, or QBO in a few clicks.
Try It Free