
A d
ying coleus is one of the most alarming sights for houseplant owners. The leaves droop and yellow, the stems turn soft and brown at the base, and the soil smells sour or musty. Within days of first symptoms, a plant that was vibrant and bushy can collapse into a mushy heap that seems beyond saving.
Before you throw the pot in the bin, stop and assess. Understanding proper coleus care helps you diagnose what went wrong. Many dying coleus plants are salvageable, and the difference between a plant that recovers and one that dies often comes down to whether you catch the problem early enough to intervene. This guide walks you through the rescue process, from initial assessment through root rot surgery, stem cutting salvage, and post-rescue care that prevents the problem from recurring.
Is Your Coleus Actually Dying or Just Stressed
The first step in any rescue attempt is honest assessment. A stressed plant looks terrible but recovers with simple care adjustments. A truly dying plant requires surgical intervention or propagation salvage. Knowing the difference saves you time and prevents you from performing unnecessary procedures on a plant that just needs better care.
A stressed coleus shows wilting that responds to watering within hours, lower leaves that yellow and drop while new growth continues, leggy stems with faded color due to insufficient light, and leaf edge crisping from low humidity. Each of these problems has a straightforward fix: adjust watering, move to brighter light, increase humidity. The plant recovers within two to three weeks once the care adjustment is made.
A dying coleus shows stems that are soft and mushy at the soil line, roots that are brown or black instead of white and firm, soil that smells sour, rotten, or musty, leaves that yellow and drop rapidly without new growth appearing, and a plant that wilts despite consistently wet soil. These symptoms indicate root rot or stem rot, which requires immediate physical intervention beyond simple care adjustments.
If your coleus shows stressed symptoms, apply the fixes in the care guide sections for light, water, and humidity and give the plant two weeks to recover. If your plant shows dying symptoms, proceed directly to the root rot rescue section below. Time matters with rot, and every day of delay reduces the plant chance of survival.
Root Rot: The Most Common Cause of Coleus Decline
Root rot is the number one killer of coleus houseplants, and it develops faster than most owners realize. The disease begins when soil stays waterlogged for extended periods, depriving roots of oxygen and creating conditions where fungal organisms like Phytophthora and Pythium thrive. Within days, healthy white roots turn brown, then black, and begin to dissolve into mush.
The signs of root rot develop in a specific sequence. First, the plant wilts despite the soil being wet, because damaged roots cannot absorb water effectively. Then the leaves yellow and drop, starting with the lower oldest leaves and progressing upward. The stems soften at the base where they meet the soil, and a sour or musty smell rises from the pot. By the time the smell is noticeable, the root system is usually more than 50 percent damaged.
The most common causes of root rot in coleus are overwatering, poor drainage, pots without drainage holes, dense potting mix that holds too much moisture, and cold temperatures that slow root function and allow fungal growth. Prevention is straightforward: water only when the top inch of soil feels dry, use pots with drainage holes, and choose well-draining potting mix amended with perlite or pumice. Proper watering technique is the single most important factor in preventing root rot.
When root rot is suspected, unpot the plant immediately and inspect the roots. Healthy roots are white to tan, firm, and springy when pressed. Rotted roots are brown to black, soft, and slimy, often falling apart when touched. The faster you catch root rot, the more roots remain viable and the higher the chance of successful rescue.
Stem Rot: When the Damage Has Spread Above Soil
Stem rot occurs when the fungal infection from root rot spreads upward into the main stem and branches. This is a more advanced stage of decline, and the window for rescue narrows significantly once the rot reaches the stem. However, as long as there is at least one firm green stem above the soil line, the plant may still be recoverable through propagation.
The signs of stem rot include soft, mushy, or discolored tissue at the base of the main stem, brown or black lesions that spread upward from the soil line, stems that snap easily when gently bent, a foul smell emanating from the stem base, and leaves that wilt rapidly even though the roots may still appear partially healthy. Stem rot progresses faster than root rot because the stem carries water and nutrients upward, and once the vascular tissue is compromised, the entire plant declines rapidly.
To assess stem rot severity, gently scrape the outer layer of the main stem with a fingernail at the soil line. Healthy stem tissue is green underneath. Rotted tissue is brown, slimy, or water-soaked. If the rot extends less than one inch above the soil line, root rot surgery may still work. If the rot extends more than one inch above the soil, or if the main stem is completely mushy, stem cutting salvage is the only remaining option.
The critical factor is whether any healthy stem tissue remains above the rot. If you can find a section of firm green stem at least three inches long, you can take a cutting from that section and propagate a new plant. The original root system is lost, but the genetics and variety are preserved through the cutting.
Step-by-Step Root Rot Rescue Surgery
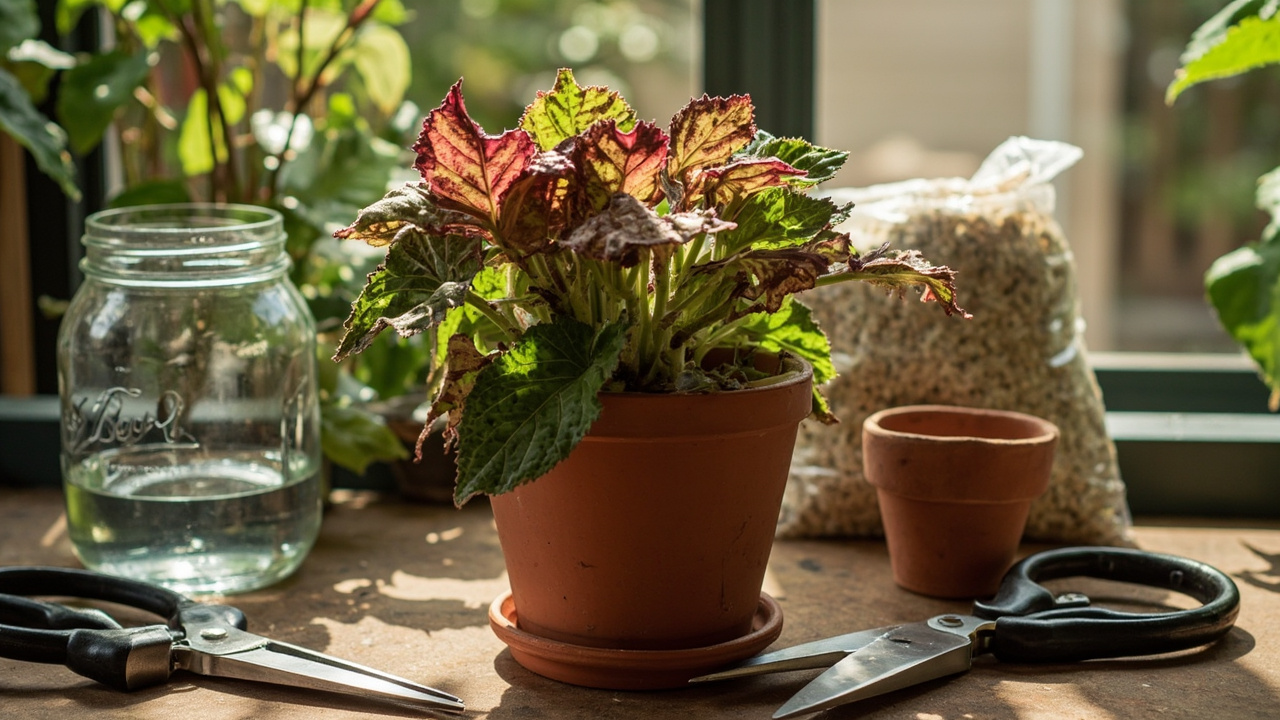
Root rot surgery is a straightforward procedure that takes about 20 minutes and saves the majority of plants caught before more than 75 percent of the root system is damaged. Work quickly and cleanly, and have your supplies ready before you start.
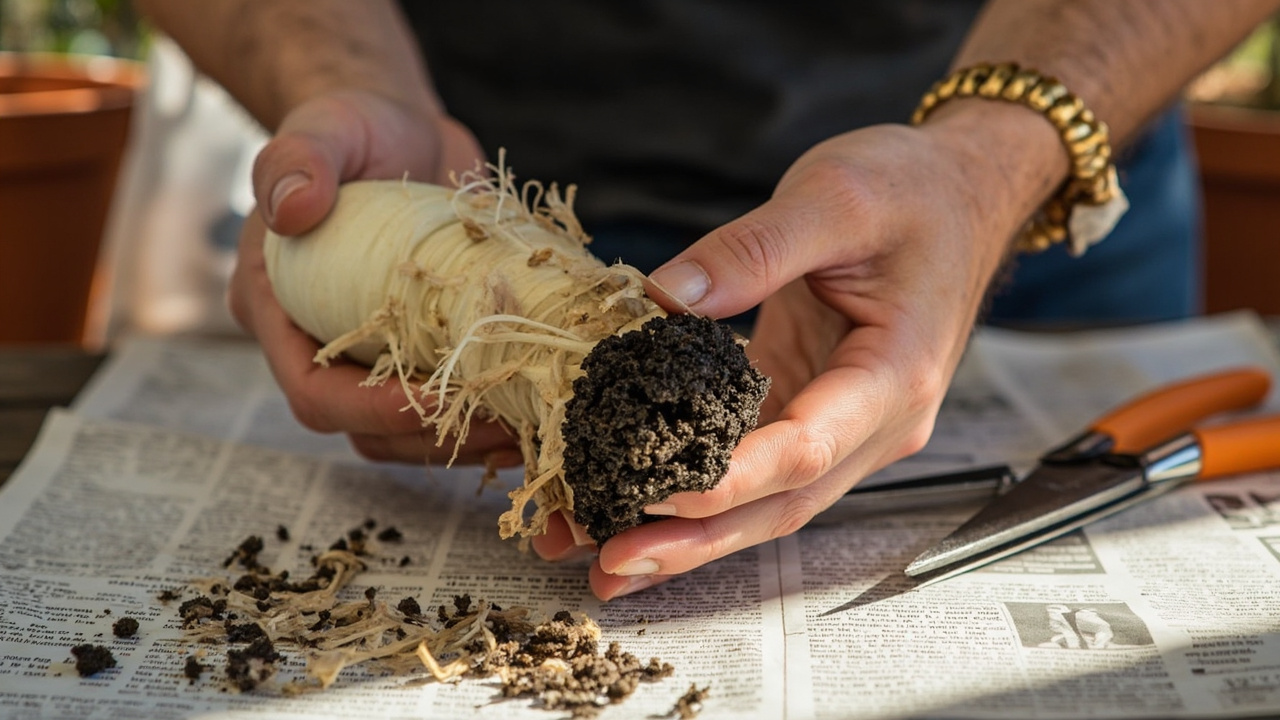
Step 1: Unpot the plant. Gently remove the coleus from its pot and shake off as much soil as possible. Rinse the root ball under lukewarm running water to expose the full root system. This lets you see exactly which roots are healthy and which are rotted.
Step 2: Inspect and trim. Using clean sharp scissors or pruning shears, cut away all brown, black, or mushy roots. Cut back to healthy white or tan tissue. Do not be conservative here, leaving rotted roots encourages the fungal infection to spread to newly healthy tissue. Remove at least half an inch of healthy root above the visible rot line as a safety margin.
Step 3: Treat the roots. Dip the remaining healthy roots in a solution of one part hydrogen peroxide (3 percent) to two parts water for one to two minutes. This kills surface fungi without damaging healthy root tissue. Alternatively, dust the cut root surfaces with cinnamon powder, which has natural antifungal properties and is gentle on plant tissue.
Step 4: Prepare the new pot. Choose a pot that is slightly smaller than the previous one, because a smaller root mass needs less soil volume to maintain appropriate moisture. Fill with fresh, well-draining potting mix amended with perlite at a ratio of three parts mix to one part perlite. The fresh soil eliminates any fungal spores remaining from the old mix.
Step 5: Repot. Place the plant in the new pot and backfill with the amended mix, firming gently to eliminate air pockets. Water lightly, just enough to settle the soil around the roots, and place the pot in bright indirect light. Do not fertilize for at least four weeks, as the damaged roots cannot process nutrients effectively and fertilizer burn compounds the existing stress.
Step 6: Monitor. Check the soil moisture daily for the first two weeks. Water only when the top inch feels dry. Watch for signs of recovery, including firm upright leaves, new growth at the stem tips, and leaf drop stabilizing. Expect the plant to look worse before it looks better, as it sheds damaged leaves and redirects energy to root recovery.
Stem Cutting Rescue: When the Roots Are Gone
When the root system is completely rotted or the stem rot has spread too far for root rescue, stem cuttings offer a second chance. This method preserves the genetics and variety of the dying plant by propagating new plants from the healthiest remaining stem tissue.
Step 1: Identify healthy stem. Examine every stem on the dying plant and find sections that are firm, green, and show no signs of brown or mushy tissue. You need at least three inches of healthy stem for each cutting, and the cutting should include at least two leaf nodes, the small bumps on the stem where leaves emerge.
Step 2: Take cuttings. Using clean sharp scissors, cut sections of healthy stem just below a leaf node at a 45 degree angle. Remove the lower leaves from each cutting, leaving two to three leaves at the top. The cuttings should be four to six inches long with two to three leaf nodes below the remaining leaves.
Step 3: Root the cuttings. Place the cuttings in a glass of clean room temperature water, ensuring the leaf nodes are submerged but the remaining leaves are above water. Change the water every two to three days to prevent bacterial growth. Alternatively, dip the cut ends in rooting hormone and insert into moist perlite or a soilless seed starting mix. Roots typically develop within seven to fourteen days in water, or two to three weeks in soil.
Step 4: Transplant. Once roots are two to three inches long, transplant the rooted cuttings into small pots with well-draining potting mix. Water lightly and place in bright indirect light. Treat the new plants as you would any young coleus cutting: consistent moisture, warm temperatures, and protection from direct sun for the first two weeks while the root system establishes.
Coleus propagation from stem cuttings preserves the exact variety, color, and growth characteristics of the dying parent plant. Even if the original plant cannot be saved, its genetics live on through the cuttings. This is why experienced coleus growers always maintain a few backup cuttings from their favorite varieties.
Post-Rescue Care: Keeping the Surviving Plant Alive
Rescue surgery is only half the battle. The weeks after rescue determine whether the plant fully recovers or declines again. The post-rescue care period requires more attention than normal coleus care because the plant is working with a reduced root system that cannot handle standard watering, feeding, or light levels.
Week 1 to 2: Keep the rescued plant in bright indirect light, avoid direct sun which stresses the weakened plant. Proper light placement supports recovery without adding stress. Water only when the top inch of soil feels dry, which may take seven to ten days depending on pot size. Do not fertilize. Mist the leaves lightly once daily to provide humidity without overwatering the soil. Expect some leaf drop as the plant sheds damaged foliage and redirects energy to root recovery.
Week 3 to 4: If the plant shows signs of recovery with firm leaves and new growth emerging, resume normal watering when the top inch feels dry. Begin fertilizing at quarter strength with a balanced liquid fertilizer every two weeks. Increase light gradually if the plant is reaching toward the window, indicating it wants more energy for recovery.
Week 5 and beyond: If the plant has stabilized with consistent new growth and no further leaf drop, resume normal coleus care including regular watering, feeding, and pinching. Monitor closely for the first three months, as a plant recovering from root rot is more susceptible to repeat infection if watering practices are not corrected.
The most important post-rescue adjustment is watering discipline. Root rot recurs when the same overwatering pattern resumes. Establish a consistent watering schedule based on soil moisture checks, not calendar dates, and ensure the pot has adequate drainage. The rescued plant will be more sensitive to overwatering than a healthy plant for at least six months as the root system fully regenerates.
Preventing Coleus Death: Long-Term Care Adjustments
After a successful rescue, the goal is preventing the problem from recurring. Most coleus deaths trace back to one of three care failures: overwatering, inadequate drainage, or cold exposure. Addressing these root causes permanently eliminates the conditions that allowed rot to develop in the first place.
Water only when the top inch of soil feels dry to the touch. During the growing season from spring through fall, this typically means watering every three to five days depending on pot size and light conditions. In winter when growth slows, extend the interval to seven to ten days. The seasonal adjustment is critical because the same watering schedule that works in summer will kill the plant in winter.
Use pots with drainage holes and never let the plant sit in standing water for more than 15 minutes after watering. Choose well-draining potting mix amended with perlite or pumice to improve aeration. Repot every 12 to 18 months to refresh the soil and prevent compaction that leads to waterlogging.
Keep coleus in temperatures above 10 degrees Celsius at all times. Cold exposure slows root function and creates conditions where fungal pathogens thrive. Move plants away from cold windows and air conditioning vents during winter. If your home drops below 13 degrees Celsius at night, consider relocating the plant to a warmer room or providing supplemental heat.
Maintain consistent humidity around the plant through pebble trays, grouping with other houseplants, or occasional misting. Dry air stresses the leaves and makes the plant more vulnerable to pest infestations that compound existing health problems.
When to Accept the Loss
Sometimes despite your best efforts, a dying coleus cannot be saved. Understanding when to stop investing time and resources prevents you from spending weeks nursing a plant that was beyond saving from the start.
Accept the loss when the main stem is completely mushy from soil line to top with no firm green tissue remaining, every root is brown and disintegrating with no healthy tissue visible, the plant has lost all leaves and shows no signs of new growth after two weeks of rescue care, or the stems snap easily at the base with no resistance. In these cases, the vascular system is completely compromised and no amount of intervention can restore function.
Before discarding a truly dead plant, check whether any healthy stem sections remain for cutting salvage. Even a single healthy three inch section can produce a new plant through propagation. If nothing remains viable, discard the plant and its soil completely. Do not reuse the soil or pot without sterilizing both, as fungal spores from the rot persist in contaminated potting mix.
Losing a coleus plant is frustrating but not uncommon, especially for new growers still developing their watering instincts. Every experienced coleus grower has lost plants to root rot, and the knowledge gained from the experience makes future plants more likely to survive. The rescue process described in this guide gives you the best chance of recovery when problems are caught early enough to intervene.
Turn That PDF Into a Spreadsheet in Minutes
You've seen how to do it manually — now let the tool handle the heavy lifting. Upload your bank statement and get Excel, CSV, or QBO in a few clicks.