Seeing your plant droop, yellow, or crispy can feel alarming — but most houseplants can be revived if you act quickly and in the right order. This step-by-step guide walks you through diagnosis and recovery, whether you grow tropical foliage, leafy greens, or herbs on a windowsill.
Step 1 — Assess the Damage
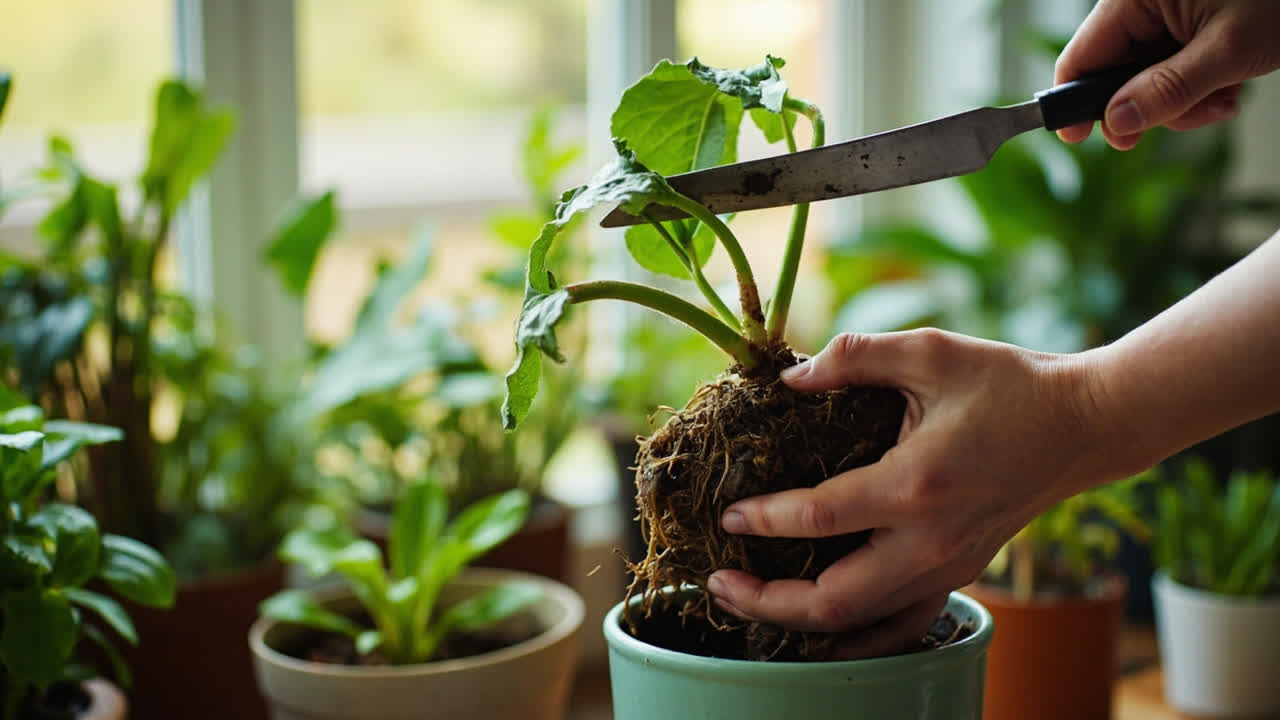
Before doing anything, spend 30 seconds honestly evaluating what you see. Pull the plant gently from its pot to inspect the roots. Healthy roots are firm and white or cream-coloured. Dark, mushy, or smelly roots indicate root rot from overwatering. If the roots look fine but the leaves are limp, the problem is likely above ground.
Work through this checklist:
- Leaves yellowing from the bottom up — overwatering or nutrient deficiency
- Leaf edges turning brown and crispy — underwatering or low humidity
- Limp, wilted leaves even when soil is moist — root rot
- Sticky residue or tiny insects — pest infestation
- Leggy growth with pale leaves — insufficient light
Step 2 — Trim What Cannot Be Saved
Using clean, sharp scissors or pruning shears, remove all clearly dead or rotting material:
- Yellow or brown leaves — cut at the base of the leaf stem
- Mushy stems — trim back to firm, living tissue
- Dead flower stalks — remove at the base
- Root rot — rinse the root ball, trim all dark roots with sterile tools
Do not over-prune: a plant under stress still needs some leaf surface for photosynthesis. Remove only what is obviously gone.
Step 3 — Correct the Watering Problem
Overwatering and underwatering both cause similar symptoms but need opposite fixes. Here is how to tell them apart and respond correctly.
If the soil is wet and the plant is wilting:
- Let the soil dry out completely before watering again
- Check that the pot has adequate drainage holes
- If root rot is present, repot into fresh, well-draining soil
- Reduce watering frequency going forward — always check soil moisture with your finger first
If the soil is bone dry and the plant is drooping:
- Water thoroughly until water runs freely from the drainage holes
- If the soil has shrunk away from the pot walls, top-dress with fresh mix
- Set a reminder to check the plant every two to three days until it stabilises
- Consider switching to a self-watering pot if you tend to forget
Step 4 — Adjust Light and Temperature
Most struggling houseplants recover fastest in bright, indirect light — a north or east-facing window is ideal. If the plant has been in a dark corner, move it gradually toward better light over the course of a week to avoid additional shock.
Avoid placing recovering plants near cold drafts, heating vents, or air-conditioning units. Sudden temperature swings are especially stressful for tropical species like mass cane plant, peace lily, and spider plant.
Step 5 — Treat Pests Early
If you spot insects, act immediately before the infestation spreads:
- Isolate the affected plant from others
- Spray the leaves and stems with a solution of mild soapy water or neem oil
- Apply weekly for at least three weeks, covering the undersides of all leaves
- For severe infestations, consider an insecticidal soap or systemic treatment
- Reinspect neighbouring plants for signs of the same pests
Step 6 — Repot If Needed
Repotting is called for when roots are circling the inside of the pot, growth has slowed despite good care, or the soil remains wet for days after watering. Choose a pot only one size larger than the current one — excessive soil volume holds moisture and can trigger fresh root rot.
Use a well-draining potting mix suited to your plant type. Worm castings added at roughly 20% of the mix give the root zone a gentle, varied nutrient boost without burning sensitive species.
Step 7 — Give It Time
After all corrections are made, move the plant to a stable spot and resist the urge to keep fussing. Most houseplants show visible improvement within 7 to 14 days. New growth at the tips of stems — even if small — is the clearest sign that recovery is underway.
If a plant shows no sign of recovery after three weeks, re-examine the roots: some types of root rot are slow to stop spreading and may require a second round of trimming and repotting.
Common Questions
Can a fully brown leaf recover?
No — once a leaf has turned completely brown, it will not green up again. Remove it so the plant directs energy toward new growth.
Should I fertilise a dying plant?
Not immediately. Wait until the plant shows clear signs of recovery, then begin a diluted, balanced fertiliser routine at half the normal strength.
How often should I water while the plant is recovering?
Check soil moisture every two to three days. Water only when the top 2 to 3 cm of soil is dry. More plants are killed by overwatering during recovery than by underwatering.
Can I save a plant with root rot?
Often, yes — if you catch it early. Trim all affected roots, rinse the healthy ones, and repot in fresh, dry mix. Reduce watering significantly until the plant establishes new roots.
Key Takeaways
- Diagnose before acting — root and soil condition tell you more than leaf appearance alone
- Trim dead material, but do not over-prune a stressed plant
- Correct watering is the most common fix and the most common cause of further damage
- Pest isolation and treatment must happen quickly
- Recovery takes 7 to 21 days; patience and consistent care beat over-intervention
Most houseplant emergencies are reversible with prompt attention and modest corrections. Build the habit of checking soil moisture before every watering, and many of these crises become entirely preventable.
From Bank Statement to QuickBooks-Ready File
That manual cleanup you just read about? This tool skips it. Turn your PDF into QBO for QuickBooks without storing your data anywhere.
Start Converting