Indoor plant humidity is the amount of water vapor present in the air around your houseplants — and when it falls too low, tropical plants signal distress through their leaves long before the plant is beyond saving. Brown leaf edges, curling leaves, stunted new growth, and yellowing lower foliage are the plant’s language for “the air is too dry for me to function normally.” The problem is that most people read these symptoms as underwatering and respond with more water, which makes the actual problem worse.
The second most common mistake is treating humidity as a single number goal. There is no universal “correct” humidity for all houseplants. Tropical species (monstera, calathea, philodendron, most ferns) genuinely need 60% relative humidity or higher to look their best. Subtropical species (pothos, peace lily, spider plant) tolerate 40–50% and stay healthy. Succulents and cacti are native to dry environments and actually suffer in consistently humid rooms. Applying one humidity level to a diverse plant collection is like giving all your pets the same food — it works for some and hurts others.
Why Humidity Is the Most Misunderstood Plant Care Factor
Most plant care advice treats humidity as a binary — “tropical plants need high humidity” — without explaining what that means mechanistically or why the number matters at a cellular level. This matters because the reason you want higher humidity for tropical plants is not preference — it is about how plants move water.
Plants transport water and nutrients from roots to leaves through transpiration — water enters at the roots, moves up through the plant, and exits through small pores in the leaves called stomata. When the air around a plant is dry, transpiration accelerates: the plant loses water faster through its leaves to try to equalize the moisture gradient. In a high-humidity environment, transpiration slows — the plant conserves water and moves it more gradually, which allows nutrients to distribute more evenly as the flow rate normalizes.
When humidity is too low, transpiration runs too fast. The plant draws water up faster than the roots can supply it, nutrient delivery becomes inconsistent, and the first visible damage appears at leaf edges — the parts of the leaf furthest from the vascular system and most exposed to air. This is why low humidity shows up as brown edges before it shows up anywhere else.
The misunderstanding that drives most humidity failures: people focus on hitting a target percentage on a hygrometer instead of reading the plant. A monstera that has brown edges at 55% humidity is telling you the humidity is too low for that specific plant in that specific spot — the number is less important than the plant’s response. Learn to read the plant first, check the number second.
What Humidity Does to Your Plants at a Cellular Level
The reason humidity stress compounds over time rather than showing up immediately is that the cellular damage happens gradually. Root function slows when transpiration is running too fast — the plant is spending resources on water management that it would rather spend on growth. This root stress is invisible until it becomes visible leaf stress, which is why the damage seems to appear all at once after weeks of accumulating.
Low humidity also affects stomata behavior. In dry air, stomata partially close to reduce water loss — a protective response that also reduces photosynthesis. The plant is literally photosynthesizing less because the conditions make it too expensive to keep the stomata open. New growth comes in smaller. Leaves develop more slowly. The plant looks “off” in ways that are hard to diagnose until the symptoms get dramatic enough to notice.
The compounding effect: low humidity doesn’t just cause cosmetic leaf damage. Over weeks, it reduces the plant’s overall carbohydrate production, weakens root systems, and compromises disease resistance. A plant that lives for years in 30% humidity is not “thriving” — it is surviving with reduced function that shows up as increased pest susceptibility, slower growth, and lower resilience to other stresses like inconsistent watering or low light.
How to Measure Humidity Without Expensive Equipment
You need two tools to measure humidity accurately, and neither is expensive.
A digital hygrometer ($10–$15 from any hardware store or online) gives you actual relative humidity readings at the plant’s location. Place it at plant level, not on a high shelf — warm air rises and humidity drops near the ceiling. The reading at the plant matters, not the reading at head height.
The ice cube test as a rough check: fill a glass with ice water, wait 5 minutes, and check if moisture condenses on the outside of the glass. Heavy condensation means high humidity (60%+); light or no condensation means lower humidity (under 50%). This is approximate but useful for a quick sanity check.
The most reliable humidity measurement tool is the plant itself. A monstera with consistent brown edges is telling you the humidity is too low for that plant in that location — regardless of what the hygrometer shows. Use the hygrometer to confirm what the plant is already expressing. Over time, you will rely more on the plant’s signals and use the hygrometer to calibrate your sense of what “normal” looks like in your space.
The Humidity Stress Sequence — What to Watch For Before It’s Too Late
Humidity damage progresses through a predictable sequence. If you catch it at stage 1 or 2, the plant recovers fully. At stage 4 or 5, the damage is permanent.
Stage 1: Brown leaf edges. The first and most common signal. Edges of the newest or most exposed leaves turn brown — dry, crispy, distinct from the yellowing of overwatering or the soft rot of disease. The browning starts at the tip or edge and moves inward. At this stage, the plant is signaling stress but has not suffered permanent damage. Increase humidity now and the plant stabilizes within 1–2 weeks.
Stage 2: Leaf edges curling inward. The plant’s protective mechanism — curling reduces the surface area exposed to dry air. Stomata close partially in response to low humidity, which also slows photosynthesis. If you see curling without brown edges, check the soil moisture to rule out underwatering — then address humidity. Curling caused by low humidity resolves when humidity increases. Curling caused by dry soil does not resolve with higher humidity alone.
Stage 3: New leaves emerging smaller than normal. When the plant’s water and nutrient distribution is consistently stressed, new leaves come in undersized. A monstera that normally produces leaves 10 inches across, producing leaves 4 inches across, is in stage 3 humidity stress. The growth rate has slowed because the plant is allocating resources to survival rather than expansion. At this stage, the plant is still recoverable — but the stress has been ongoing for weeks.
Stage 4: Yellowing lower leaves, overall slowdown. The plant is now visibly declining rather than just underperforming. Lower leaves yellow and drop. Overall growth has essentially stopped. The root system is compromised. Recovery at this stage takes 4–8 weeks of consistent ideal conditions, and some permanent damage is already done.
Stage 5: Permanent damage — crispy brown patches that don’t recover. Leaf tissue that has fully desiccated does not come back. Brown patches that are dry and firm to the touch are dead — no amount of increased humidity will restore them. The plant can recover, but those leaves will not recover. Prune them and redirect the plant’s energy to new growth.

Pebble Trays, Grouping, and the Humidity Methods Ranked by Effectiveness
Every humidity method works, but they work at different scales. Matching the method to the actual need is where most people go wrong.
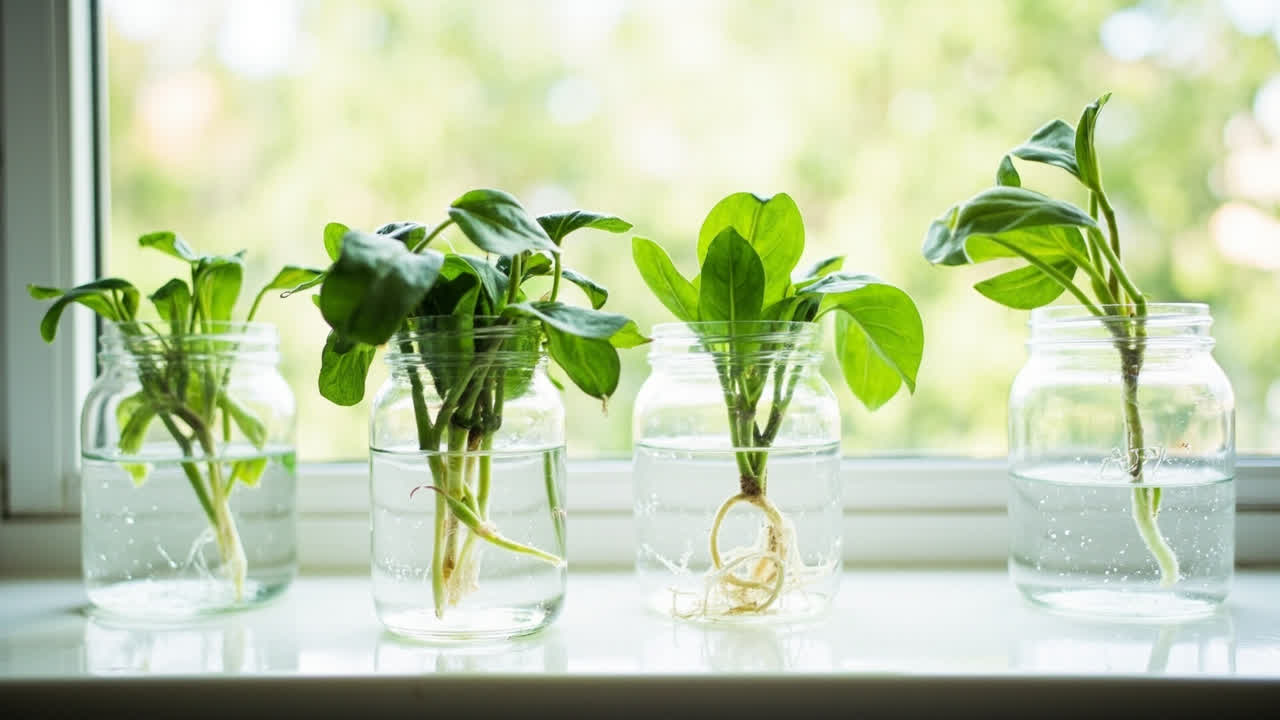
Pebble trays: a tray of water with pebbles or stones, the plant pot sits on the pebbles above the water line. Water evaporates from the tray and raises humidity in the immediate area around the pot — specifically within 1–2 inches above the tray surface. A pebble tray does not raise the humidity of an entire room, a corner, or a shelf. It raises the humidity immediately around the base of the plant. If you have a single humidity-sensitive plant, a pebble tray is appropriate and works. If you have 5 plants in a room and try to manage them all with pebble trays, you need a different solution.
Grouping plants together: plants transpire and release moisture through their leaves. When grouped, this moisture creates a shared microclimate that raises humidity for all of them. Grouping works for plant collections — a corner of 4–6 tropical plants will maintain higher humidity than the same plants scattered around the room. This is why plant corners tend to look lush: it’s partly the grouping effect. Effective for plant collections, not effective for a single isolated plant.
Humidifier: the only method that meaningfully raises room-level humidity. A small cool-mist humidifier in a room with 4+ tropical plants will raise the room’s relative humidity from 30% to 55–65% within a few hours. The key is placement — not pointing the mist directly at plants, but placing it so the moisture disperses into the room’s air before reaching the plants. Direct mist on leaves can cause fungal issues if it sits on leaf surfaces too long.
Air circulation: the most overlooked humidity variable. Raising humidity without air circulation in a closed room creates stagnant, moist air — a perfect environment for fungal growth on leaves and mold on walls or window frames. A small fan on low speed, not pointed directly at plants but creating gentle air movement in the room, prevents this. It is a small addition that makes humidifier use significantly safer.
The honest assessment: pebble trays are oversold as room solutions. They are a single-plant tool. If you have 3 or more humidity-sensitive plants, a humidifier is the practical investment. Grouping is free and effective if you have the space to keep plants together.
The Seasonal Humidity Trap — Why Winter Is the Most Dangerous Time
Indoor humidity changes seasonally in ways that are easy to miss unless you are tracking them. Central heating strips moisture from indoor air with remarkable efficiency. A home that sits at 55–60% relative humidity in summer can drop to 20–30% relative humidity in winter when the heating system runs continuously. This is the most common humidity crash moment — plants that survived the previous summer without humidity issues suddenly show brown edges and curling in November.
The instinct is to water more when you see stress symptoms. This is the wrong response to humidity-induced stress. More water in a heated, low-humidity environment causes root rot faster than the dry air does. The plant needs humidity, not water. When you see humidity stress symptoms appear in fall or early winter, increase humidity first, before adjusting the watering schedule.
Also watch for the opposite trap: in spring, as heating goes off and humidity naturally rises, plants that were kept correctly watered through winter may suddenly look overwatered — softer leaves, yellowing, slower drainage. This is not a disease; it’s the return of higher humidity meaning the plant’s water needs decreased. Reduce watering frequency as the seasons shift, not just as the calendar changes.
What Humidity Level Do Your Plants Actually Need?
Use this as a reference guide, not an absolute rule — individual plants in individual locations respond slightly differently. Watch the plant, not just the percentage.
- 60–80%: Most tropical ferns, calathea, prayer plant, some philodendrons, sensitive orchids. If your collection leans toward fern-heavy or calathea-heavy, target the high end of this range.
- 55–65%: Monstera, most philodendrons, alocasia, Begonia rex, tropical palms (parlor palm, areca palm). This is the most common target range for popular tropical houseplants.
- 40–50%: Pothos, peace lily, spider plant, Chinese evergreen (aglaonema), dracaena, most succulents and cacti. These tolerate lower humidity without showing stress.
- 30–40%: Succulents, cacti, and yucca. These native to arid environments are actually damaged by high humidity — consistently high humidity causes rot and fungal issues.
If you are growing a mixed collection, a practical approach is to group plants by humidity need and create microclimate zones in your home — the bathroom (naturally humid from showers) for ferns, the living room with a humidifier for tropicals, the windowsill for succulents. This is more effective than trying to achieve one humidity level for all plants.
How to Fix Low Humidity Without Buying a Humidifier
If a humidifier is not immediately accessible, these steps raise humidity at the plant level without spending money:
Move plants away from heating vents and cold drafts. Forced-air heating dries the air immediately around supply vents. Cold drafts from single-pane windows or poor-seal doors create low-humidity microzones. Moving plants 3–4 feet from heating vents and away from drafty windows is the single most impactful free adjustment.
Use a pebble tray for each sensitive plant. One tray per plant, properly maintained (water level kept above the pebbles, not allowed to evaporate to nothing). Refill when the water level drops below the top of the pebbles.
Group humidity-loving plants together. Move all your tropicals into one corner or near one window. The grouping effect raises the humidity around them collectively.
Close the bathroom door during and after showers. A single shower creates a significant but brief humidity spike. Keeping the door closed afterward traps the moisture in the bathroom rather than letting it disperse into the rest of the home. If you have a bathroom with good light and a vent that doesn’t run constantly, that bathroom is a natural fern and calathea space.
Misting has minimal lasting effect and is worth skipping. A fine mist evaporates from leaf surfaces within minutes — it raises humidity for less than 10 minutes and can leave moisture on leaves that promotes fungal growth. It is not an effective humidity management tool.
When a Humidifier Is Worth the Investment
A humidifier is worth the investment when you have a collection of 5 or more humidity-sensitive tropical plants, when you live in a climate with dry winters (heated indoor air is always dry), or when you are specifically trying to grow calathea, ferns, or orchids — these do not survive long-term in homes below 50% relative humidity.
Which type: cool-mist ultrasonic humidifiers are the most common and are safer around plants than warm-mist models, which raise the temperature near the plants and can create temperature differentials. For most indoor plant situations, a cool-mist unit is the right choice.
Maintenance is the part nobody mentions in the sales pitch: humidifiers grow mold and bacteria in the water tank if not cleaned regularly. A weekly clean (empty, rinse, dry) is the minimum to prevent the unit from spreading mold spores into the air. If you are not willing to clean it weekly, the health risks of an unmaintained humidifier outweigh the humidity benefits for your plants.
Placement: 3–5 feet from the plants, not directly pointed at them. The goal is to raise the ambient humidity of the room, not create a localized high-humidity zone directly on one plant’s leaves. Elevated placement (on a shelf or table, not on the floor) helps the moisture disperse more effectively throughout the room’s air volume.