The Hoya vine along your windowsill is doing one thing well: length. You wanted a bushy plant and got a single stem with leaves clustered at the tip.
Every cut you make sits a few nodes below the flowering spurs that carry next season’s bloom. Trade shape for a year of lost flowers and you will not know the vine had a second setting until it is too late.
The resolution is simple: never cut below the highest peduncle spur. Tissue above it is pure vegetative growth, and removing it redirects energy to dormant buds lower on the vine. The spurs stay put.
Below: visual inspection for peduncles and nodes, the sterilized cutting technique, the one-thirds rule for leggy growth, the aftercare that brings new growth in two to four weeks at 72 to 78°F, and the two situations where pruning is wasted effort.
The Hoya Pruning Paradox: Bushiness vs Peduncle Preservation
A Hoya flower is not a single bloom that opens on new wood, the way a rose does. By definition, it emerges from a peduncle — a short, woody flowering spur that extends from a node and persists for years.
Per Royal Horticultural Society guidance, a mature Hoya carnosa can carry 10 to 20 of these spurs, and each one comprises a waxy flower cluster that reopens each season. The underlying biology is what makes the cut decision so consequential: once the spur is removed, the plant cannot regenerate it at the same node. A replacement spur takes 12 to 18 months to form at a different node.
That is why pruning carries a built-in trade-off, however useful the technique may be. The same cut that encourages branching also forces you to leave more stem above the highest spur untouched. How much stem you leave depends on where that highest spur sits.
The resolution is to treat the highest peduncle on each vine as a hard ceiling: cut above it, never below.
Selective pruning above the spurs breaks apical dominance — the tendency of a vine to keep extending from its tip while side buds stay dormant. In active growth, the same cut gives lower buds permission to push, which is what builds the bushy silhouette the technique is meant to produce.
The corollary is that the central skill is visual, not mechanical. A peduncle spur looks distinctive once you have seen one: a short, brown, woody stub, a quarter to half an inch long, jutting from the node.
It does not look like an aerial root, which is longer and flexible. It does not look like the smooth green internode between two leaves. If you cannot tell which structure is which from a few feet away, walk closer and look at the joint itself — a spur emerges at a fixed 45 to 90 degree angle opposite the leaf, while an aerial root drops straight down.
A peduncle that has not announced itself yet will, within one blooming season, push out a cluster of buds. Wait for that confirmation rather than guessing.
Reading the Vine: Identifying Peduncles, Nodes, and Growth Points
Start the inspection by sliding your fingers along the vine from tip to base. The first thing you notice is internode length, the gap between two leaves.
Hoya carnosa typically spaces its nodes two to four inches apart, while Hoya compacta (Hindu rope) packs nodes within half an inch of each other. Internode spacing is a quick species check and also tells you how much bare stem you are about to work with.
Stop at each node and look for three structures. First, the leaf petiole attaches to the stem at a slight swelling. Second, an aerial root may extend from the same junction — a thin, flexible filament that is usually green on young growth and brown on older wood. Each node carries exactly three countable structures: one leaf petiole, one possible aerial root, and one peduncle spur — that is the structural inventory of the vine, and every cut you make removes exactly one of these three things from the count. For instance, a four-node cutting from a mature Hoya carnosa vine placed in damp sphagnum typically roots within three to four weeks, with the first new leaf unfurling from the uppermost node once the callus is set.
Third, and most important, the peduncle spur extends laterally from the node at roughly a 45 to 90 degree angle, most often on the side opposite the leaf. On a flowering-age plant the spur is visible year-round as a woody nub; during bloom season it carries a cluster of waxy flowers.
Cutting above a node for the same identification work is covered in the Hoya propagation guide, and the visual skills transfer directly.
Before touching the shears, step back and map the vine. Count the peduncle spurs on each long stem and note where the highest one sits — that is your cutting ceiling for that stem. Painter’s tape or a soft marker dot on the vine is a fair memory aid.
Any stem that has zero peduncle spurs, whether a young vine or an older one that has not bloomed in years, can be cut more aggressively. Any stem with spurs near its tip needs a lighter touch and a confirmed ceiling before you cut.
The Cutting Technique: Where and How to Prune
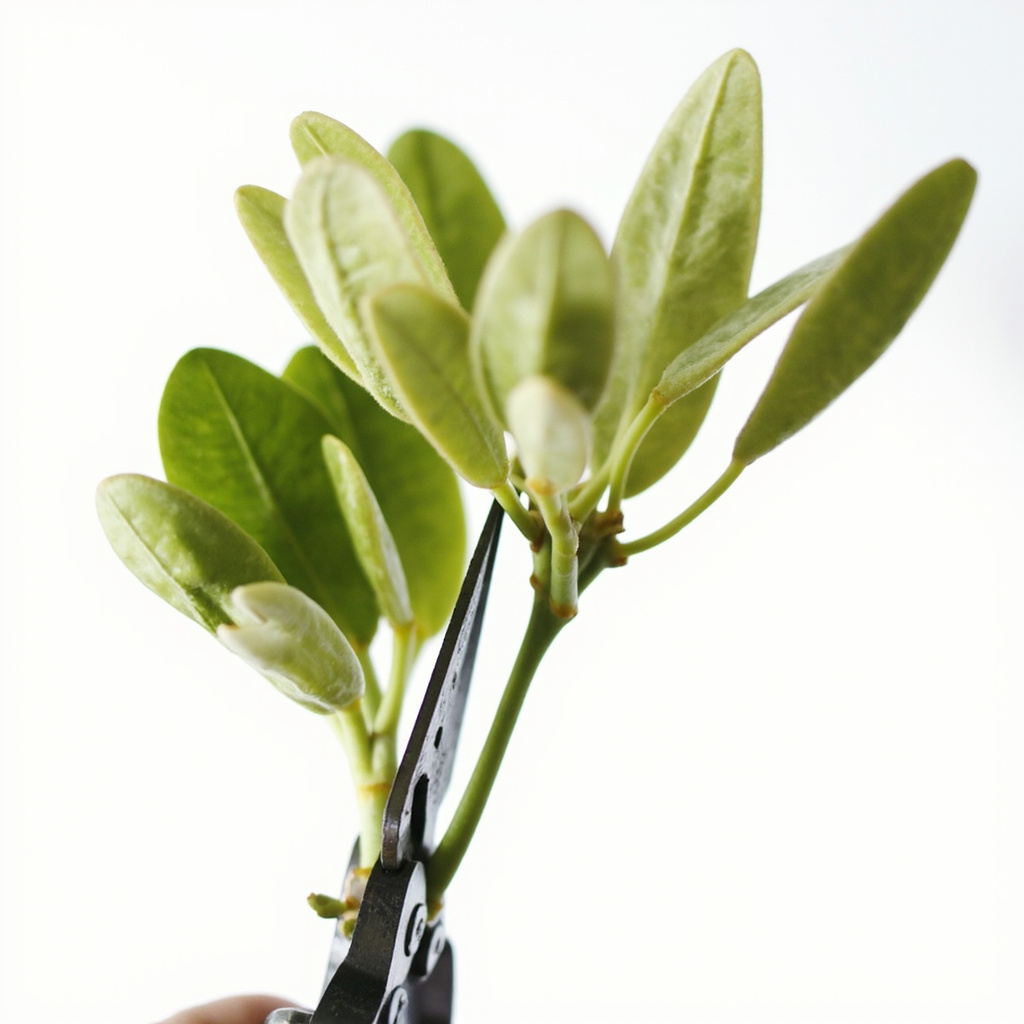
Use sterilized bypass pruners or a fresh razor blade, and wipe the cutting edge with 70 percent isopropyl alcohol between every cut.
Hoya stems exude a milky latex when cut, and that latex smears the blade and can carry fungal spores from one node to the next. Per University of Florida IFAS Extension, clean cuts heal faster on ornamentals and reduce the chance of stem-end rot on tropical vines. Sterilized shears are not a flourish here; they are part of the technique.
Place the cut a quarter inch above the chosen node and angle the blade at roughly 45 degrees away from the node. The angle is not decorative; it lets water run off the cut surface rather than pool on the wound, and pool water is what invites rot.
Cut during active growth, late spring to early summer in most climates, when the vine is pushing out new leaves and the cut nodes respond within two to four weeks. Cut in fall or winter on a plant that has slowed or stopped growing and the open wound just sits until the next spring flush, an open invitation for fungal entry in the meantime.
Light drives the response, and the Hoya light requirements page maps which window orientations deliver the 2000-plus lux a pruned Hoya needs to break dormancy at the cut.
Right after cutting, the wound weeps white latex for one to two hours. Set the plant on newspaper or a tray to catch the drip. The latex dries on its own and seals the cut; do not apply cinnamon, fungicide, or commercial wound sealer.
Peer-reviewed ornamental horticulture research shows that Hoya stems heal cleanly without assistance, and foreign substances on the wound trap moisture against the cambium and slow the callusing process. That callus should otherwise complete within three to five days in dry indoor air.
Selective Stem Removal: The One-Thirds Rule for Leggy Plants
A Hoya with three or more long bare stems has crossed from routine tip trimming into structural pruning, and structural pruning has stricter limits. Removing too much at once throws the plant into survival mode: it redirects stored energy to root maintenance rather than new top growth. A heavily pruned Hoya can sit dormant for two to three months with no visible change as a result.
The one-thirds rule keeps the work inside the plant’s recovery budget. In any single session, remove no more than one-third of the longest stems, then leave the plant alone for six to eight weeks before addressing the next third.
Plants fall into two situations. For a leggy vine with zero peduncle spurs — a young plant, or one you are willing to sacrifice for a season to reshape — cut back to two or three nodes above the soil line and let the new shoots rebuild the silhouette. For a mature vine with spurs along its length, the cut is the lighter one: ceiling set by the highest spur, nothing below it.
A pruned Hoya often yellows a leaf or two after a heavy cut. The Hoya leaves turning yellow page covers how to tell that normal stress apart from overwatering or nutrient deficiency, which would need a different fix.
There is also an upper limit. Never remove more than 50 percent of the leaf mass in a single season. Leaves are the engine; strip the plant below that threshold and it enters a slow decline that takes six to twelve months to reverse.
A third at a time, eight weeks between rounds, is the cadence that turns a leggy Hoya into a bushy one.
After-Pruning Recovery: Light, Water, and the Four-Week Wait
The first two weeks after pruning decide what the cut actually produces. Bright indirect light is non-negotiable: 2000-plus lux from an east-facing or unobstructed north window, or about 12 inches (30 cm) under a full-spectrum LED panel that runs 12 to 14 hours a day. The cut nodes need photosynthate from the leaves that remain.
In low light, the plant may push a single thin shoot from each cut instead of the bushy branching the pruning was meant to trigger. If the windowsill cannot deliver that brightness, supplement it during the recovery window.
Back off on watering for the first two weeks. A Hoya with fewer leaves transpires less and drinks less; watering on the old schedule can saturate the mix and stress new root tips before they have grown into the surrounding medium.
The Hoya watering guide maps seasonal frequency by pot size and mix, and after a heavy prune you shift one tier toward the drier side of the range rather than holding the line.
Wait to feed until new growth shows at the cut nodes. Fertilizer salts on a damaged or quiet root system cause tip burn and slow the callus-to-shoot transition the cut is trying to start.
The predictive window is short and reliable when the conditions above are met, although the exact timing varies by season and indoor temperature.
Cut nodes held at 72 to 78°F (22 to 26°C), in bright indirect light and slightly reduced water, typically break within two to four weeks. Stems that thick and woody callus over in three to five days; the callus is the visible green-brown ridge that forms across the cut surface. Total regrowth to a bushy silhouette lands at six to eight weeks post-prune, which is why the one-thirds rule’s revisit interval is set where it is.
When Not to Prune: The Low-Light and Dormancy Traps
Every pruning guide has an honest limit, and for Hoya it is light. No cutting technique forces a Hoya to branch in low light. A Hoya in a dim north-facing room will produce exactly one thin shoot per cut node, regardless of precision.
Within four to six weeks that single shoot stretches in leggy upward growth, and the bushy-plant goal recedes another year. If the windowsill is dim and the vine has more bare stem than leaf, the fix pruning cannot deliver is light, and the Hoya not flowering page covers the 2000 lux vegetative and 4000 lux flowering thresholds that double as the cut-response thresholds.
Winter is the other trap. A dormant Hoya below 65°F (18°C) with short daylight calluses the cut and then sits. New growth will not push for eight weeks or longer, and the open node stays vulnerable to fungal entry that whole time.
Wait until the plant is producing new leaves on its own, March through May in the Northern Hemisphere, and the cut response comes in weeks. Removing a peduncle spur during dormancy, by accident or by late-season trimming, can push the next flowering cycle back by four to six weeks on top of the regrowth delay.
A Hoya that does not respond to a spring prune within six weeks is signaling a deeper problem. Tight pot means check the rootball; dim light means move closer to a window; salt buildup means flush the mix.
Pruning shapes a healthy plant. It does not rescue a declining one. Fix the conditions first and prune second.
Turn That PDF Into a Spreadsheet in Minutes
You've seen how to do it manually — now let the tool handle the heavy lifting. Upload your bank statement and get Excel, CSV, or QBO in a few clicks.
Try It Free