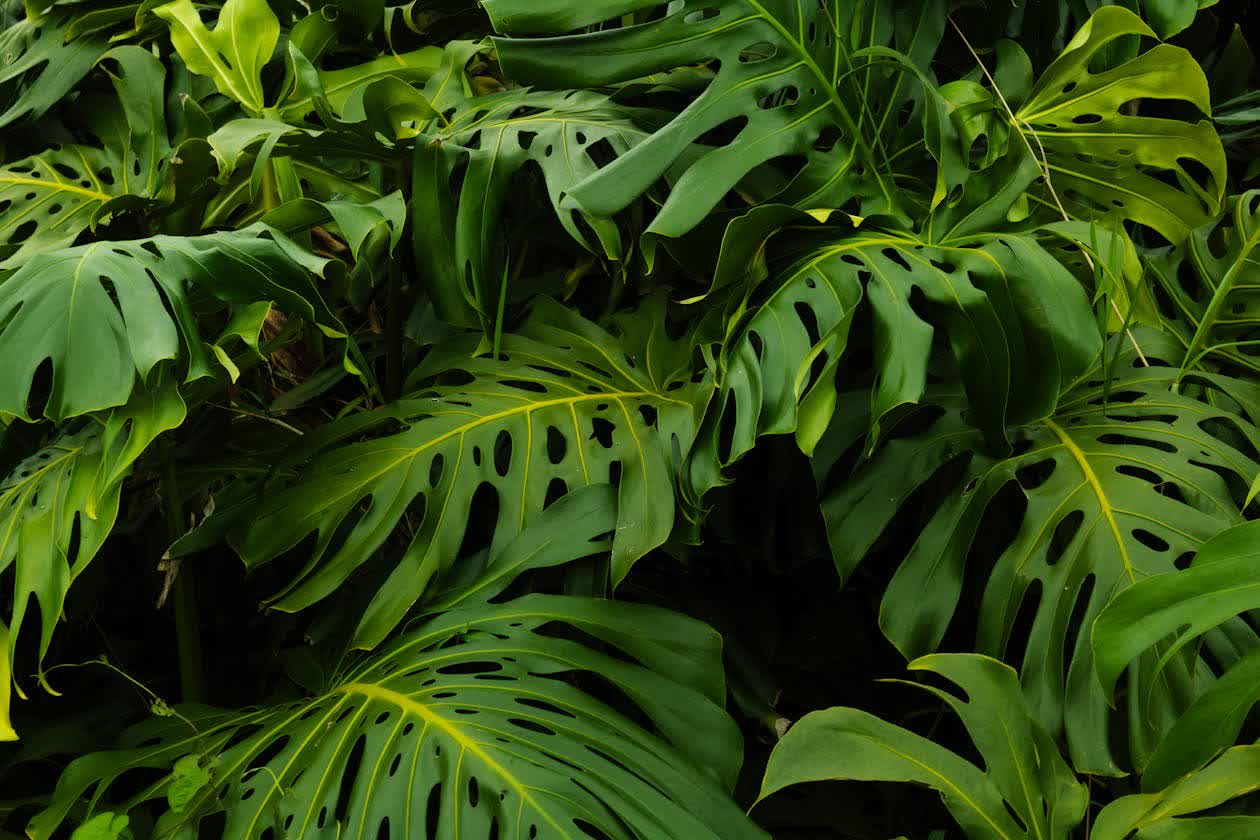
Pruning a Monstera is rarely just one decision. Most owners face a four-way choice the moment a leaf yellows, a stem gets leggy, or an aerial root wanders across the floor: cut the stem, remove a leaf, trim an aerial root, or excise damaged growth. Treat pruning as a 4-decision tree and the right cut is obvious. Treat it as a single act and you risk a bald stem that never refills.
This guide walks through each decision in order, the cut location, what the plant does in response, and what to do with the cutting afterwards. The one rule that makes Monstera pruning forgiving: every node on the stem can regenerate a new growing point, so even a hard cut rarely kills the plant. Mistakes come from cutting in the wrong place, at the wrong time, or with dirty shears.
When to Prune a Monstera (and When to Wait)
The best window is active growth — spring through early summer, roughly 65–85°F (18–29°C) with bright indirect light and steady watering. In that window the plant pushes new leaves from cut nodes within 3–4 weeks.
There are three times to not prune:
- Dormancy (late fall and winter, below 60°F / 15°C or with very slow growth). Cuts sit dormant and the stem may not refoliate from that node until spring.
- A sick or stressed plant — yellowing from overwatering, root rot, or recent pest treatment. Pruning removes leaf surface the plant needs to recover.
- The first 2–3 weeks after repotting. Roots are still re-anchoring; losing top growth at the same time double-stresses the plant.
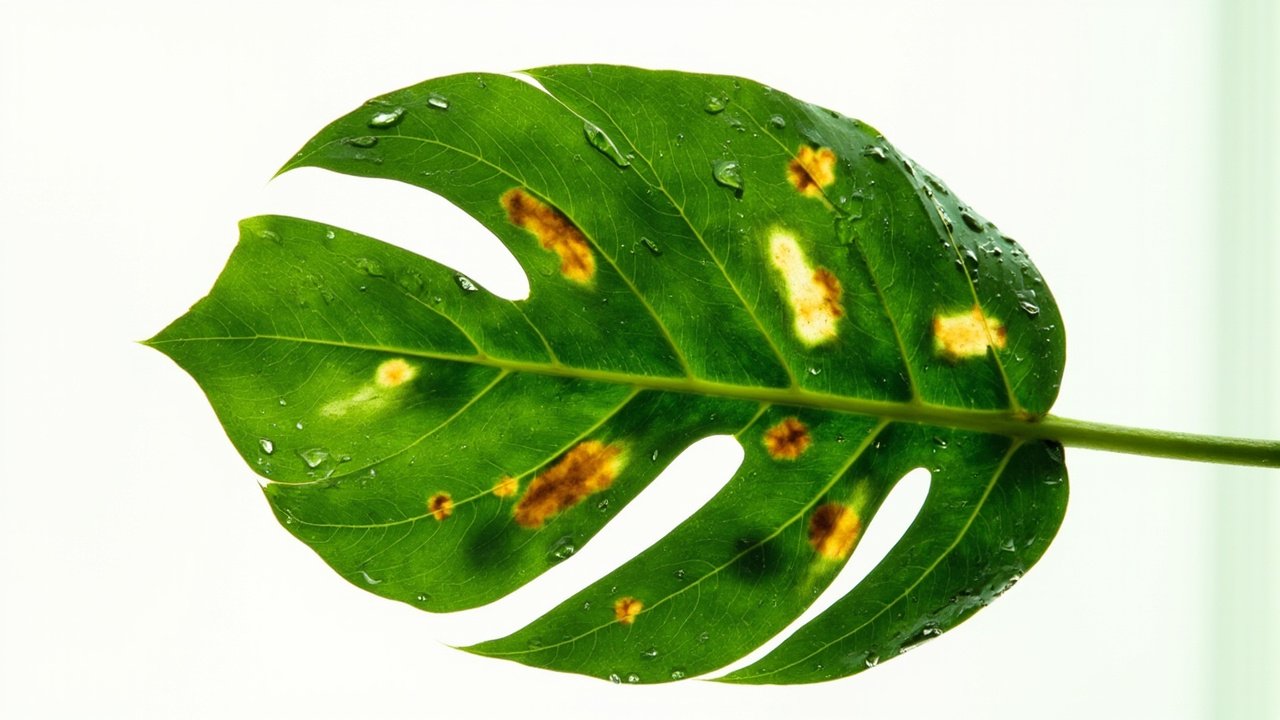
Damaged leaves (torn, brown-edged, black-spotted) are the only safe exception — those can be removed any time of year because they no longer pull their weight for photosynthesis.
What You Need
You do not need much, but each item has a reason.
- Sharp, bypass pruning shears. Bypass cuts cleaner than anvil shears and crush less stem tissue.
- 70% isopropyl rubbing alcohol for the blades. Wipe before you start and again between plants — the single most skipped step, and the most common way fungal leaf spot and bacterial infections spread from one houseplant to the next.
- A clean cloth for sap. Monstera sap contains calcium oxalate and can irritate skin.
- A glass of water or moist sphagnum if you plan to propagate any cuttings — see the propagation page for node-to-node technique.
Skip the wound-sealant products sold for trees. Houseplant stems heal on their own and sealing the cut traps moisture against the tissue.
The 4 Pruning Decisions
Each decision below is a separate choice with its own cut location, recovery window, and rule. Walk through them in order when you stand in front of the plant.
Decision 1: Cutting a Stem to Control Size or Shape
The most common pruning task. Use it when a vine has outgrown its space, the plant is leggy with bare lower stem, or you want a fuller silhouette.
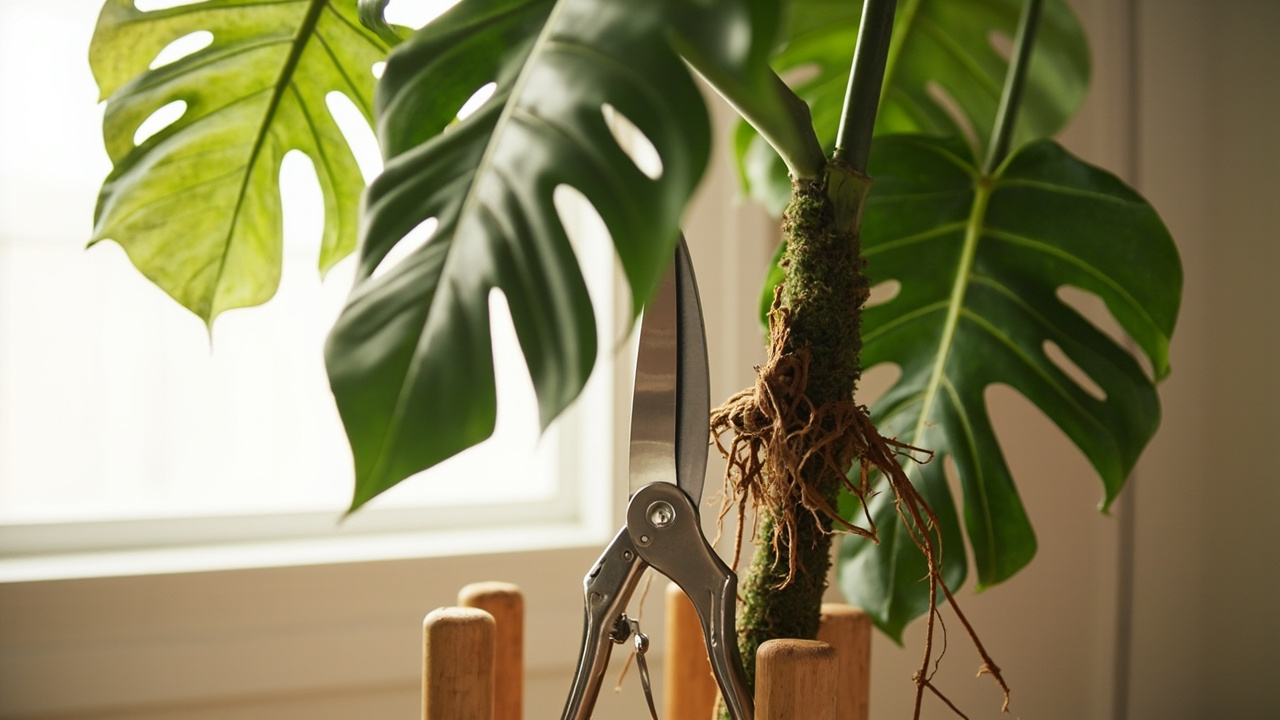
Where to cut: about ½ inch (1–1.5 cm) above a node — the small brown ring on the stem where a leaf and an aerial root meet. Cut on a slight angle so water runs off the wound.
What happens next: within 5–7 days a callus forms over the cut, and within 3–4 weeks a new growing point pushes from the node you left behind. The vine you cut off becomes a propagation cutting as long as it has at least one node of its own — yes, you can root it.
The hard rule: never cut below the last node on a stem segment. A leafless internode (the smooth green stretch between two nodes) cannot regenerate. Cut below the last node on a branch and that branch dies back to the main stem.
Decision 2: Removing a Whole Leaf
Sometimes the cut is to a leaf, not a stem. Remove a leaf when it is yellow, brown, torn past the midrib, or shading a fenestrated leaf below it.
Where to cut: follow the petiole back to the main vine and cut ¼ inch (0.5 cm) out from the stem. Do not cut flush — leave a small stub so you do not wound the vascular tissue of the parent stem.
What happens next: the stub dries and falls off within 2–3 weeks. The node on the main stem is unaffected and can still push new growth later.
Trade-off: removing a healthy green leaf to “balance” the plant costs energy the plant has already invested. A Monstera with 8 leaves refills faster after a stem cut than one stripped down to 3 leaves, because each remaining leaf is a solar panel. Remove whole leaves only when they are damaged, diseased, or blocking fenestrations below.
Decision 3: Cutting an Aerial Root
Aerial roots are the thick brown cords that grow from the stem into the air. They are not parasitic and not optional — they pull humidity from the air, anchor the plant to its moss pole, and in the wild they feed the plant from the soil below.
You have three honest options:
- Redirect into the pot or moss pole. Best option when possible. Tuck the aerial root into the potting mix or guide it back onto a damp moss pole. It roots in within 2–3 weeks.
- Leave it alone. Aerial roots that hang freely are not harming the plant.
- Trim it back. Cut the aerial root to within 1–2 inches (2.5–5 cm) of the stem with sterilized shears. Do not cut flush — leave a short stub so the plant can seal the wound.
Trade-off disclosure: cutting an aerial root does not hurt the plant in the short term, but it does reduce its anchor and its ability to pull humidity from the air. A plant with many aerial roots cut short grows slightly slower than an unmolested one, all else equal. If your home runs below 40% humidity, prefer redirecting over cutting.
What happens next: the trimmed stub calluses over within a week, and the stem often pushes a replacement aerial root from the same node within a month. For a deeper look at the role aerial roots play, see the full aerial roots guide.
Decision 4: Cutting Damaged or Diseased Growth
Brown edges, black spots, torn halves, sunburn patches, and pest-eaten sections all fall under this decision. The rule is different from the other three: cut into healthy tissue, not at the edge of the damage.
Where to cut: trace the damage back until you reach green, healthy tissue, then cut ½ inch (1–1.5 cm) into the healthy zone. Cutting at the visible edge leaves the pathogen in living tissue and it spreads.
What happens next: the cut edge dries and browns slightly — that is normal sealing. Watch for 1–2 weeks; if the brown keeps advancing, the issue is below the cut (usually a watering or fungal problem) and a second pass is needed.
Sterilize between every cut on diseased tissue. Wipe the blade with alcohol after each snip. Shears can move infection from one part of the plant to another if you skip it.
After You Cut: What Recovery Looks Like
A Monstera pruned well shows signs of recovery quickly. In the first 5–7 days the cut edges dry to a light tan and form a callus. In weeks 2–3 the plant redirects energy to the remaining nodes. In weeks 3–4 you should see a new leaf unfurling or a new aerial root pushing from a node just behind a stem cut.
Three habits speed recovery:
- Hold off on fertilizer for 2 weeks. Fresh cuts and fresh nitrogen do not mix — fertilizer on a wounded plant can scorch the new tissue at the cut edge.
- Keep the top inch of soil lightly moist, not soggy. A recovering plant drinks less than an actively growing one.
- Maintain bright indirect light. This is the energy source for the new push. A pruned plant in a dim corner stalls; the same plant 3 feet from an east-facing window refills within a month.
If you want a fuller plant on the next growth flush, this is also a good time to check whether the pot is rootbound — a post-pruning assessment catches both problems in the same walk-through.
Common Mistakes to Avoid
Five pruning errors account for most slow-recovery cases.
- Cutting below the last node on a stem. A leafless internode cannot regenerate. The branch dies back to the parent stem.
- Using unsterilized shears. Fungal and bacterial leaf spot spread plant-to-plant through sap on the blade. Wipe with 70% isopropyl alcohol before and between plants.
- Pruning in winter. Cuts sit dormant until spring. The plant looks “stuck” for months and the owner assumes the cut killed it.
- Removing too many leaves at once. Never remove more than one-third of the foliage in a single session. A heavily pruned Monstera cannot photosynthesize fast enough to push new growth.
- Throwing away healthy cuttings. A stem cutting with at least one node can be rooted in water or propagated in sphagnum, perlite, or LECA. The cut that would otherwise go in the compost is a free backup plant.
Done with the right cut, the right tool, and the right season, pruning is the single fastest way to make a Monstera fuller, more balanced, and ready for the next growth flush. For the full picture on caring for a Monstera deliciosa year-round, return to the pillar care guide — pruning is one of five habits that compound over a season.