A gooseberry bush planted at the wrong depth or in sodden soil will struggle for three years before you realize the root zone never established. Get the first week right and the bush rewards you for two decades.
When to plant gooseberry bushes for strongest establishment
A gooseberry bush planted at the wrong depth or in sodden soil will struggle for three years before you realize the root zone never established. Get the first week right and the bush rewards you for two decades.
The planting window for gooseberries is narrow by design. Bare-root stock must go into the ground while the bush is fully dormant — from leaf-drop in late autumn through to late winter, ideally finishing 4-6 weeks before bud break. This gives roots time to anchor into surrounding soil before top growth demands water and nutrients. Container-grown stock is more forgiving and can be planted from autumn through early spring, but the same dormancy principle applies: roots establish faster when the bush is not simultaneously pushing leaves.
Chill hours matter here even before you plant. If your chosen cultivar needs 800-1200 hours below 7°C, planting in late autumn ensures the bush accumulates those hours in the ground rather than sitting in a nursery bag losing cold exposure. American cultivars with lower chill requirements can wait until early spring without penalty.
The RHS recommends planting only when soil temperature is above 5°C and the ground is workable — not frozen, not waterlogged. In most of the UK and northern US, this means October through March. In warmer zones, December through February is the practical window.
Soil preparation before planting day makes the difference between a bush that establishes in weeks and one that takes a full season. Clear a metre-diameter circle of all weeds, dig to a full spade depth, and work in 5-10cm of well-rotted compost across the entire planting area — not just the hole. This improves drainage and soil structure throughout the root zone rather than creating a single pocket of rich soil that roots refuse to grow beyond. Gooseberries prefer acidic soil with a pH between 6.0 and 6.5 — test before planting and adjust with sulphur if your garden soil trends alkaline.
Bare-root planting step by step
Bare-root gooseberry whips are the cheapest and fastest-establishing option, but they arrive looking like dead sticks with exposed roots. The difference between a whip that thrives and one that stalls is a 12-24 hour soak in a bucket of water before the roots touch garden soil. This rehydrates the fine root hairs that dried out during storage and transport — skip it and the bush spends its first month recovering instead of growing.
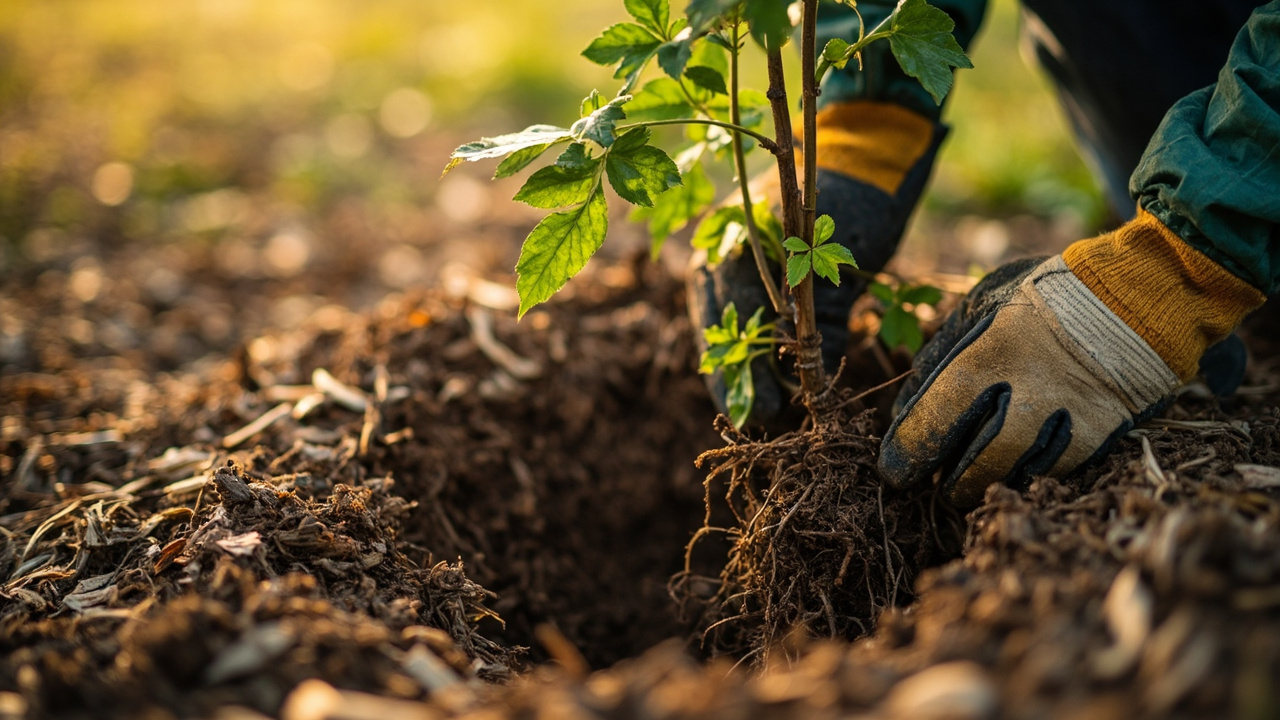
Dig a hole twice the spread of the root system and deep enough so the original soil line on the stem sits exactly at ground level. The root flare — where the first roots branch from the stem — should be visible after planting. Burying it deeper than this invites stem rot and delays establishment by a full season. Spread the roots naturally in the hole; never coil or cram them into an undersized space.
Backfill with a mix of two-thirds excavated soil and one-third well-rotted compost. Do not add fertilizer, bone meal, or manure to the planting hole — fresh nitrogen burns the delicate new root tips and sets the bush back by weeks. Firm the soil by heel as you fill to eliminate air pockets, then water thoroughly with 10-15 litres to settle the root zone.
Apply a 5cm mulch ring of wood chip or composted bark around the bush, keeping it 5cm clear of the stem to prevent moisture buildup against the bark. This suppresses weeds, retains soil moisture, and moderates soil temperature through the critical first season.
At planting, cut all canes back to 15-20cm above ground level. This harsh-looking step balances the root-to-shoot ratio and forces strong new basal growth that forms the framework of your goblet shape.
Spacing and site layout for goblet-shaped bushes
Space gooseberry bushes 1.5 metres apart with 2 metres between rows. Tighter spacing looks efficient in year one but becomes a mildew trap by year three, when mature canes from adjacent bushes interlock and block airflow through the centre of each plant. For the full goblet structure to develop, each bush needs its own air corridor.
The goblet shape — an open centre with canes radiating outward like a wine glass — depends on light reaching the inner wood. When canes cross-shade each other, fruit production retreats to the outermost tips where light is available. You end up with a ring of berries and a barren centre, which is exactly what overcrowded spacing produces.
Site orientation affects flowering and frost damage more than most gardeners expect. An east-facing position with a wall or fence behind the bush provides morning sun and thermal mass that buffers late-spring frosts. Avoid frost pockets at the bottom of slopes — cold air settles there and kills open gooseberry flowers at -2°C, wiping out the entire season’s crop in a single night.
Keep gooseberries at least 3 metres from large tree roots. Competing root zones rob the bush of water and nitrogen during the establishment year, and tree roots are nearly impossible to remove from the planting area without damaging the gooseberry’s own root system.
Container planting for patios and small gardens
Gooseberries grow well in containers if you commit to a pot of at least 40-50 litres. Smaller pots dry out too fast in summer, restrict root development, and produce a bush that survives but never fruits heavily. Half-barrel-sized containers (60-80L) are ideal — they provide enough soil volume to buffer temperature swings and hold moisture through a hot week.
The potting mix matters more in containers than in open ground because there is no surrounding soil to buffer errors. Use 60% loam-based compost such as John Innes No. 3 for structure and nutrient retention, 30% multipurpose compost for organic matter, and 10% horticultural grit for drainage. Peat-only mixes collapse within a season, becoming waterlogged at the bottom and hydrophobic at the top — gooseberry roots cannot tolerate either extreme.
Drainage is the make-or-break factor. Place a 5cm layer of crocks, gravel, or broken terracotta at the pot base before adding mix. Gooseberry roots rot in stagnant water within days, and containers without adequate drainage are the number one cause of container-gone-wrong failures. Raise the pot on pot feet or bricks so water flows freely from the drainage holes.
Position the container where it receives morning sun and afternoon shade — a patio against an east-facing wall is ideal. Feed fortnightly from bud break through to harvest with a high-potassium liquid feed such as tomato fertiliser. Container-grown bushes need more frequent feeding than ground-planted ones because nutrients leach out with every watering.
Repot every 2-3 years into fresh mix, root-pruning by removing the outer 5cm of the root ball to stimulate new feeder roots. Without repotting, the bush becomes pot-bound, growth stalls, and fruit production drops sharply.
First-month care after planting
Water newly planted gooseberry bushes with approximately 10 litres every 3-4 days during the first month if rainfall is under 25mm per week. The goal is consistent moisture without waterlogging — push a finger 5cm into the soil near the drip line; it should feel damp but not sodden. Reduce frequency if rain is consistent; increase during dry spells.
Hand-weed within 30cm of the stem rather than hoeing. Gooseberry feeder roots run shallow and spread wide, and a hoe cuts through them before they have had a chance to establish. A 5cm mulch ring handles most of the weed suppression, but the area immediately around the stem needs careful attention for the first season.
New shoot emergence within 3-4 weeks signals that the root system is establishing and the bush has moved from survival mode into growth. If you see no growth by week 6, check soil moisture first — both drought and waterlogging present as stalled growth — then verify that the root flare is not buried too deep.
Do not apply any fertilizer for the first six weeks after planting. The compost in the backfill provides enough nutrition, and premature nitrogen pushes soft new growth that attracts aphids and is vulnerable to late frosts. Wait until the bush is clearly growing before introducing any feed.
Bird protection becomes critical in year two as fruit begins to set. Bullfinches, sparrows, and blackbirds all target developing gooseberry fruit, and a single bush can be stripped overnight. Install netting on a lightweight frame before the first berries colour — retrofitting netting over a thorny mature bush is an exercise in frustration you only endure once.
Once the first growing season is complete, the bush enters its first dormant season. This is when you begin shaping the goblet framework through pruning — selecting the strongest five to eight canes and removing the rest. The establishment work you do in year one determines how quickly the bush responds to that first structural pruning. A well-planted bush with strong root zone development will push vigorous new canes from the base, giving you the wood you need to build the open center structure that maximises fruit set in subsequent years.
For the full cultivation lifecycle including pruning, harvesting, and pest management, see the complete gooseberry plant care guide. For variety selection matched to your climate and chill hours, see the gooseberry varieties guide. For soil pH, drainage, and light requirements in detail, see the gooseberry light and soil requirements page.