If a prayer plant cutting has no node, the cutting will never root. The node is the small bump on the stem where the leaf attaches — it holds the meristematic cells that become roots. A leaf-only cutting of a prayer plant sits in water for months and produces nothing.
Three propagation methods work for the prayer plant, and they do not rank equally. Water rooting gives visible progress but the highest potting shock. Soil rooting hides the roots but produces the hardiest transplant. Division is the fastest to a full-size plant but requires a mature root ball.
The skip-ahead version: cut below a node, submerge it in room-temperature water, wait 2 to 4 weeks for 2 to 4 cm roots, then pot in 1:1 peat-and-perlite. The details below separate surviving cuttings from rotting ones.
Why the Node Is the Whole Game: Where Prayer Plant Roots Actually Form
The prayer plant stores rooting cells in one location: the node. This thickened ring where leaf meets stem holds meristematic cells that differentiate into root primordia when submerged. Miss the node and the cutting has no meristematic source.
Find the node before the cut. It shows as a raised band — the leaf attaches just above, and roots emerge from the node itself. The node travels with the cutting.
Place the cut 0.5 to 1 cm below the node. This is the internode section, and it gives the cutting enough stem length to sit stable in water without submerging the leaf.
Sterilize the blade with 70% isopropyl alcohol first.
The Cornell horticulture extension notes that prayer plant cuttings with the node intact succeed 80 to 90% of the time in water. Cuttings with the node left on the mother plant only succeed 30 to 40% of the time.
Within 5 to 7 days of the cut, the wound on the prayer plant stem forms a callus — a dry, pale plug of undifferentiated cells. The callus is the precursor to roots. If the wound stays wet and soft after 7 days, the cutting is roting, not rooting.
No prayer plant cutting roots from a leaf blade alone. The leaf may sit in water and look healthy for 6 to 8 weeks, but no root meristem exists in the leaf tissue. The leaf-only cutting wastes 2 months.
For the full care routine the mother plant needs while it regrows after cutting removal, the cluster prayer plant care guide covers the light and watering schedule.
Three Propagation Methods for the Prayer Plant, Ranked by Survival Rate
Three propagation methods work for the prayer plant. They rank differently on visibility, speed, and transplant survival. The reader picks based on what they can control: humidity, patience, and potting confidence.
Division ranks first for survival rate. A mature prayer plant with at least 6 to 8 healthy stems and a root ball filling a 15-cm pot splits into two sections. Each section keeps its own root system, so there is no transplant shock.
The survival rate is 95 to 100%. The trade-off: the mother plant is halved for 2 to 3 weeks while it recovers.
Soil rooting ranks second for survival rate but first for transplant hardiness. The cutting goes directly into moist, sterile potting mix. The roots that form are soil-adapted from the start.
The survival rate is 75 to 85%. The trade-off: overwatering the mix causes rot before roots form in 30 to 40% of attempts.
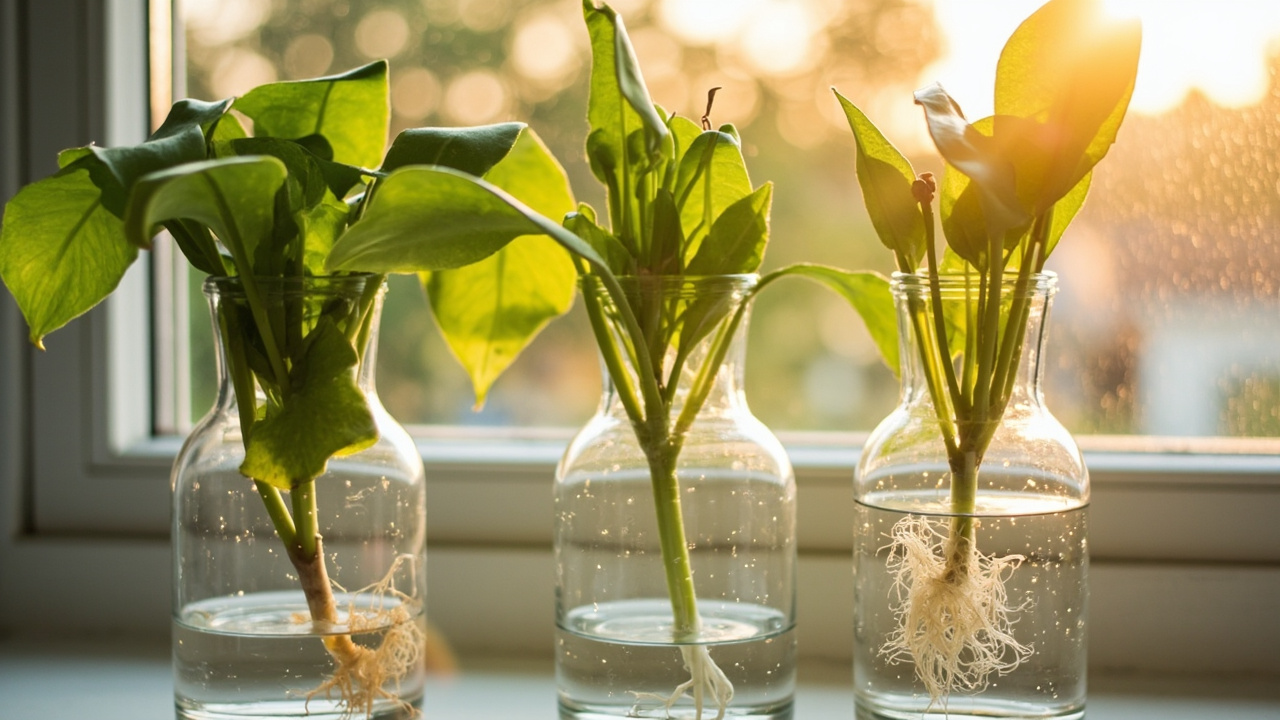
Water rooting ranks third for survival rate but first for visibility. The cutting goes into a clear vase of room-temperature water.
The survival rate is 65 to 80% — lower because water-rooted cuttings undergo transplant shock when moved to soil. The trade-off: visible progress is reassuring, but the potting step loses 15 to 20% of water-rooted cuttings within the first 2 weeks in soil.
The Missouri Botanical Garden Maranta profile notes that one drop of liquid rooting hormone (0.1% IBA) in the water accelerates meristematic cell division at the node. Without it, the prayer plant still roots in 3 to 4 weeks instead of 2 to 3.
For the watering side of the rooted cutting, the cluster prayer plant watering guide covers the fluoride-and-chlorine trap that kills new roots as fast as mature plants.
Step by Step: The Stem Cutting Method in Water
The stem cutting method in water breaks into three named steps. Each one has a different purpose and the reader follows them in order.
Step 1: The Cut
Pick a healthy stem with at least two leaves and a visible node. A sterilized blade makes a clean cut 0.5 to 1 cm below the node.
Remove the lower leaf if it would sit below the waterline — leaves submerged for more than 3 to 4 days rot and foul the water.
The node itself stays fully intact. A bruised or half-cut node produces roots at half the normal rate because the meristematic tissue is damaged. Handle the cutting by the internode section, never by the node.
Step 2: The Rooting Window
Fill a clear glass vase with room-temperature water (20 to 23°C / 68 to 73°F) and place the cutting so the node sits 1 to 2 cm below the surface. The vase goes in bright indirect light — direct sun heats the water and cooks the node within 2 to 3 days.
White root nubs appear at the node in 10 to 14 days under normal indoor conditions (18 to 24°C / 65 to 75°F, 40 to 60% RH). Change the water every 5 to 7 days to prevent bacterial buildup. The IFAS extension notes that prayer plant water-rooting success drops below 50% when the water goes unchanged for 10 or more days.
When roots reach 2 to 4 cm long (typically 3 to 4 weeks), the cutting is ready for potting.
Roots shorter than 1 cm do not survive the transfer. Roots longer than 5 cm become fragile and break during potting.
Timing Summary for Water Rooting
| Phase | Prayer Plant Timeline | What Happens |
|---|---|---|
| Callus formation | Days 5 to 7 | Wound seals; no action needed |
| First root nubs | Days 10 to 14 | Water change; check color |
| Roots reach 2 to 4 cm | Weeks 3 to 4 | Move to soil |
| Total water phase | 3 to 4 weeks max | Pot after 4 weeks regardless |
Step 3: The Callus Check Before Potting
Inspect the root mass for healthy white or cream-colored roots. Brown, slimy roots mean the cutting started roting during the water phase — trim the rot, return the cutting to fresh water for 5 to 7 days, and recheck. Never pot a prayer plant cutting with any rot on the root system.
Potting the Rooted Cutting: The Step Most Readers Miss
The potting step loses more prayer plant cuttings than the rooting phase. Water-rooted roots are thinner and more fragile than soil-rooted roots, and they desiccate in dry soil within 24 to 48 hours.
Pre-moisten the potting mix first. A 1:1 blend of peat moss and perlite is the floor — the peat holds moisture around the new roots, the perlite keeps the mix aerobic.
Add water to the mix until it feels like a wrung-out sponge. Dry mix pulls water out of the new root cells by osmosis and the roots collapse.
The planting hole must be wide enough for the root mass without bending the roots. A 90° bend severs the root cap and the cutting loses 30 to 40% of its uptake capacity for 5 to 7 days. Set the cutting at the same soil depth it sat in water — nodes that were above the waterline stay above the soil line.
For the first 3 to 5 days, the soil stays consistently moist (not wet) to mimic the water-rooted environment. After day 5, allow the top 1 cm of soil to dry between waterings, which forces the roots to grow outward. By day 14, the prayer plant cutting is on a normal schedule.
New leaf growth within 2 to 3 weeks means the roots have transitioned to soil. No new growth by week 4 means overwatering or root failure during the transfer. The honest limit: 15 to 20% of water-rooted prayer plant cuttings die during the potting transition regardless of technique.
For the humidity reading the potted cutting needs in recovery, the cluster prayer plant humidity is the pair. A newly potted cutting needs 60%+ RH to reduce transpiration stress while roots establish.
Division: When the Root Ball Is Big Enough to Split
Division skips the rooting phase entirely. The prayer plant reader splits a mature plant into two sections, each with its own root system. This works only when the prayer plant has outgrown its pot — typically 12 to 18 months after the last repotting, when roots circle the inside of the pot.
Remove the prayer plant from its pot and rinse the soil from the root ball with room-temperature water. Natural division points show where stems cluster into distinct crowns with their own root clusters. Two to three crowns is the minimum for a safe division.
Pull the root ball apart at the natural division points by hand. A clean tear is better than a cut because the fine root tips stay intact.
If the roots are too tangled, a sterilized blade cuts through the center. Each section keeps at least 3 to 4 stems and a proportional share of the roots.
Pot each division immediately in a pot 2 to 3 cm larger than the root mass, using the same 1:1 peat-and-perlite mix. The crown sits at the same soil depth — burying it by 1 to 2 cm triggers stem rot in 2 to 3 weeks.
The division wilts for the first 3 to 5 days as the reduced root system reestablishes. Keep the soil consistently moist and humidity above 60%. New growth appears at week 3 if the division succeeded.
For the full care routine for the post-division prayer plant, the cluster prayer plant care guide covers the light and watering schedule that prevents setbacks during recovery.
After the Potting: The 2-Week Recovery Window
Take no action for the first 5 to 7 days beyond checking soil moisture. No fertilizer, no repotting, no moving to a brighter spot. The roots need 5 to 7 days to grow root hairs — the microscopic extensions that absorb water and nutrients.
At day 7 to 10, the first predictive signal appears. If the cutting holds its existing leaves upright and the leaf color stays consistent, the roots are absorbing.
Wilting or yellowing by day 10 means overwatering (mushy stem base) or underwatering (bone-dry soil). The failure modes are almost always water-related.
Start a half-strength balanced liquid fertilizer at week 3. The new roots can handle dilute nutrients at this point — a full-dose fertilizer at week 1 to 2 burns the root hairs and the cutting loses 1 to 2 weeks of progress. Wait until the prayer plant shows active new growth before the first feed.
By week 4 to 6, the reader knows if the propagation worked. A prayer plant cutting that has produced at least one new leaf with normal variegation has a viable root system. Resume the normal care routine — the cutting is no longer a cutting.
No propagation method produces a full-size prayer plant in under 4 months. Even under ideal conditions, the new plant adds a leaf every 4 to 6 weeks in active season.
The water-rooted cutting that potted successfully in week 4 is still a 3 to 6 inch plant at week 6. Patience is the floor.
Turn That PDF Into a Spreadsheet in Minutes
You've seen how to do it manually — now let the tool handle the heavy lifting. Upload your bank statement and get Excel, CSV, or QBO in a few clicks.
Try It Free